Refit year 9
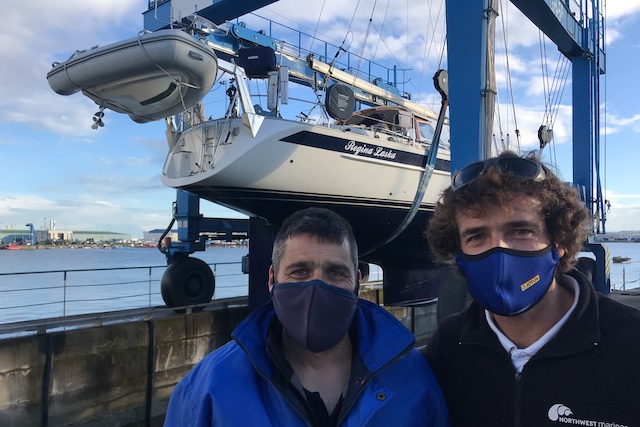
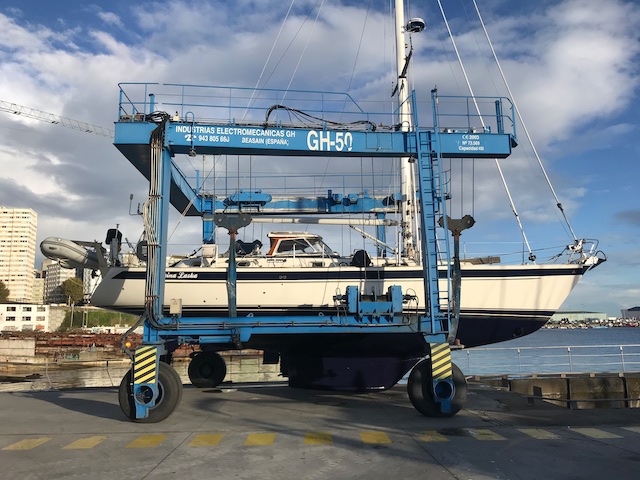
Diego (left) and Chuny (right) lifting Regina Laska into her winter storage 2020/21.
Second winter storage at Marina Coruña, Spain
Due to Covid-19, I stayed in Galicia and Portugal for the entire season of 2020. Or, what was left of it, after Europe opened up again after the lockdown on 1 July 2020.
Despite Corona, it became one of my finest sailing years! So relaxed, so gentle and in such fantastic weather! Corona was far away in these empty Rías and the sleepy fishing villages of Galicia and we all felt perfectly safe here.
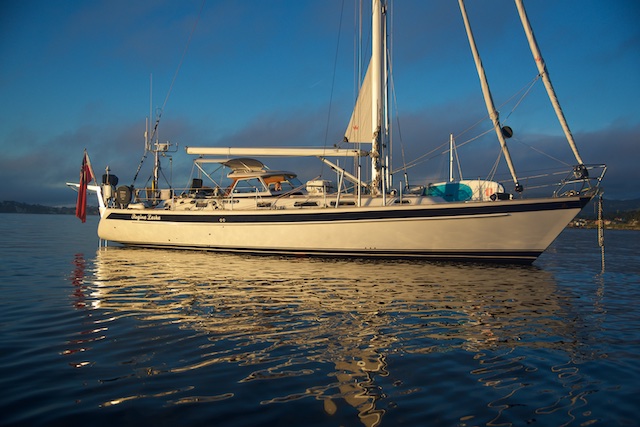
After 4 months of sailing in Galicia and Portugal, the decision came natural to ask Marina Coruña if they would take Regina Laska for another winter, which they gladly accepted, flattering me by calling Regina Laska the "Queen of Marina Coruña" making a reference to her name ("Regina", meaning Queen in latin).
When I arrived at Marina Coruña after the summer I was positively surprised to be welcomed by a real sailing celebrity! Spains most prominent sailor and one of the worlds most respected ocean racers, Chuny, welcomed me back to Marina Coruña!
Now, how cool is this?!
Chuny, whose real name is Roberto Bermúdez de Castro, has sailed everything that can be considered as elite sailing, starting from America's Cup via the Olympic Games (Star class 2004 in Athen) and finally he has sailed no less than 7 times around the world in the Whitbread/Volvo Ocean Race! Lately Chuny was part of the Team VESTAS 11th HOUR RACING in 2017/18. Here, he was the helmsman and sail trimmer, responsible for Boat Performance. He has also skippered the Delta Lloyd in the Whitbread/Volvo Ocean Race 2008/09 and was sailing on the overall winner Abu Dhabi Ocean Racing in 2014/15.

A few weeks before I returned to La Coruña after the summer, Chuny had become the new CEO of the Northwestmarinas group, managing several marinas and dockyards in the north-west corner of Spain, i.e. Galicia.
Chuny's overall team-building experience and joy for sailing is highly welcomed by the entire crew of Marina Coruña, who takes care of Regina Laska. His background as an Industrial Engineer certainly comes in handy when dealing with problem solving and understanding onboard marine technical challenges. What an asset!
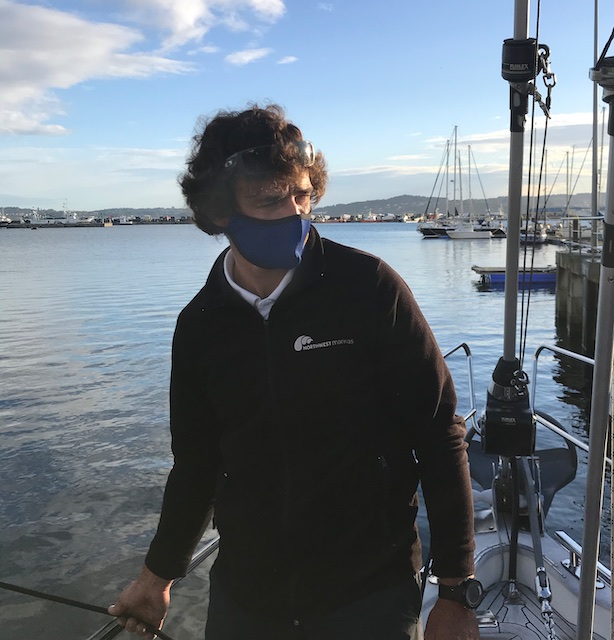
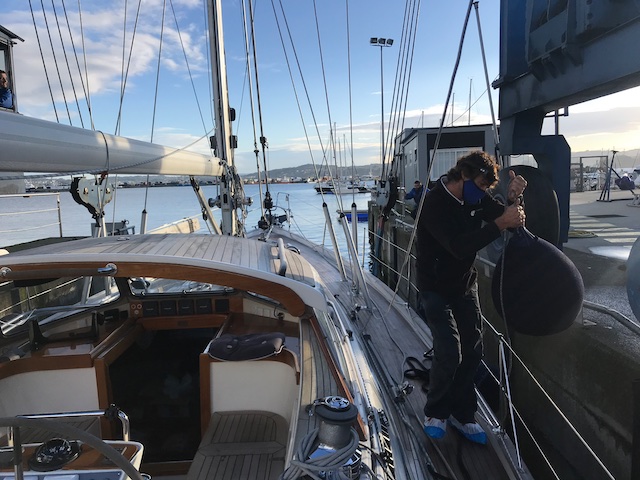
One could really feel Chuny's spirit spreading over the marina and the dockyard in La Coruña and it was an especial honour to have such a celebrity handling my fenders while joining me onboard on my last short trip into the travel lift.
Not that it hadn't been great before. Not that I wasn't treated with enthusiasm last year. Not that the wonderful crew of Marina Coruña hadn't been wonderful to me and Regina Laska! I had been very content. But this is somehow the icing on the Coruña-cake!

Chuny's vision is to boost the sailing sport in northwest Spain especially engaging the young people in sailing, making sailing more accessible to everyone. He is in good company, since for years, Marina Coruña has already a very profound sailing activity, e.g. with special sailing boats for handicapped people. And the famous Royal Coruña Yacht Club is his second home and just next to the marina!
La Coruña has always been in Chuny's heart, since he was brought up here. He has been very active in the Royal Coruña Yacht Club, which, in its own rights, is a center for sailing expertise. In 2000, Real Club Náutico de La Coruña organised the Optimist World Championship and in 2017 the Snipe World Championship. Further to Chuny, also Sofía Toro from Real Club Náutico de La Coruña won the gold medal at the 2012 London Olympics in the Elliott 6m class.

With Chuny now at the rudder of Northwestmarinas, there are fresh warm and pleasant winds blowing and I would like to congratulate him and all the employees at Marina Coruña to his appointment!
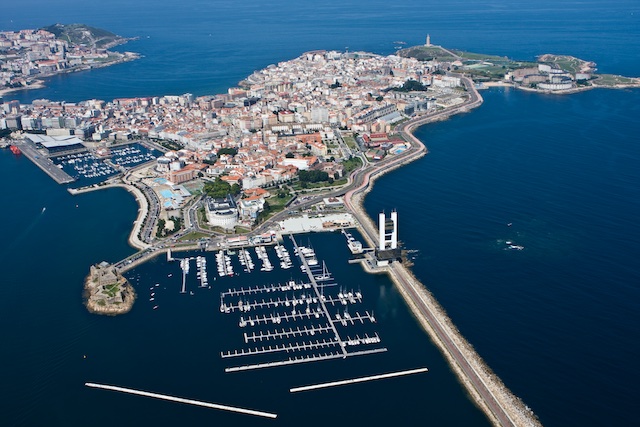
Marina Coruna directly next to the famous H-shaped harbour tower just behind the huge breakwater when you arrive from crossing the Bay of Biscay. The old town immediately in vicinity in the background.
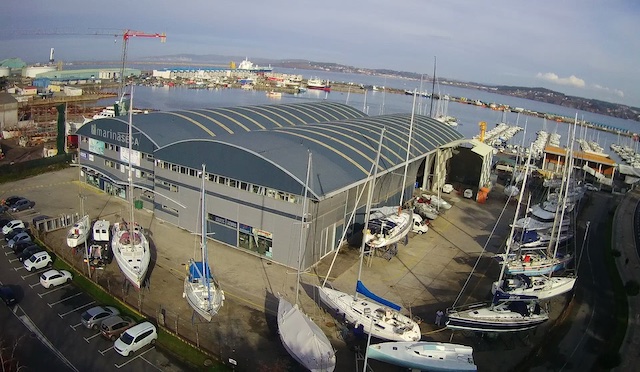
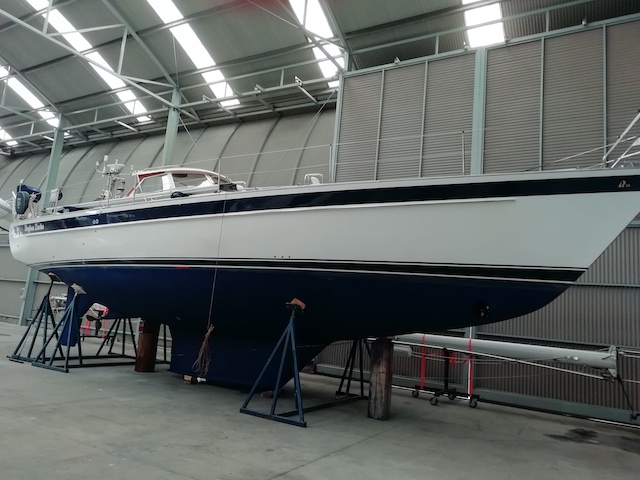
The boat yard ("Marina Seca" in Spanish) belonging to Marina Coruña. In these halls, Regina Laska will be spending her winter again.
Regina Laska was lifted out of the water on 22 October 2020 to spend yet another winter in the modern halls of Marina Coruna.
And, you guessed it: The list of refit jobs is never ending, so here are the main points of refit work on Regina Laska this coming winter of 2020/2021.
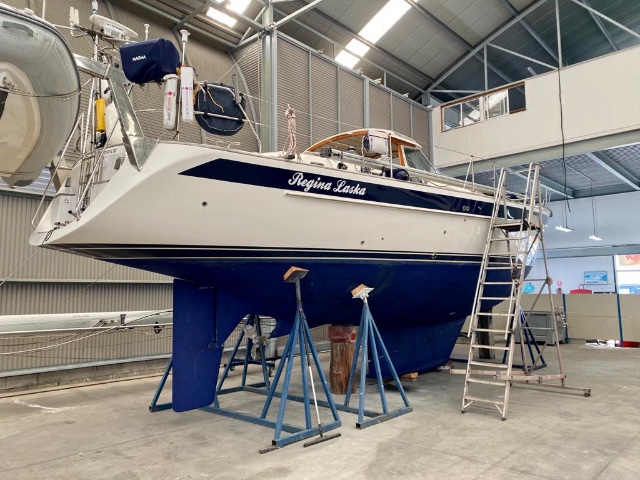
Regina Laska safe and dry in the halls of Marina Coruna. She couldn't have a better place to stay for the winter!
Copper Coat
Campillo Méndez of FibraCoruna Composites is authorised and very experienced in applying Copper Coat. He is part of the Marina Coruña group.
Before meeting Campillo, I was primarily trusting Adams Boat Care to apply Copper Coat, but I am now convinced that Campillo is no less skilled to do the work.
After decades of applying more and more coats of poisonous antifouling, I was still seldom really satisfied with the result. So now, I have decided to invest in Copper Coat, which is said to last for some 10 years without the constant bleed of poison into the sea.
Let's see and hope so!
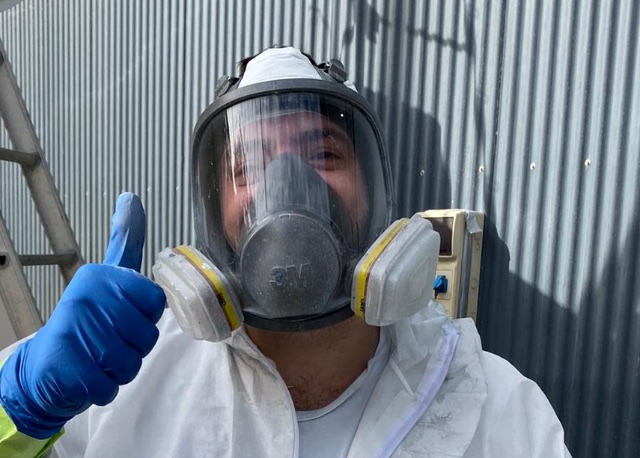
One way of covering up against Covid-19. But, in truth, this is Campillo working on a boat.
Unfortunately, the entire hull needs to be sanded down (again), which was also done in 2013 during the major refit. 7 yers ago, we started off from a clean hull and then applied 6 coats of (waterbased) epoxy from International (Gelshield). While this is easy to apply, it's not quite as good as solvent free epoxy. Since Campillo needs to go down to the GRP anyway, and by this removing all the 6 layers of epoxy, we decided to build up a new coat of solvent-free epoxy. This is more hard to work with (feels "sticky") and you need to know how much micron you add in each area to build up enough, but then Regina Laska may stay in the water all year round.
On top of the new layer(s) of epoxy, there will come several coats of CopperCoat, which, per se, is also an epoxy. Possibly, the first underlying epoxy is not really necessary, but while we're at it, why don't we... you know!
PropSpeed
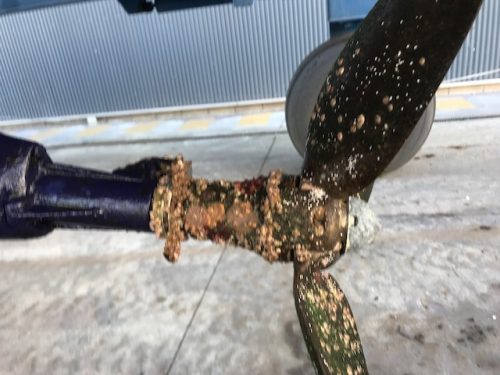
You might recognise the look of my propeller when lifting out your own boat. After no more than 4 months at sea, the antifouling was still great, but the propeller showed the proof of my suspicions: I had felt decreased speed, increased vibration and more noise for the last couple of weeks. And here was the reason:
I asked Campillo to please clean the propeller and polish it, while he asked back, why I didn't have put on PropSpeed, something I had not heard of before, to be honest.
Campillo showed me around on the yard and pointed at some boats with propellers that he had applied with PropSpeed, swearing that they were not cleaned after lifting and still looked completely clean.
I got interested, since, as I said, I hadn't heard of PropSpeed before. I asked my friend John Neal sailing on Mahina Tiare III if he had some experience of PropSpeed, since there are few sailors who sail so much and who are so obsessed about underwater cleanness! And sure enough, John and Amanda have been using PropSpeed for 5-6 years and wouldn't want to go back!
Well, if its good for John and Amanda, it must be perfect for me, so here we go: Hopefully no more fouling of the propeller! See commercial video from PropSpeed here.
Sail upgrades
My brand-new genoa and furling main sail from Elvstrom Sails have been excellent. More speed, less heel and especially fantastic performance in little wind. Overall they are great, but this doesn't mean they can be improved yet a bit more for classic ladies such as Regina Laska.
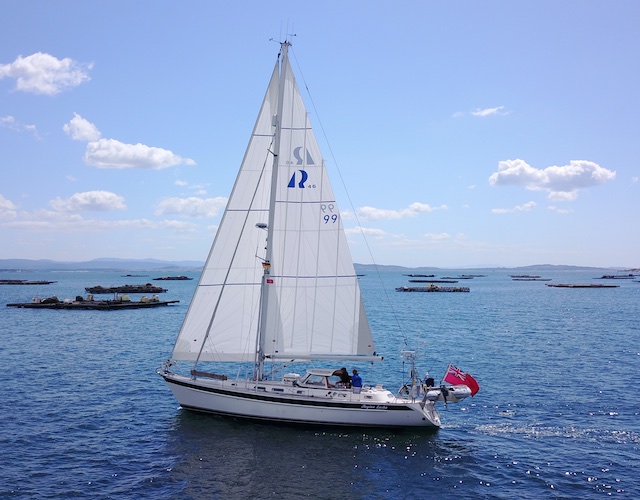
Sailing zig-zag through the viveros (mussel farms) in the Rías. Good speed despite hardly any wind with these great new Elvstrøm sails! Photo by Pablo.
You see, in the olden days (1990's) when the furling mast systems were still in their early years, Seldén still made the masts with a somewhat smaller exit in the rear for the sail to come out. This, obviously, in order to maximise sturdiness since the smaller the exit, the stronger the mast.
While it's working perfectly for Dacron or any sail without batten, Regina Laska's sails are made out of very thick and sturdy Hydranet material with extra strong re-enforced batten pockets and vertical battens.
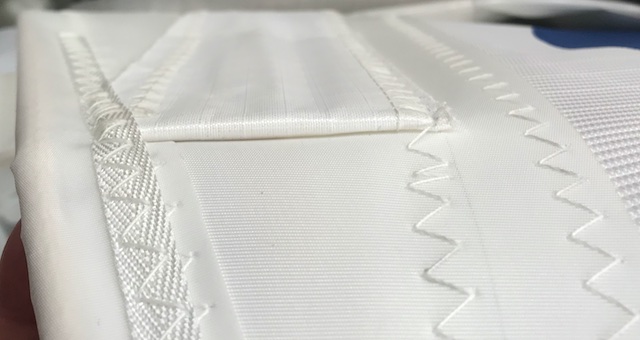
Beautifully made sail pocket seen from top. This one fits nicely into the mast after having furled in and out for 4 months. No sign of chafing.
While it did work all summer all right, the third batten usually "jumped" in and out of the mast at its very top. Checking the sail after the season, one could observe some marks of chafing on the top end of the batten pocket. If I had had a mast of the newer type, this would have been no problem, but since I had the old mast type, I wanted to look at a slight improvement. I'm not an engineer for nothing and I'm enjoying to refine products.
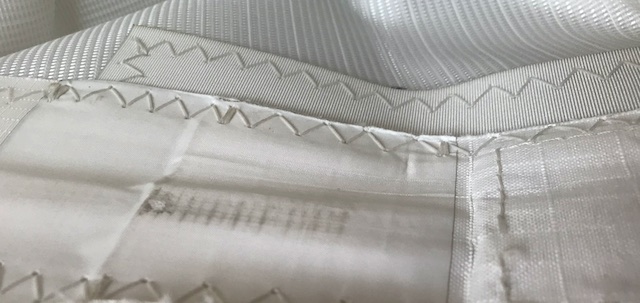
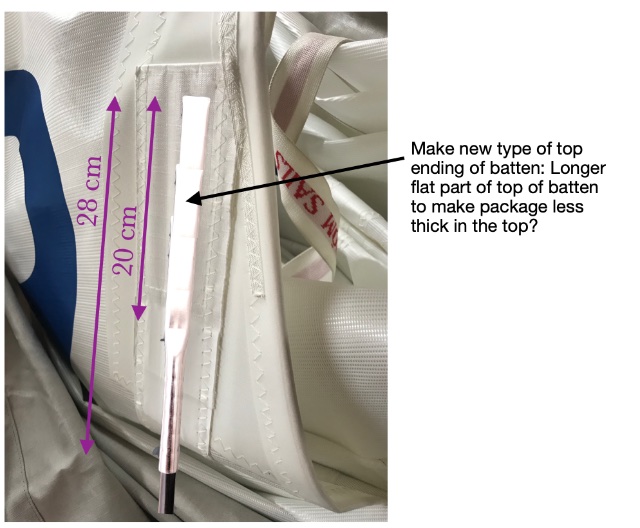
This third batten showing signs of chafing at the top. This problem is only with the third batten, possibly because my mast exit is just this little slightly more narrow there?
Juan, the sailmaker of Finish Terra NorthWest SailMakers which is also part of the Marina Coruña group, helped me to take down the sails on a one of these beautiful Galicien days and we discussed the problem.
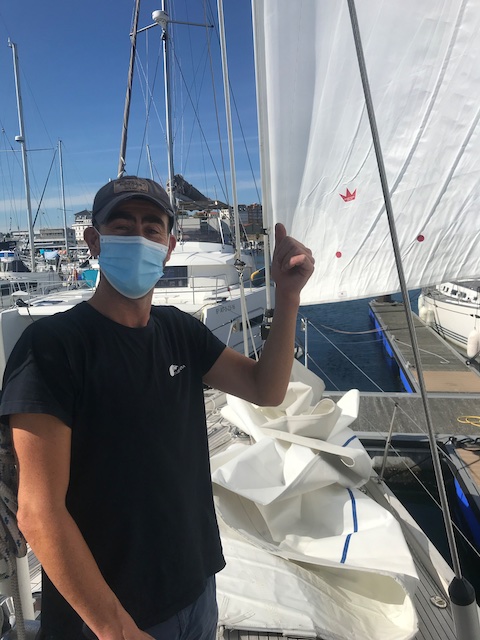
Juan helping me to take down the sails of Regina Laska before the lift.
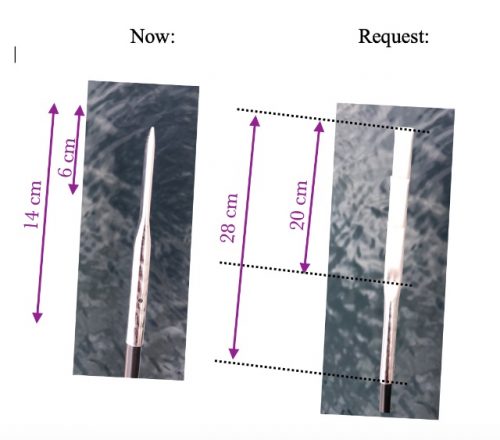
Juan suggested that if we could have a batten that had a slightly longer thin part on the top, he could then additionally place a thin cover over the area, making the transition from "thin" to "thick" more smooth.
I sent the below two pictures to Søren Hansen at Elvstrøm Sails and I got an immediate reply that they liked our idea and trusted this would improve furling experience on the older type of mast. They would make five new end covers with the requested dimensions and have them sent to Marina Coruña the next day. What a service!
New TruDesign Through-Hulls
When I did my first and major refit in 2012-13, I changed all the through-hulls from brass to bronze. Bronze is far superior as an alloy than brass since it doesn't contain any zink. For centuries bronze has been use on ships under the waterline and it's not until in the last 30 years or so that some yards have replaced bronze by cheaper brass, albeit "marine" so called DZR brass (De-Zincification Resistant) which means that it contains no more than 15% zink.
And, as anyone knows, zink is used as an anode and is intended to be sacrificed to save other, more valuable metals on the boat. Now if the through-hulls contain zink, these vital pieces of equipment could act as a scarifying metal, something you definitely don't want.
This is how my through-hulls looked like when I bought Regina Laska in 2012. I am sure I could have kicked the entire tower with my foot...!
Never mind, if the sales person claims that his products are "marine brass" (meaning containing less zink) but they are still brass and brass contains zink. Period.
That's why brass through-hulls have a much shorter life-span than most sailors tend to believe, while bronze might outlive your boat. That is especially true if the brass has some sort of electrical contact with another type (and more nobel) metal.
So, if DZR brass components are fitted in contact with parts made from different
alloys or metals, an electrolytic cell might be formed, with the resulting risk of galvanic
corrosion.
The anti-dezincificant properties of DZR brass give no effective protection
against galvanic corrosion. The conditions that trigger galvanic corrosion are:
- An electrolyte bridging the two metals, which may not necessarily be aggressive to
the individual metals when they are not coupled; - Electrical connection (direct contact) between the metals;
- A significant difference in potential between the two metals to provide a significant galvanic current;
- A sustained cathodic reaction on the more noble of the two metals, in most practical situations the consumption of dissolved oxygen in the electrolyte.
Don't say that your through hulls are not bonded and thus have no contact with other metals. Don't you have a hose connected to your valve? Many hoses are reinforced with a metal spiral or otherwise made conductive on purpose so a hose can sometimes electrically connect a valve or through-hull with other metal pieces around it, like the engine. And if you are certain your hose is definitely non-conductive, what if it contains salt water? Salt-water is definitely conductive and over time, it will "eat up" the brass.
Do you want to have your through-hull acting as your sacrificing anode, even if we are "only" talking about a 15% zink content in "marine-grade brass"?
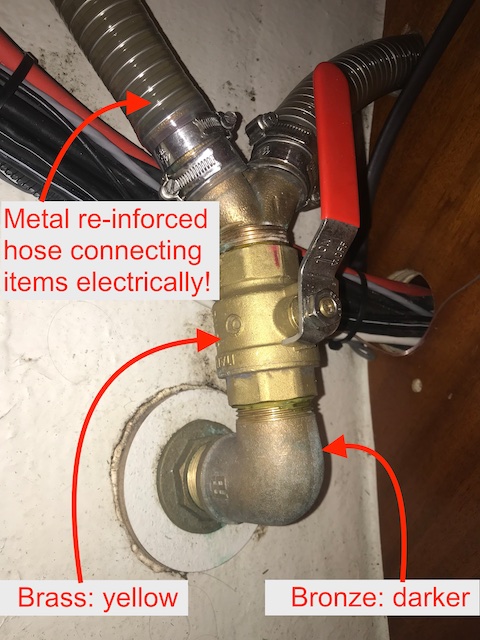
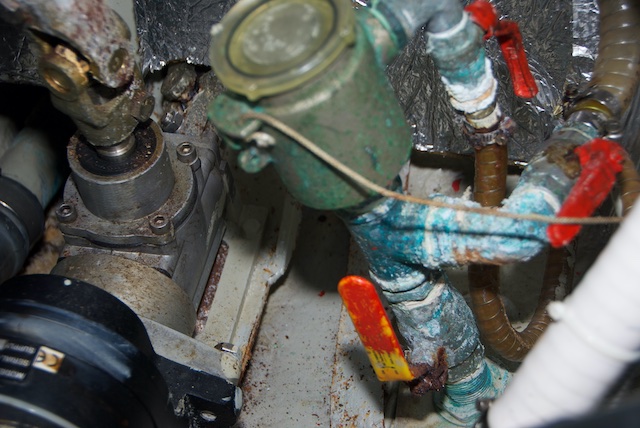
Very unlucky marriage: Brass replacement valve screwed onto a bronze skin fitting. Galvanic corrosion is on order! This solution will not hold more than a couple of seasons before the brass is scarified for the bronze. In addition: Metal-reinforced hose leading direct current (DC) between connected items giving galvanic corrosion. Also salt-water inside the hose is conductive as well!
Personally, I don't trust a brass through hull for more than some 5 years. How old are yours?
Am I a scaremonger?
Well, let's look at reality: Here is a picture taken on a HR46 being refitted at Adams Boat Care (no it wasn't Regina Laska, but in my boat it looked very similar). Both through-hulls on the photo come from the same boat and they had been placed close to each other (but not bonded or connected). Note the difference: The left through-hull is made of bronze (and was delivered by Volvo Penta to the yard) and the right through-hull is made of brass. This picture says it all!
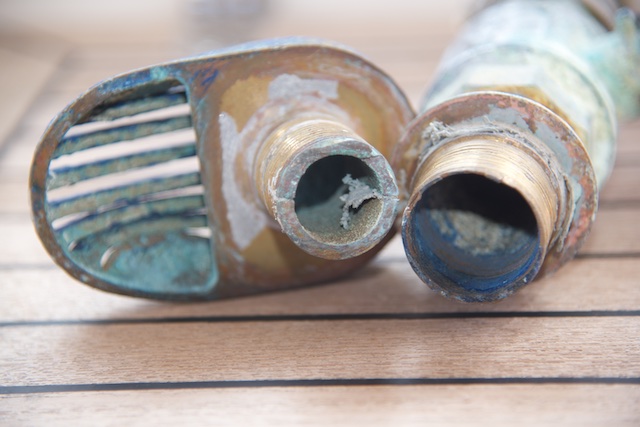
Left: bronze. Right: brass
Check out the video below how soft a brass through-hull gets after years in a boat (this is a HR36 refitted at Adams Boat Care).
Not all boats have the same fate, but this boat had been sitting in a Mediterranean marina for years - always on shore-power and with no isolation transfomer. It is very difficult to judge how thick the material of a through-hull actually is after a couple of years, so if you have brass through-hulls, you should consider changing them ideally after 5 years but definitely after 10 years, unless you have not been using your shore-power for a huge amount of time or you have an isolation transfomer installed. But can you be certain?
The above picture sparks some sleepless nights, doesn't it? At least it does for me. And that's why I changed to bronze in 2013.
So why do I change again after no more than 8 seasons?

My through-hulls including skin-fittings and ball valves are today made out of bronze. You can see the dark colour. If you are not certain what you have, take a knife and scratch on the surface. Underneath you will see the true colour. If it's bright yellow, it's brass! By the way: Note the orange fire-proof covers on all hoses in the engine room which are under the water line. This is important, since, in case of fire, the hoses would otherwise melt and water would penetrate and potentially sink the boat before one gets into the burning engine room to close the valves!
What I didn't know is that the inside my strong-acting bronze seacocks, in other words the ball and the mechanics moving it, often consists of much weaker material! Dunken Kent puts it so well in his article in a recent issue of SAIL MAGAZINE, when he says: "While they might have DZR (De-Zincification Resistant) bodies, they frequently have brass or stainless-steel ball valves and mild steel handles. The former can seize up if not turned on and off regularly. The latter will simply rust away and possibly snap off in as little as a matter of months."
And this is exactly my experience, unfortunately: While still strong on the outside, some of my bronze valves have seized and others broke inside so the handle moved in "idle". Don't take me wrong! The outer body is bronze and very durable! But while often just the outer bodies of the valves are made out of bronze and the entire skin-fittings are made of of bronze throughout, it's the interior of the valves that give problems: the ball valves of many bronze valves have had a life-span of not much more than cheap brass valves, despite the outer skin being bronze. I already exchanged all mild steel handles with custom-made stainless steel handles two years ago but no less than 3 ball valves had to be changed already. Very disappointing!
So, what's the solution?
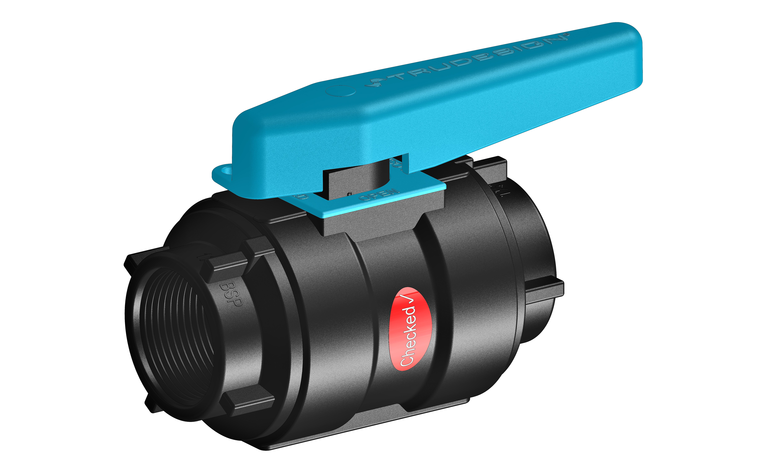
After having sneaked at the TruDesign valves from New Zealand for quite some years now, having heard a lot of good testimonials, I finally talked with Geoff Nathan from TruDesign at METS Amsterdam last year. I began explaining my problem and belief in bronze since I honestly preferred "the real stuff", i.e. ball valves made of "real metal" instead of "just plastic"... And so I went on!
Geoff lifted his eye-brows while politely listening to my concerns about "plastic" and then just replied: "Leon, just remind me for a second please: Of which material did you say was your hull made out of...?!"
Bang! He got me there! Should skin fittings made out of complex composite material be any less reliable than my entire hull made out of glass-fibre?
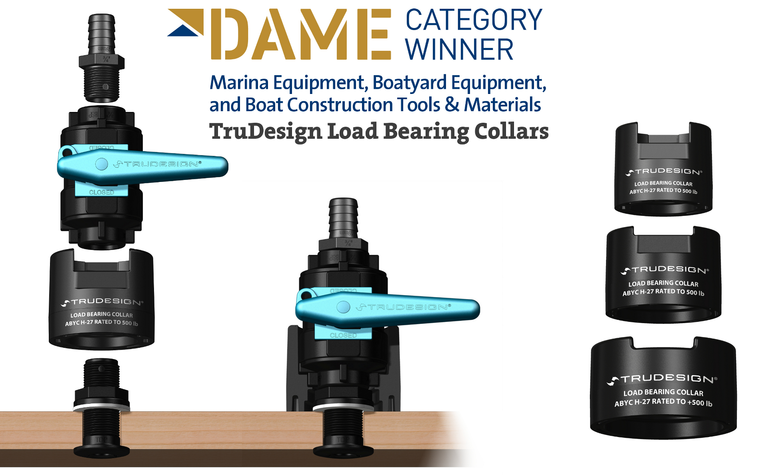
TruDesign valves are certified by 5 bodies, including Bureau Veritas for commercial use and fulfil the stringent rules for fire safety. They have won a lot of awards, including the 2016 & 2015 DAME Award Winners, 2016 HISWA 'Product of the Year' nominee, & 2009 HISWA Innovation Award Winner. It doesn't hurt that they have been around for 40 years either, and the fact that they are made out of non-conductive material also leaves behind the question if you should bond or not to bond your through-hulls against galvanic corrosion and you don't have to ponder over hoses that might give any galvanic corrosion.
Testimonials have been overwhelmingly positive form users, and many really high-end yards fit them on their yachts as standard or at least as an optional upgrade. So, ladies and gentlemen: I'll give it a go!
All through-hulls, including skin fittings, ball valves and load bearings are now to be changed on Regina Laska by Marina Coruña. And I'm in good company! Another boat at the yard, a huge X-Yacht, has also decided to change all 22 through-hulls on his boat to TruDesign.
TruDesign claims they last for the next 35 years with constant smooth movement of the ball valves. I'll be over 90 by then, so that's perfect!
Changing Fridge and Freezer compressor units
Regina Laska's current water-cooled fridge and freezer systems are 5 years old. They are still working, but both of the water cooling pumps had to be changed already after just 2 and 3 years respectively, due to fouling inside. And now it's time again...
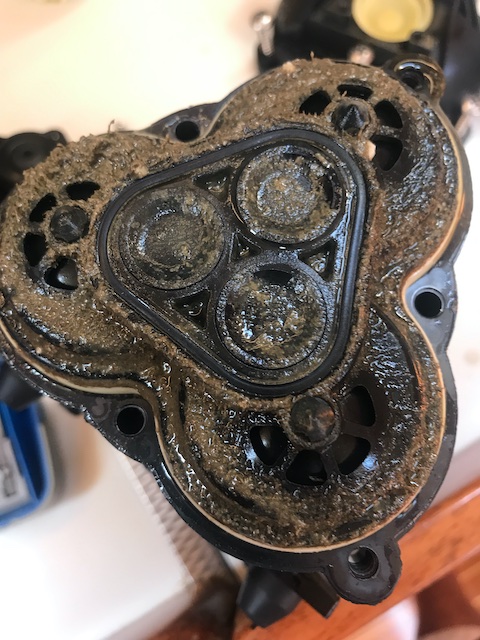
This is how the water pumps looked from the inside when I changed the pumps two years ago. They had just run for 2 and 3 seasons respectively, when they looked like this!
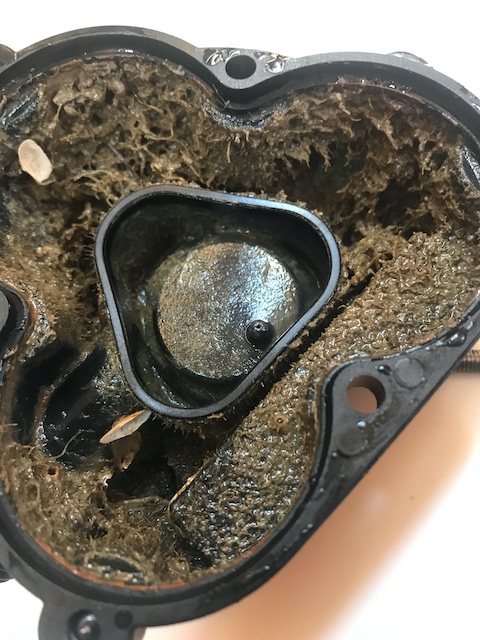
The filtering system has not been good enough for the pumps, which have again begun to go loudly, with the compressors getting hot and not cooling very efficiently. The next step is that the pumps leak, is my experience.
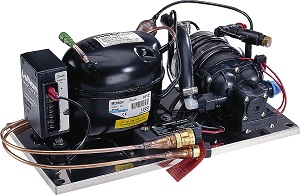
Both of these compressor units (one for the fridge and one for the freezer) are to be changed.
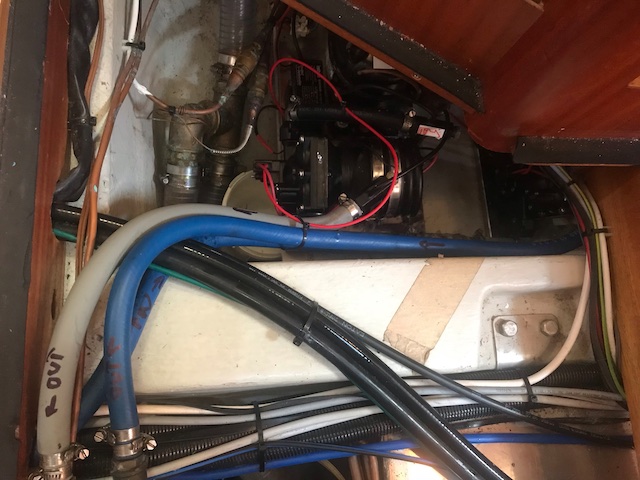
Where-ever you lift the floor-boards on Regina Laska, there are cables and hoses running across the entire boat. It takes a couple of years to get to know where every one leads to. Here, you see part of one of the compressor units under the navigational table with cooling water led in and out (blue and grey hose). Top left also shows the huge hoses for the two massive 12V and 24V Rule4000 bilge pumps, pumping 252 L/min each, thus over 500L/min in total. Black high-pressure hoses leading diagonal over the photo are for the water-maker and then you have endless cables leading to all sorts of electrical installations onboard.
Instead of looking for the actual fault, I decided to simply swap both to identical Isotherm Magnum compressor units for fridge and freezer, starting from scratch. At the same time, an additional second fine strainer will be built into the inlet, so the water is being double filtered before entering the pump.
Last, but not least, this said strainer will be installed just above the waterline, so that if the fridge or freezer unit would start to leak cooling water from the water pump (which has happened!) the boat would not become water-filled. After all, the compressor units are placed under floorboards under the water line and hence a leaking pump or a broken hose camps (there are always two under the water line on Regina Laska) could sink the boat in worst case... So the hose should do a short loop above the waterline on its way to the compressors.
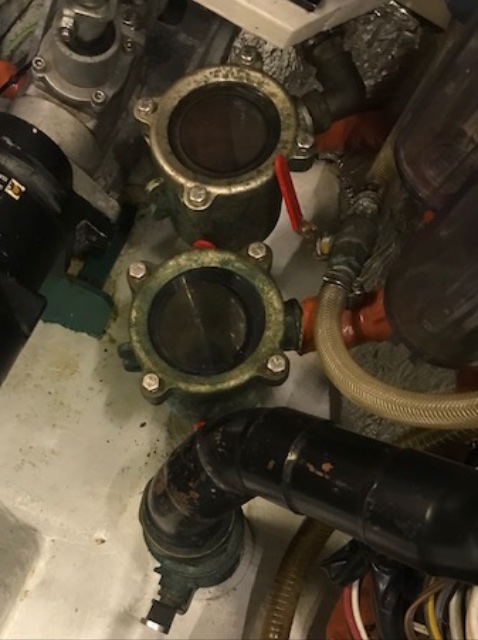
The bronze strainers used today will be kept as a pre-strainer (here strainers for the generator plus the watermaker sharing the strainer with the fridge/freezer.) After this large strainer, I will have a second strainer on its way to the fridge/freezer compressors.
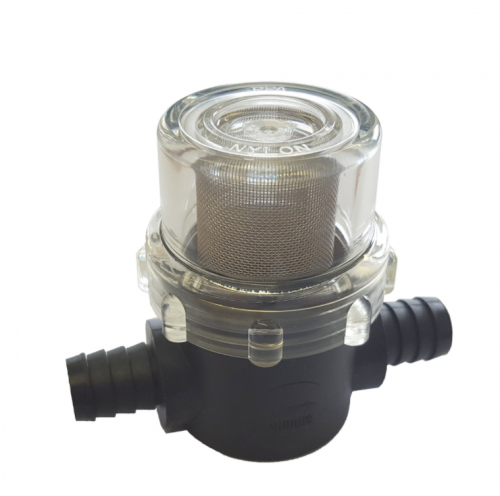
This is a typical extra second strainer placed in line on its way to the fridge/freezer compartment. This extra strainer is to be installed on the in-take hose for the cooling water pumps on the compressor units. Easy access is promised by Marina Coruña, so I can clean it regularly if needed.
New Furuno Plotter
This year's Furuno-upgrade is to exchange my current 5 years old TZT14 with the brand new TZT16F. This third generation of TZT-plotter is a 16 inch wide (the old one was 14 inch, hence their names). The outer measurements of the TZT16F are very similar to the TZT14, despite the larger screen, since it lacks the hard-buttons on the side.
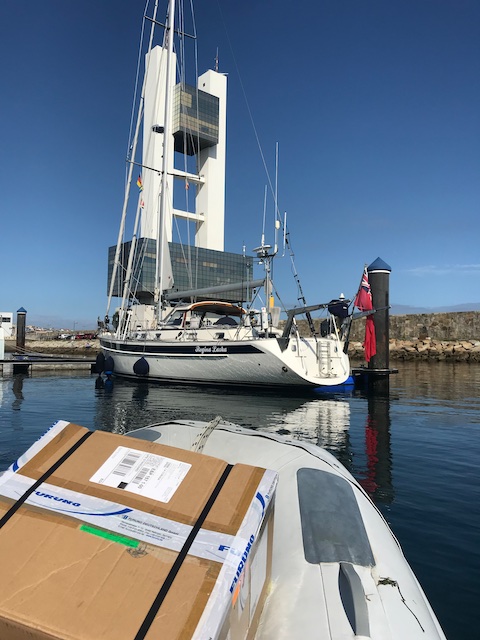
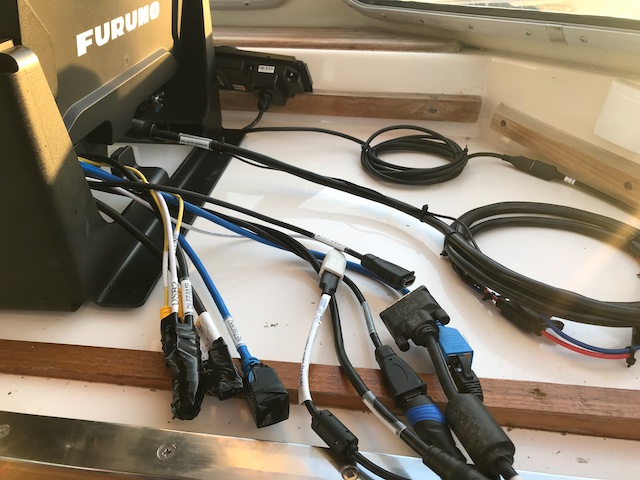
Picking up the new Furuno equipment by dinghy in Marina Coruna.

Opening Furuno-boxes is like having a private little Christmas party in solitude.
I use the touch-functions at times, but prefer a hybrid solution with real buttons. For gloves or wet fingers, it's good to add the MCU-004 remote with real buttons.
This MCU-004 remote is to be placed just next to the plotter. The second, smaller remote called MCU-002 is already placed on the pedestal and will remain.

This is the plan: New plotter on the same place as the old plotter and the MCU-004 remote flush-mounted into the teak on the outer chart table.
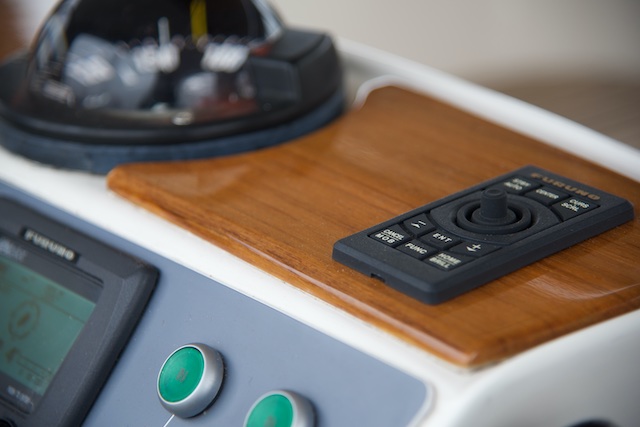
The MCU-002 is already installed at the pedestal, since it was used in conjunction with the TZT14.

MCU002 (at pedestal) and MCU004 (flush mounted next to the plotter) are working flawlessly together as USB-control units in addition to the touch screen.
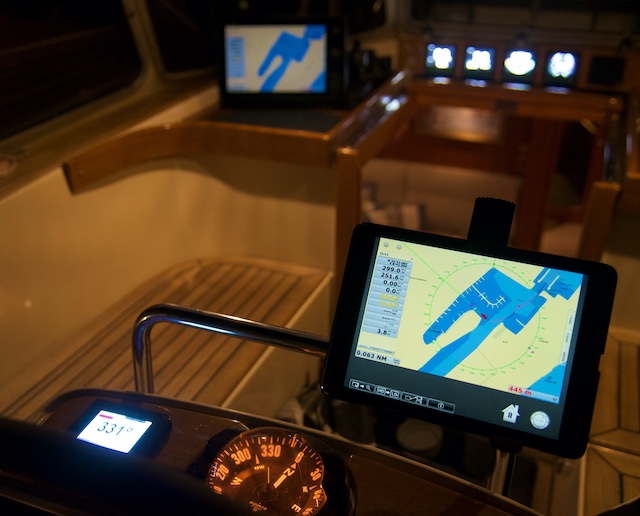
Further to the touch-screen and the two USB-remotes, the fourth possibility to control the TZT is by means of an iPad which is connected to the TZT via WiFi. This was so with the TZT14 and still works for the new TZT16F. The marina on the photos is Cuxhaven City Marina, if you wonder, and the photo was taken last year, when we entered late at night having followed the tide.
Using two USB-remotes requires an extra USB-hub. I chose a 4-port hub which I installed under the internal ceiling (dry and yet close to the plotter so the USB cables are not getting too long).

Hallberg-Rassy's have huge space under the ceiling and thanks to the fact that the ceiling is screwed in place, it's easy to take down for service or, like here, installing extra equipment. This is a great plus for HR's, despite some criticising that you can see plastic hats covering the screws. These boats are made to retrofit and service and I'm very glad that ceilings (and anything) is so easily dissembled!
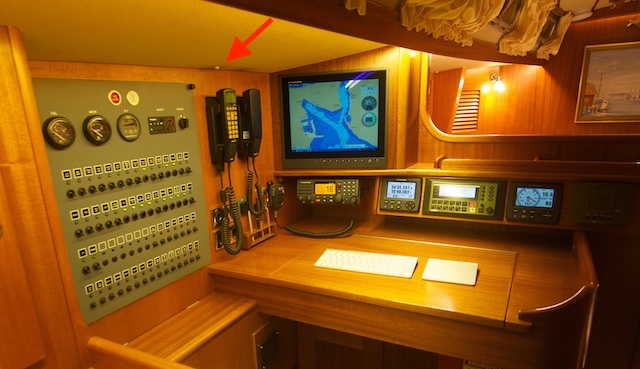
Red arrow pointing at one of the plastic caps. If you undo the cap you will find a screw hiding thereunder. Unscrewing these screws lets you easily take down the entire ceiling to access anything hidden behind it.
With one of the free ports, I used an USB-extension cable and connected it to an external USB-stick, where backups, the electronic logbook and the screenshots are saved.
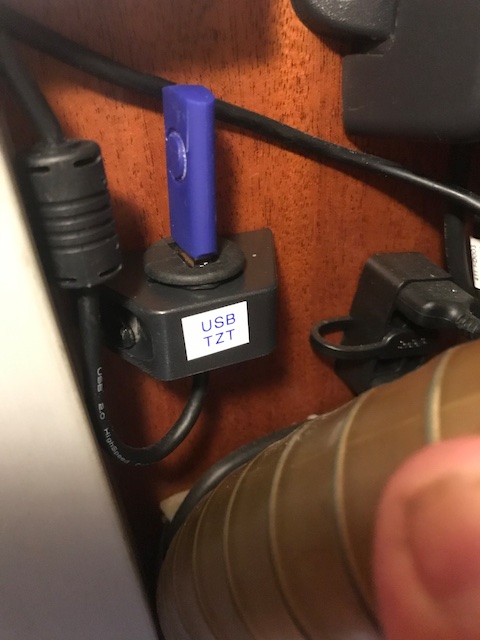
The USB-stick where data from the TZT is transferred, such as backups, screenshots and logging data from all sorts of input devices.
Next year, I will hopefully have some experiences to share about the new TZT16F, which is said to have a much faster processor and a new Man-Machine-Interface.
Another little plus is that one can now use the TZT as an external screen. Welcome to watch movies outside in the cockpit!
Like most Furuno equipment, The TZT16F has loads of interface options, supporting all sorts of protocols, such as NMEA2k, NMEA183, Ethernet, USB, HDMI in and out, Sound, Video from cameras etc.
Not being a great fan of Windows as an operating system for a navigation equipment, I'm glad to announce that the new TZT16F uses Android instead of Windows in the TZT14. The only drawback is that it can only export a mirrored screen with the same resolution as its own, in this case it is fixed to 1920x1080 pixels. My external MU-150HD screen at the navstation, however, has a maximum resolution of 1024x768 pixels. Unfortunately, I thus cannot mirror the plotter at the navstation any longer, like I used to.
What it can, however, is to show HDMI-movies in the cockpit! :-)
FOR SALE
My old TZT14 model today costs new EUR 5,027. I was thinking of selling it for some EUR 900. If you are interested, drop me a line! I'll send you some more information about it!
I also have my old MU-150HD 15" navigation screen for sale (see below) which I sell for very little, since it has some cosmetic but transparent bubbles on the sides of the screen.
Upgrading TimeZero Navigation Software
At the same time I am upgrading my TimeZero navigation software, which I use at the navstation and which works flawlessly with the TZT16F and the other Furuno equipment. (And with the said MU-150HD screen by the way).
TimeZero (previously MaxSea) is one of the best navigation softwares on the market, I think. It's really intuitive and if you are looking for a PC-solution, this is what I really can recommend, especially if you have other Furuno equipment, such a Furuno-radar, Furuno satellite compass etc.
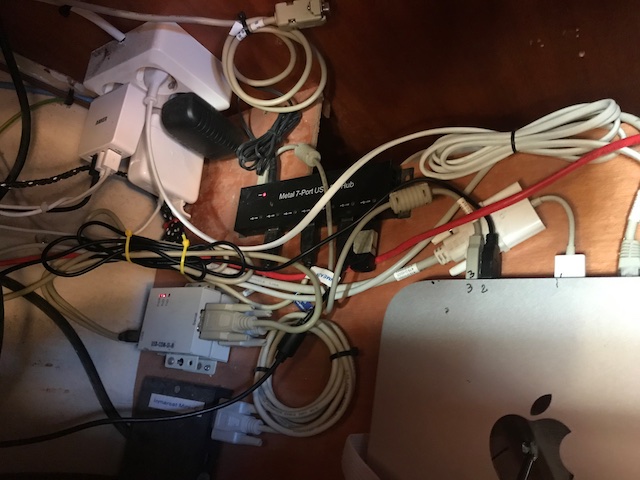
This is how it looks under my nav-station. The MacMini runs on BootCamp and acts as a PC with Windows-based programmes. Yes, I know. Windows... But TimeZero runs on Windows! And why Mac as hardware with Windows XP as the operation system? Because it is rather small and uses quite little power. USB-hubs are used to handle several Serial-to-USB ports in order to deliver redundancy. The Mac is connected to the Navigation data systems via NMEA-2000, NMEA-183 and Ethernet and via WiFi to the RedBox which is acting as the communication center.
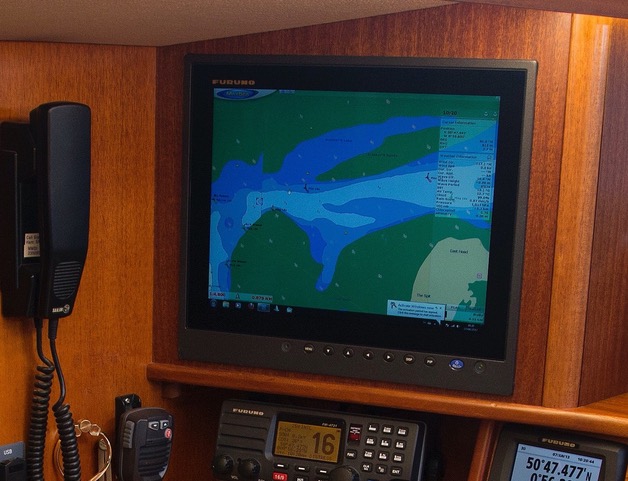
The MU-150HD screen and TimeZero navigation Software.
New Mobile (4G/LTE/3G) Internet Gateway
Mailasail is a great supplier for onboard communication solutions, be it to boost the WiFi signal in port, communicating via Satellite or here - brand new - via LTE.
The various communication devices are simply plugged into the the heart of the communication system: Mailasail's renown RedBox. You just plug all the other communication devices into the RedBox and it works so wonderfully together that one can really say "it works out of the (red) box". This is plug&play how it should be!
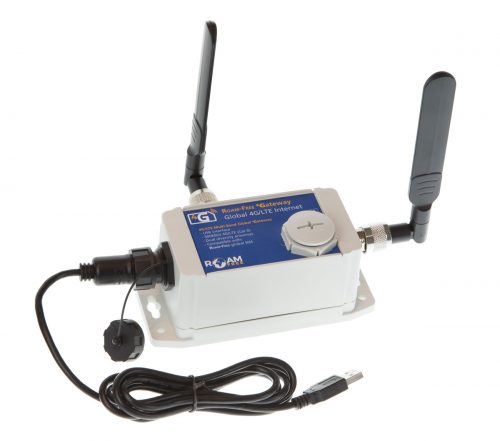
The Mailasail 4G Gateway that simply plugs into the RedBox. I installed mine at deck level in a locker in the aft cabin.
All I had to do is to plug the new Mobile 4G/LTE/3G Internet interface into the RedBox, and it couldn't be easier! You just add water as they say, whereby "water" in this case is a standard SIM card you would put into your iPad.
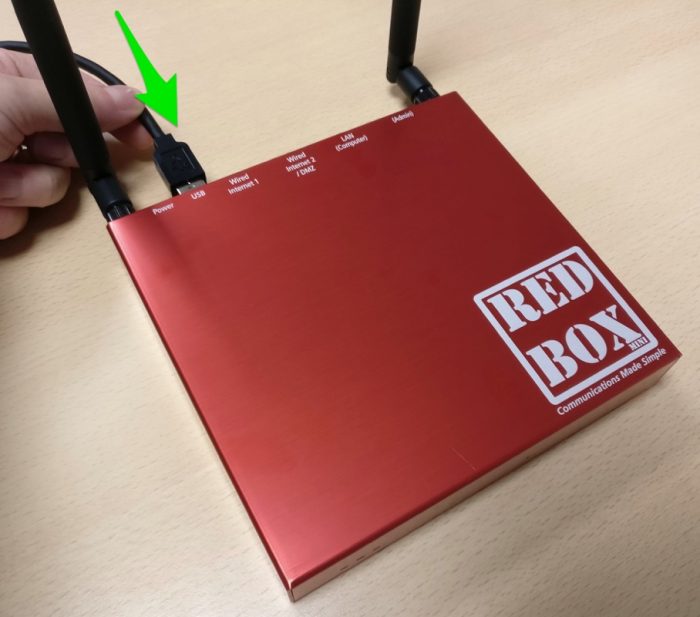
It can't become more simple that this: Plug in the 4G Gateway in a free USB-port (next to your possible WiFi-boosting antenna and your optional SatPhone), install the SIM-card you normally use in your iPad, and that's it! Works out of the (red) box!
Once you have plugged in your hardware, the routine goes like follows:
- Connect to the WiFi network of the RedBox as if you connected to your WiFi network at home. I called my WiFi-network "Regina Laska RedBox" so you can easily access it. The reason why I changed the name is that I have noticed that sometimes there are several boats in the marina all having "RedBox" as their Wifi-names! It's becoming popular!
- Go to your web-browser (Mac or Windows) and surf to "Redbox" or, alternatively, to "http://192.168.111.1/".
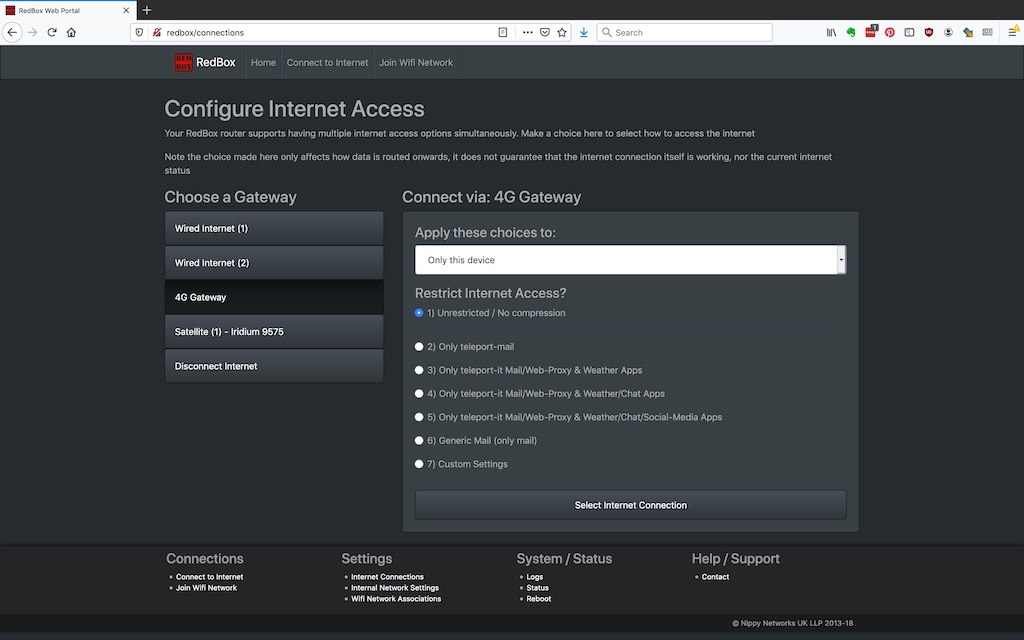
- Click on "Connect to Internet"
- To the left: Choose through which gateway you want to get out into the Internet (e.g. via a WiFi booster, via your Satellite Phone or, here, via the new 4G Gateway).
- To the right: Choose how you want to restrict your internet access. For instance, if you use the WiFi-Bat or the 4G Gateway, you would possibly not restrict it at all. But if you use your Satellite Phone, you certainly don't want Windows to go out checking for any new software updates or receiving heavy pictures from your friends' dinner plate...!
This is how it looks. Can't get more simple than this!
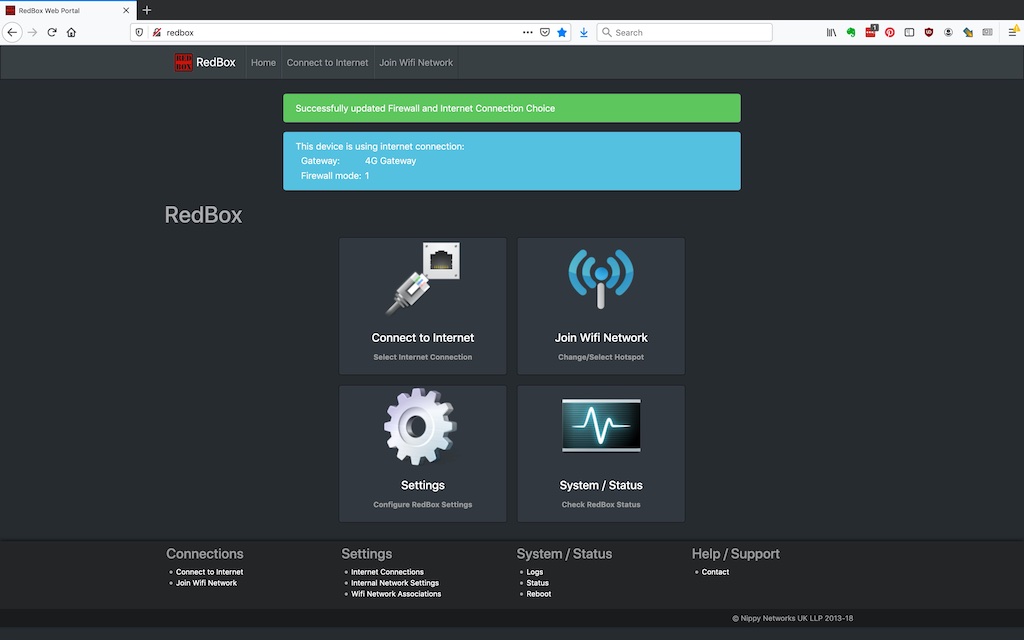
RedBox answers with an acknowledgement that the internet Gateway is connected and off you go! Surfing the Internet!
Yes, Europeans are used to roam freely within the EU. And yes, coverage in most towns are good enough so you could use the tethering function on your smartphone. But once outside your general cell coverage, there are various standards and other issues. One SIM card doesn't fit all hubs and vice versa and countries don't always offer what they could do technically!
So why did I got rid of my little sweet Huawei GSM-router I used to use?
To start with, Mailasail uses radios from Sierra Wireless in its equipment, which might be worth noting, since some governments around the world recently have embargoed Huawei products. So far, I have not had any issues with my Huawei GSM-router inside the EU, but you never know.
The main reason I upgraded to Mailasail's Gateway is the stronger signals I get thanks to Mailasail's robust design with two pretty large external antennas. Stronger signals mean higher speeds and being able to connect over longer distances, which is often an issue while sailing or anchoring in a remote anchorage. The Roam-Free 4G Gateway has dual antennas which are much larger than on a mobile phone (or hotspot) to hook in signals from a much longer range.
Additionally, the 4G Gateway is one of the first devices that keeps working at maximum speed all around Europe and even all around the globe. Most hotspots only support 4G in certain regions, for example in the UK Vodafone uses different standards for 4G in London vs in Southampton. Most devices fall back to older slower speeds at best, or may not work as you travel through Europe (and few will support best speeds in the Caribbean).
And last, but definitely not least, the RedBox comes with a compression software and various filter options, so I can really save on airtime! While this is not an issue within the EU where I can use my beefy 60GB each months by Spanish Telefonica, it would become an issue, once I sail outside the EU. And remember: for me, the UK will be outside the EU from next year on and for all UK boats, EU would be outside your standard area. While possibly, but not certainly, they might finally agree on some sort of roaming agreement between EU and UK, it definitely doesn't need to be the full amount of data or the normal speed we got used to.
So, in order to save data and airtime, RedBox is really clever, as most of you will now who use it for their SatPhone data.
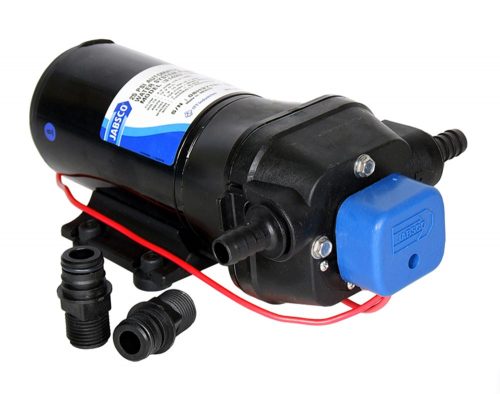
Changing the domestic water pump
Every five years, I change the Jabsco ParMax4 water pump for the domestic water. Not that I have any issues with it right now, but that's exactly how it should remain.
After 5 years of constant use for 6 months a year, it's just good to exchange to be on the safe side.
For private pleasure sailing one wouldn't change the pump until it stops functioning (and yes, I have a spare, of course). Sailing with guests is another ballgame. I just don't want to come in the unpleasant situation that a guest is in the bathroom in the middle of the Bay of Biscay and the water doesn't flow any more....
Changing the pump before it breaks is a simple and not too expensive solution to be on the safe side so that such an embarrassing situation won't occur.
Anchor Plow with custom made backstay cleat
Lundh Sails in Sweden is an inventive sail maker producing the Lundh Anchor Plow. This is an alternative to a standard anchor sail. I have used anchor sails on several boats and I really like anchor sails making life much easier at anchor.
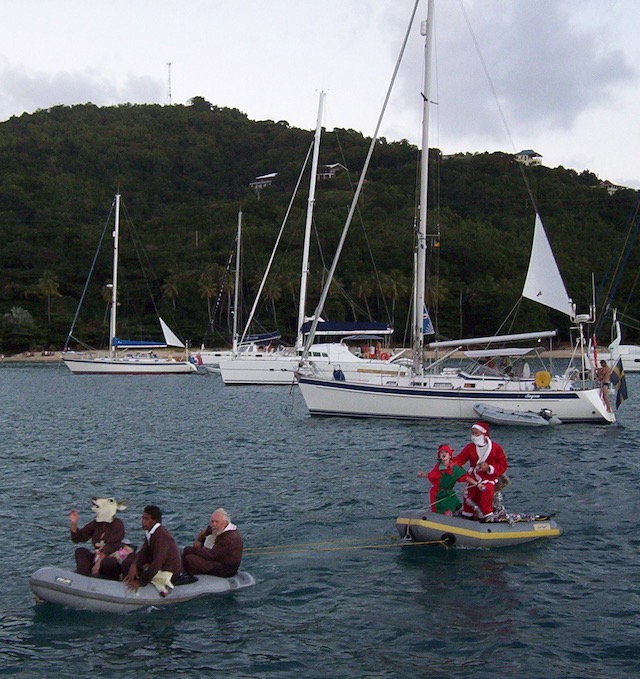
Santa visiting us with his reindeers for Christmas 2005 in Bequia, Caribbean. Our HR40 Regina in the background with a standard anchor sail. Further to the left another Hallberg-Rassy (HR42F), also flying an anchor sail. Let's see how much better the anchor plow might become!
Lundh sails has improved the anchor sail and developed the Anchor Plow, meaning that the stern ist not "tacking" into the wind with wind blowing either into one side or the other of the anchor sail. With a standard anchor sail the boat needs to swing a little for the anchor sail to have an impact.
Not so with the anchor plow: Here both sides are constantly being blown at and it's a more question of how much wind force on each side. The idea is that the boat does not need to change its angle much before the correction sets in and the boat sails considerably less at anchor and remains steady in the wind at anchor. This significantly decreasing the force on the anchor, which is the main reason why one sets an anchor sail in first place. Further, an anchor sail is offering better lee in the cockpit and it is much easier to dock with the dinghy without the ever moving and swinging boat.
I especially like the fact that the stern part of the Anchor Plow is divided so it is not attached along the backstay but instead are tied to the stern cleats port and starboard. This avoids the anchor sail flapping against the SSB-antenna along the backstay.
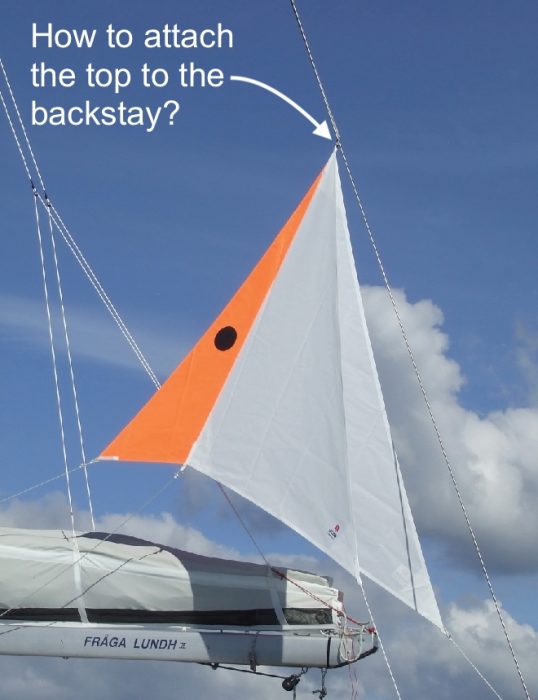
The challenge is now how to hoist the anchor plow so the top is kept as close as possible to the backstay. For this reason I needed some sort of cleat that you attach to the backstay, but it should not be of any metal to avoid corrosion between the metal parts.
I contacted Daniel, my rigger at Spinsail in Sweden, who is a very inventive person loving new challenges. He solved it by simply 3-D printing a custom-made backstay cleat for me. How cool is that?! He designed it first in his computer, we discussed it via a video call and then he had it printed in carbon fibre reinforced nylon. A low friction ring by Seldén and some Liros ropes made the rest and now there is a kit available for any type of anchor sail!
If you are interested in such a kit, please contact Daniel: daniel(.at.)spinsail.com.
My back stay is 12mm, but Daniel from Spinsail can print a cleat for any dimensions. Really cool!
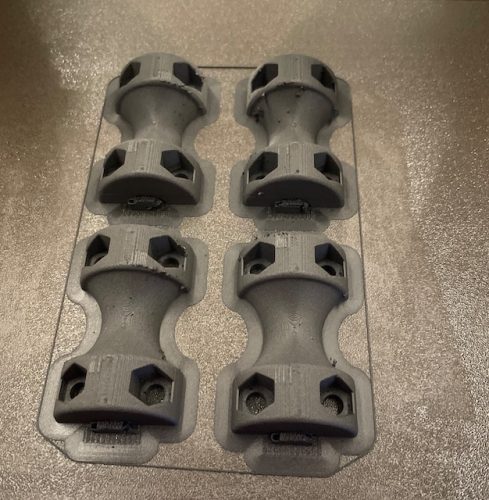
It took 8 hours for the printer to make two back stay cleats.
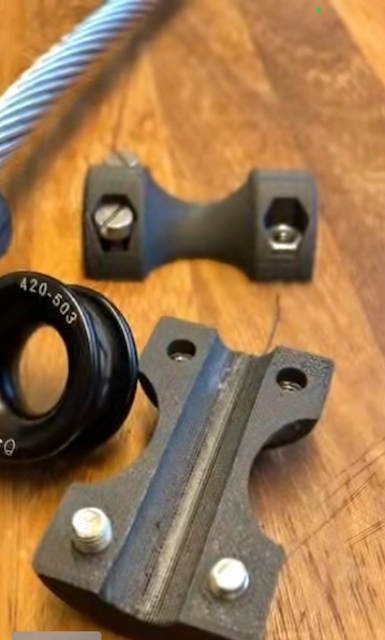
The cleat ready to be screwed onto the backstay.
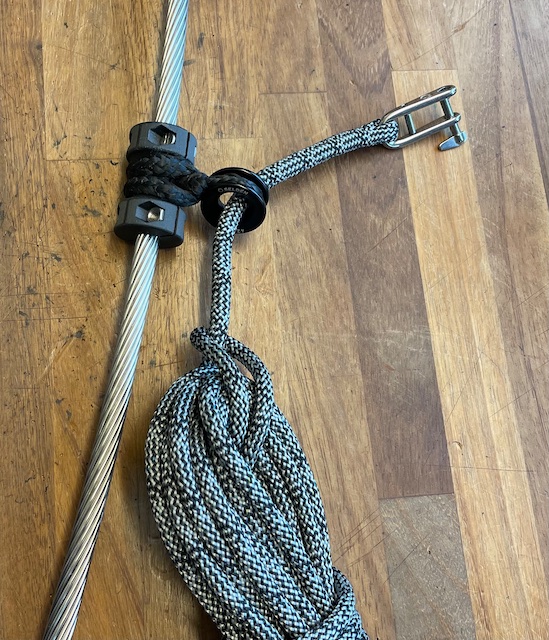
The complete kit consisting of the printed carbon reinforced nylon cleats, Seldén low friction ring, a shackle and 15m 8mm Liros-rope ready to be shipped to Regina Laska in Marina Coruna in Spain.