Refit year 10
Tenth refit and third winter storage at Marina Coruña, Spain
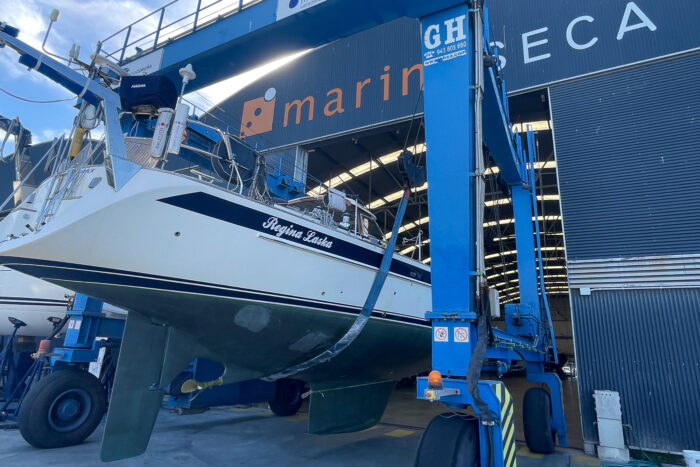
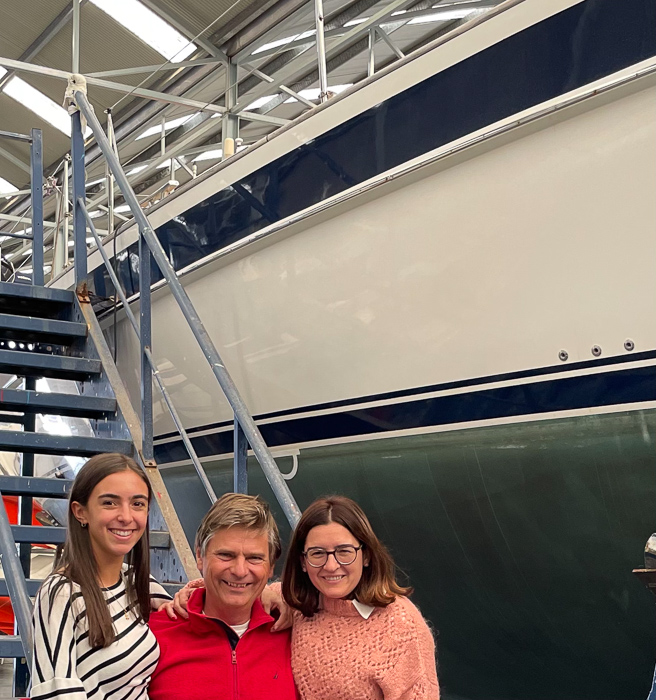
Regina Laska has found a new home in La Coruña and is very well looked after on the northwest tip of the Spanish Atlantic coast. This is not only her 10th refit anniversary and her third winter in La Coruña, but also the second winter under the leadership of Chuny Bermúdez and his great team.
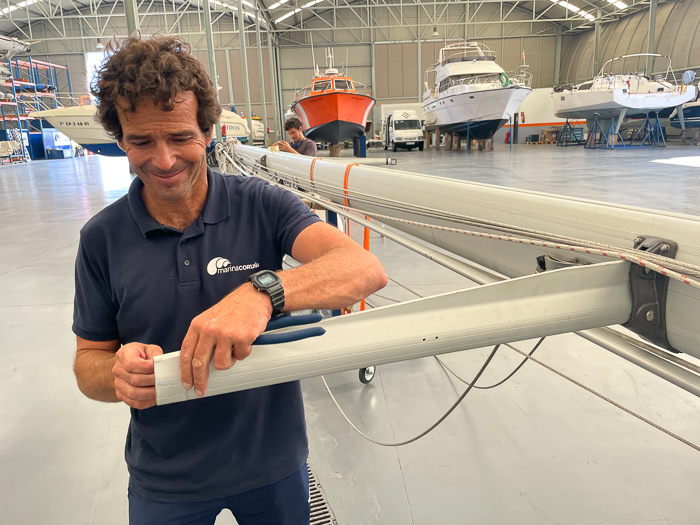
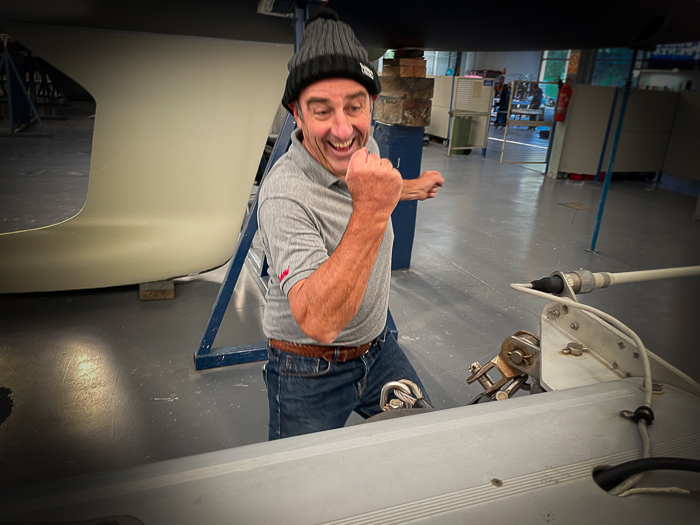
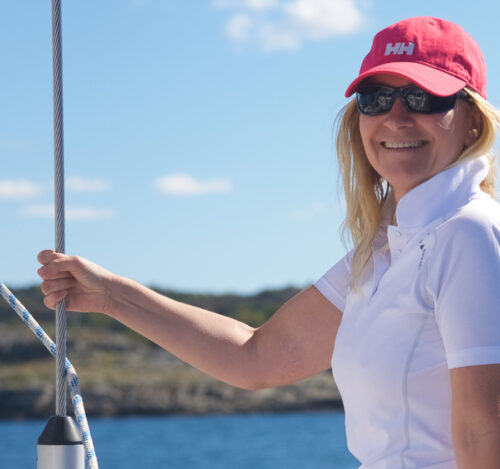
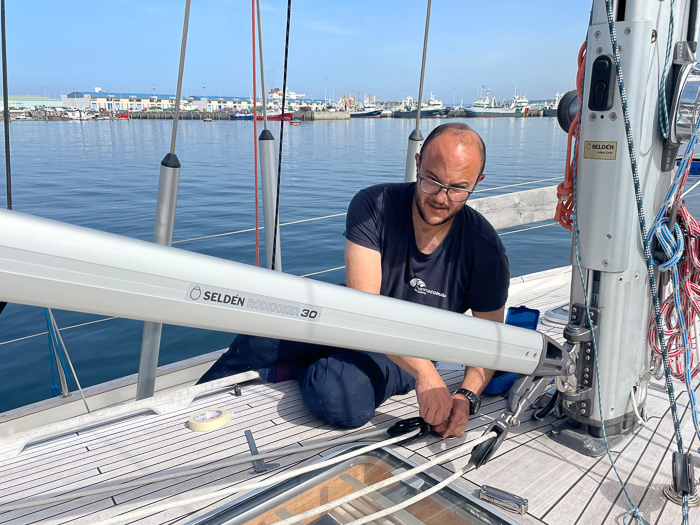
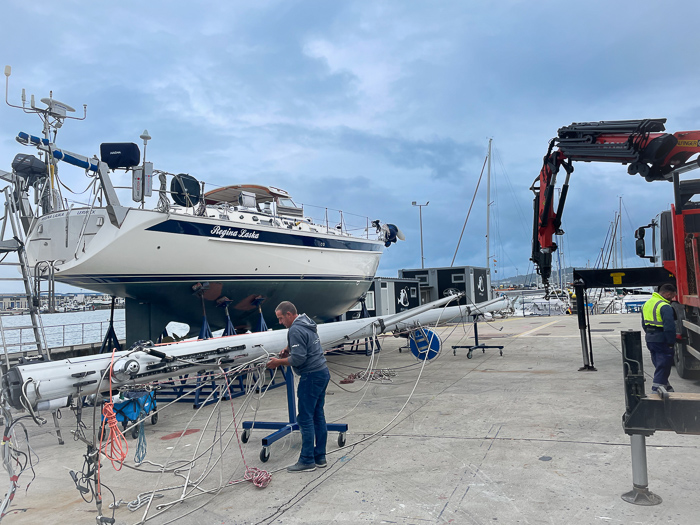
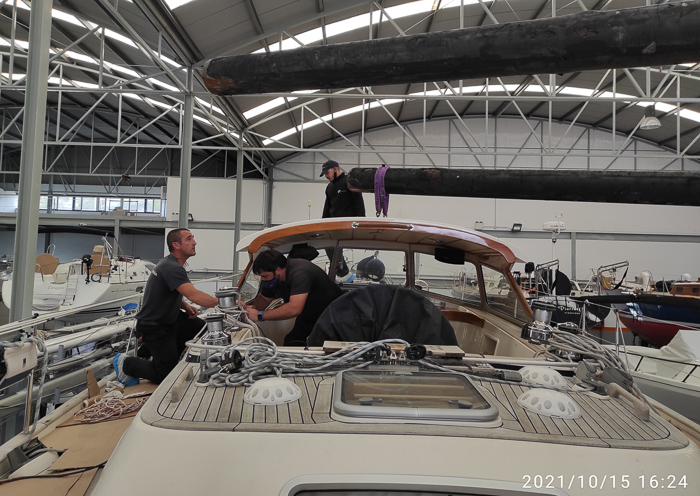
Chuny is taking a personal pride in looking after Regina Laska, here, he's dismantling the rig. Chuny is my primary rigger on site.
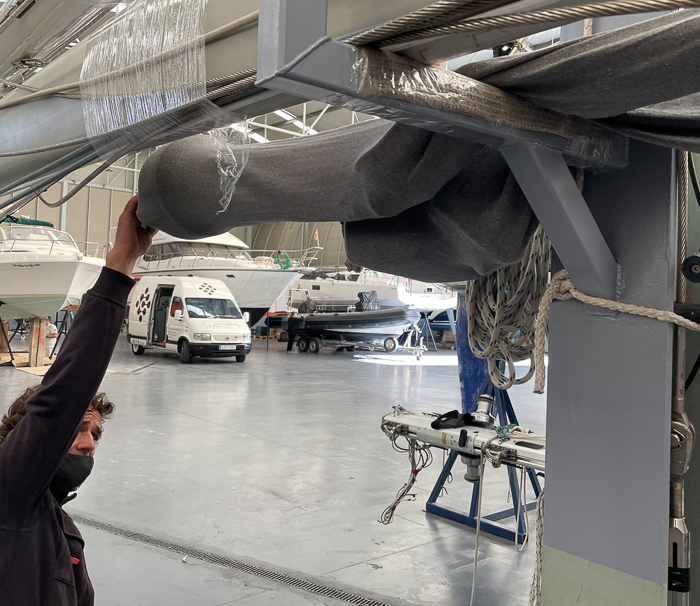
Masts are carefully stored indoors with "socks" covering the furlers.
What is new in the organisation is that big projects like Regina Laska gets a dedicated refit manager, who is constantly looking after and organising the jobs, keeping the owner informed on the progress. In my case, it's Carlos Landa, who has been at Marina Coruña for a year now. He is a civil engineer and is used to organise huge projects like building bridges and roads. Carlos and Chuny have been sailing together since childhood, so understanding boats both as sailors as well as from a technical engineering standpoint is a perfect match, if you ask me! (okay, I'm bias, I know....)
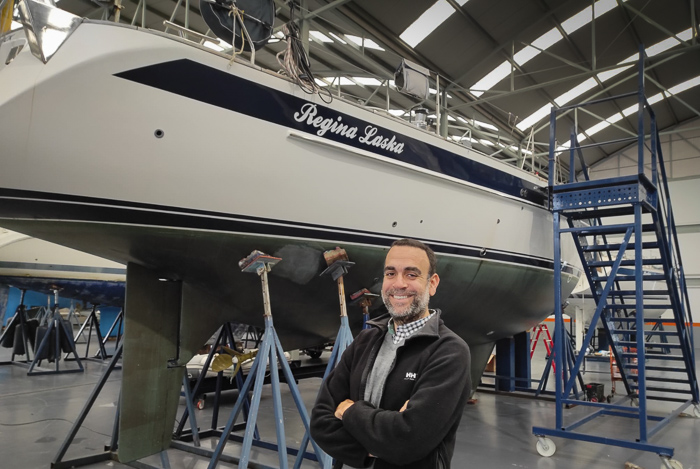
Carlos Landa is my project manager for Regina Laska. He's a civil engineer, loves sailing and a great organised person looking after Regina Laska as his new daughter, he emphasis!
And, not to forget, the charming ladies Alda and Norma taking care of the reception so each and every customer feels so well taken care of as soon has he or she steps through the doors.
Using the ladder next to Regina Laska in order to come at a similar hight for the camera... (Alda to the left and Norma to the right closest to Regina Laska).
After 10 years of ownership and more than 35,000 miles of sailing, the time has come for another major refit, plus, of course, the general overhaul job of polishing with Nano-Polish, repairing some scratches and marks, varnishing, changing some silicone in the bathrooms and the fridge, polishing the bathroom floors (in GRP), plus fixing some leaks which never seem to vanish in a complex boat like Regina Laska. It's all part of keeping a classic boat looking like new.
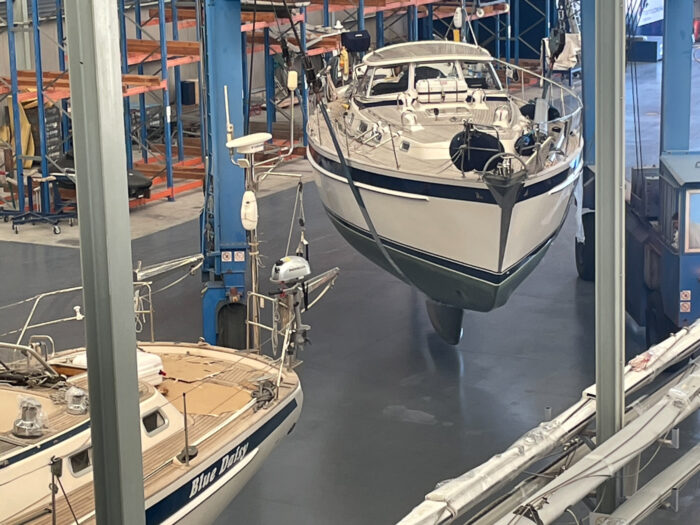
Regina Laska is being moved to her winter place behind Hallberg-Rassy 46 Blue Daisy. The boats know each other well after having spent several winters together at Adams Boat Care in Sweden.
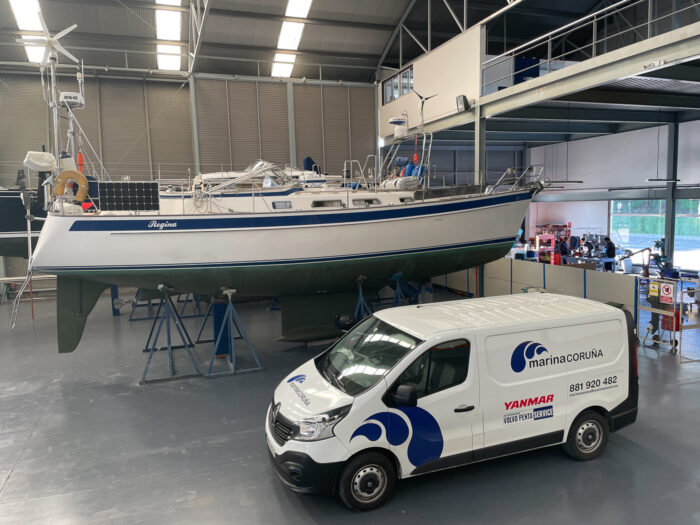
Regina Laska is placed next to my own old Hallberg-Rassy 40 ("Regina", now under Swiss ownership) so the two lady-boats are sharing the same roof during this winter as well. The two boats haven't met during a winter yet and will certainly have a lot to chat about! In the background to the right, the mechanical workshop of Marina Coruna, by the way; on top floor the sailmaker's loft. Please observe the cleanness everywhere in Marina Coruna. It's like in a hospital or spa.
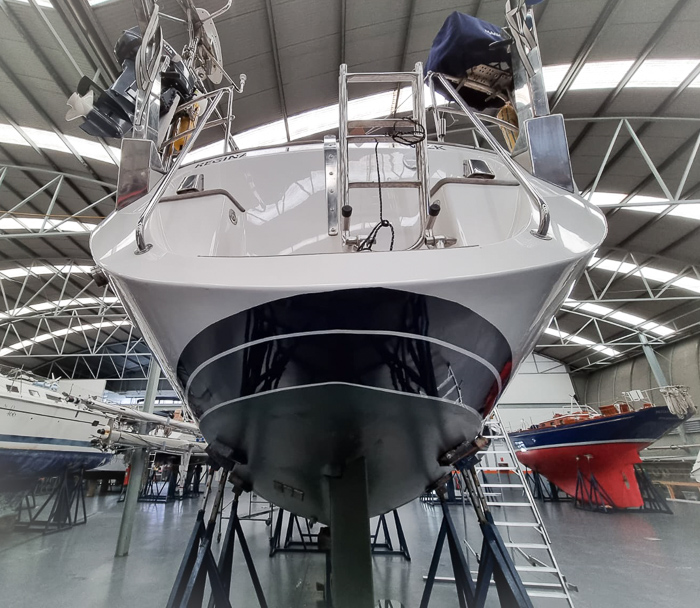
Polished hull
I'm not sure how Campillo succeeds every year, but the hull looks better and better for each year. Would you think this Hallberg-Rassy is close to 25 years old?

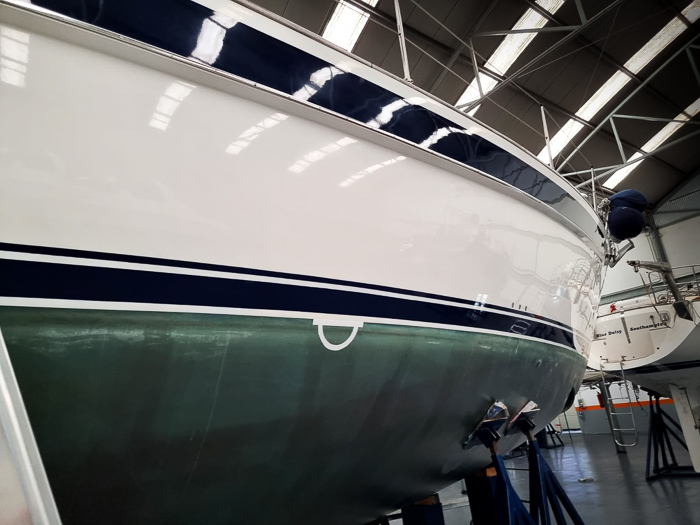
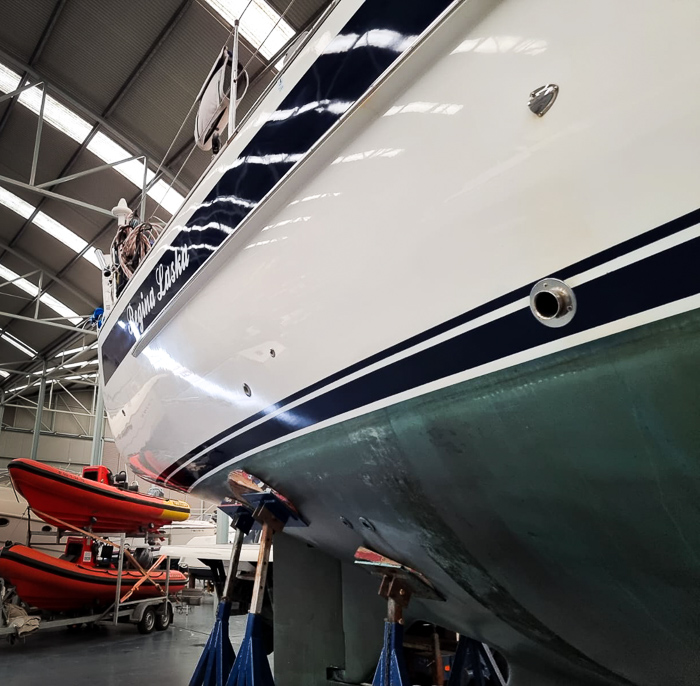
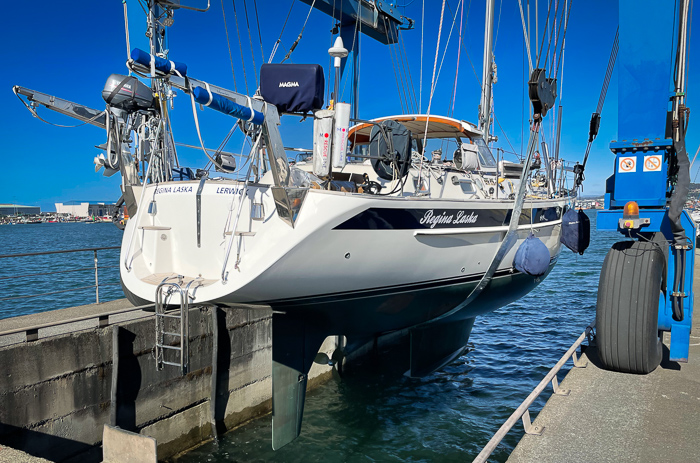
Here follow some pictures from just before the launch, after she has been polished, sanded and varnished for 213 hours.

New rigging
Since last time Regina Laska got her new rig in the 2013 refit, she has sailed for 9 seasons and 35,000 miles. Renown riggers and Seldén recommend to change the standing and running rigging every 10 years or 30,000 miles and as a commercial vessel, I also have the obligation for a detailed rig inspection every 5 years and complete rig change every 10 years. Safety first!
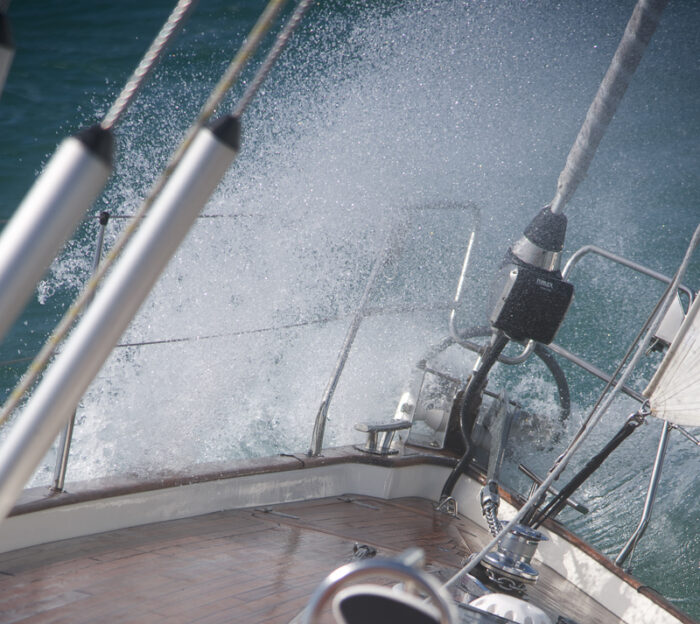
A sailor needs to be able to trust his or her rig to 100%! Here, Regina Laska is sailing upwind with her cutter-stay sail through some splashy waves in a gale in the English Channel.
Why Pete Keeping Rigging?
Chuny is the main guy regarding rigging questions at Marina Coruna and had it been a simple inspection only, Chuny would have been the natural person taking care of my rig as usual.
In 2021/22 refit, the project becomes a major one and we needed a second guy to work on my rig and he or she should be a true rigging specialist with many years of experience. In the end, I chose to co-operate with Pete Keeping from Pete Keeping Rigging for this project. Pete is not only a very pleasant person to work with, but a very experienced rigger working very closely with my rig manufacturer Seldén in Sweden. The fact that Mats-Uno Fredrikson from Seldén in Sweden only had positive things to say about Pete was a further plus.
Pete Keeping Rigging and its team of riggers is based in Portimão at the Algarve. It's a prime address if you have rigging issues on your way out of or into the Mediterranean.
I wish to mention that Pete is a very keen sailor, specialising in racing. Pete has been the RYA coach for the UK youth team at the World Championships, as well as taking the World Championship title in Windsurfing in 1988.
Pete Keeping on his Elan Impression I50.
Pete and his partner Eve love the Azores (which we have in common) and also run a charter company called "Atlantic Sailing" during summers. Pete and Eve offer sailing holidays in the Azores. Pete, being the sailor and Eve, with her background in tourism is a perfect match for organising sailing holiday: Eve Koch is originally from Appenzell in Switzerland, and a trained travel agent. She has worked for many years as tour guide before running a rural tourism property followed by event management.
Eve taking the helm on the expedition boat (Elan I50) in the Azores.
Pete and Eve have both really inspired me to sail back to the Azores in the very near future, I can reveal...
Back to the subject! Rigging it was! And not dreaming about future sail training legs to and in the Azores!
So, Pete and I get along very well and the combination Pete as the sailor/rigger from the sea shores of Cornwall and Eve, running the company together with Pete, stands for Swiss precision making sure everything is handles with perfectionism. That's what I like! The combination of craftsmanship, seamanship, dedication and precision.
Oh, and Pete has a fifth quality as well: H huge bunch om humour and a great personality!
Always up for a joke and fun while working!
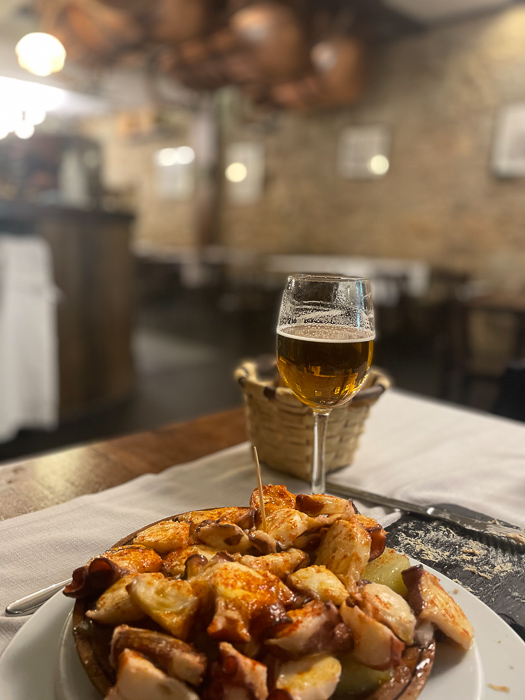
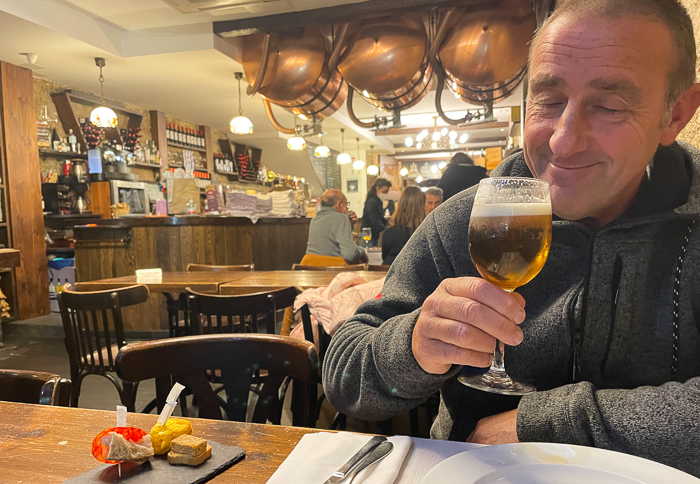
This is how we spent the nights in La Coruna: My favourite beer "Estella Galicia" coming freshly directly from the tanks hanging in the ceiling in the background and Pulpo (octupus), the speciality in La Coruna. Correctly served it should be on wooden plates eaten with wooden tooth-pegs, I'm told. Anyway: The Estrella Galicia is a reason to come to La Coruna frequently!
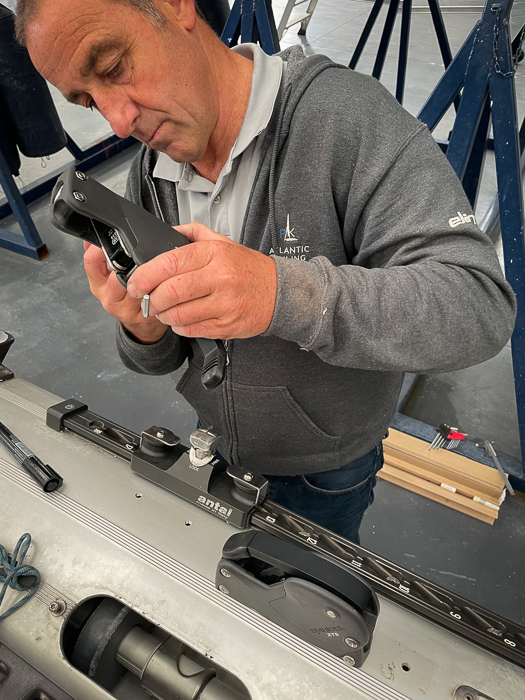
Inspection
Pete traveled to La Coruna and spent 2.5 days on Regina Laska taking apart the entire mast, boom and spreaders, looking at every single bolt, rivet, pin and sheave. 6 sheaves will be replaced on the mast top together with an entire sheave box for the genoa halyard. All pins will be replaced on both spreaders and any sharp edges will be filed down. Some more washers will be added to the spinnacker pole to prevent excess movement. The brackets on the mast for the boom and the vang will also be replaced. All D-shackels and snap-shackles will be upgraded to Wishard.

Wichard in France make the best shackles if you ask me. They even have the breaking load printed on the shackle.
The Navtec hydraulic back stay tensioner is being sent to Navtec for a rebuild.
The internal furling system for the main sail is completely taken apart and is being transported to Pete's rigging workshop in Portimão, together with the E400 and 304 furling systems for the genoa and the cutter stay, respectively, for a complete inspection and rebuild. Pete will take apart the furlers to check them in every detail.
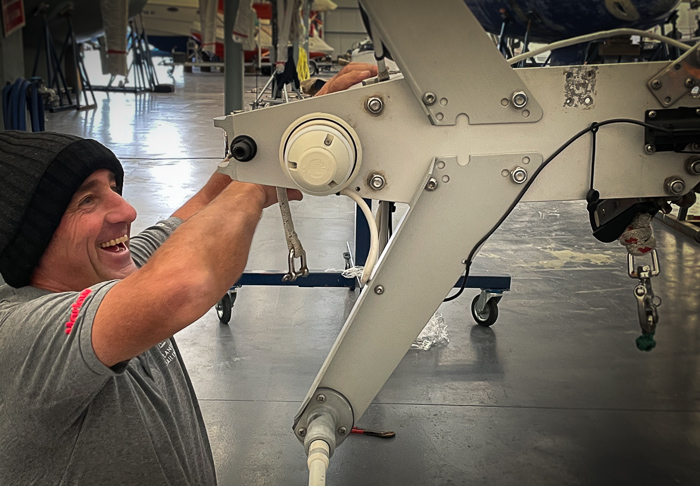
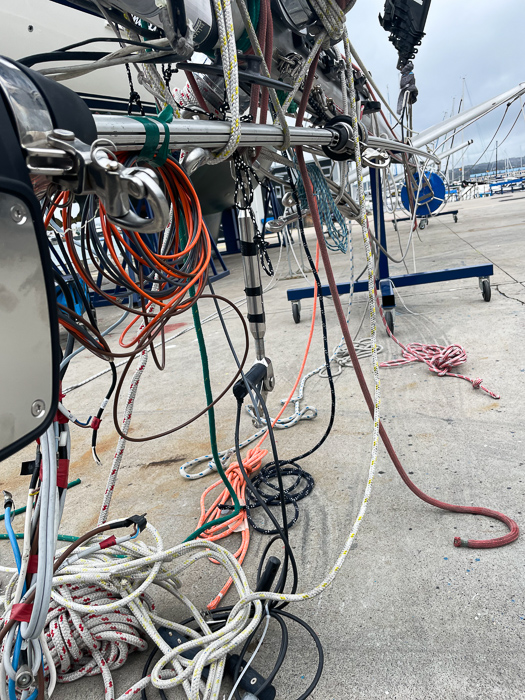
The furler has been taken apart from the forestay and is ready to be transported to the rigging workshop in Portimão.
The bracket on the boom for the vang will be replaced. Note the oval hole due to a 12mm pin in a 16mm hole, which left a considerable play.
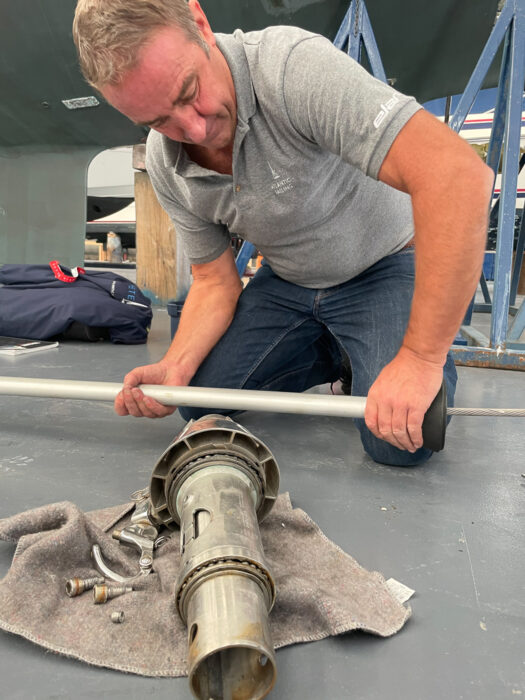
Every sheave is being checked, every pin and anything that looks questionable is being replaced.
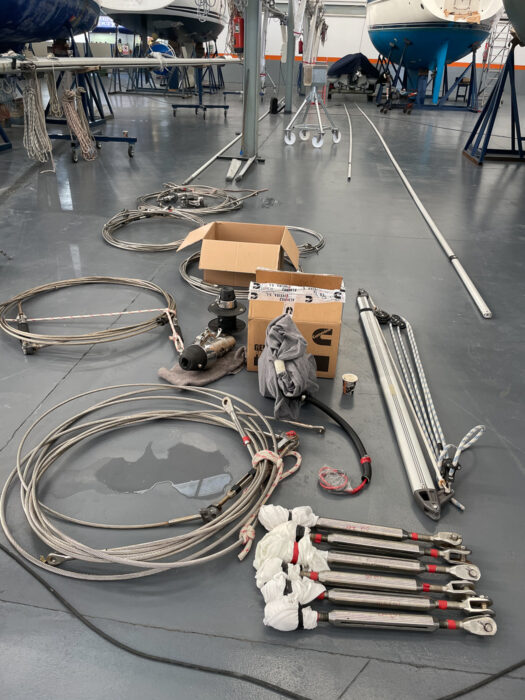
The rig taken down to its pieces and ready to be taken to the Algarve to Pete's rigging-shop.
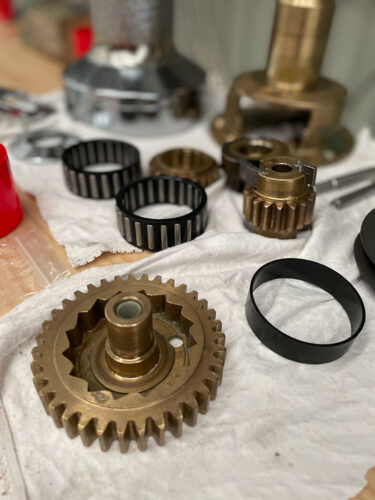
New upgraded electrical Genoa Furler
My 9 years old E400 Mk1 will be replaced by the updated E400 Mk2 Furler. This is a major and costly replacement, but the new design is so much more sturdy from a technical point of view.
Personally, I have never had any problems with my E400 Mk1, possibly also due to the fact that I have been sending the furler to Seldén every 4 years for a complete rebuild. The issue with the Mk1 series is that they are belt driven. The smaller E200 and E300 are more delicate than the larger E400 which at least has twin belts. Two belts are better than one, but the Mk2 is so much well designed. Instead of belts driving the furler, Seldén has upgraded to a gearbox using a worm drive instead.
The ones who know me will agree that for me the good is the enemy of the the better, always striving to perfection (yes, I'm half German, but luckily, when it comes to pleasure, I have some Swedish genes as well...).
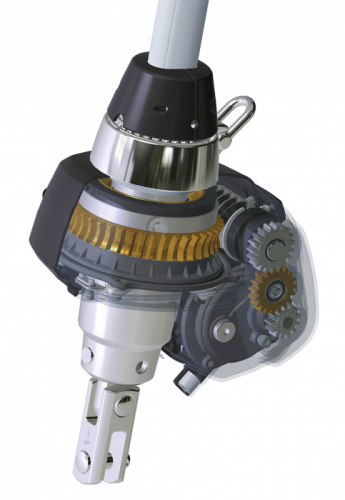
The new Mk2-series of Seldén electrical furlers have no belts. The Worm-Drive is completely free from service and more sturdy and thus reliable.
Another nice feature is that it has two speeds (fast and slow furling) meaning that under normal conditions it's much faster to furl the large genoa, e.g. for tacking past the cutter stay sail. The design is also slimmer thanks to the fact that it is powered by a 48V motor . This means that an interface box (24V/48V inverter) will be necessary (installed under deck) and new cables have to be drawn since the E400 Mk2 is computer-controlled via CAN-Bus. I'm no big fan of bus-drives, but this SEL-BUS is said to be very stable. Hopefully!
New Stays and Shrouds
Regina Laska has an over-dimensioned rig to start with. Not only does Hallberg-Rassy always specify a strong rig, but Regina Laska is one of the few HR46's that has 14mm lower shrouds instead of the 12mm standard for the HR46. You can really feel it: It's a strong piece of wire you hold in your hands!
All wires for all shrouds and stays will be replaced during this 10th refit and Pete has chosen a good quality wires, I am told.
New Rigging Screws in Bronze and with extra toggle
It has also become time to change the rigging screws. This does not need to be done every 1o years, but I believe these to be original from 1997. Further, my current rigging screws are made out of stainless steel which was used during that time but now they go back to the classic material: bronze. Bronze is much less brittle and can withstand vibrations and metal fatigue better.
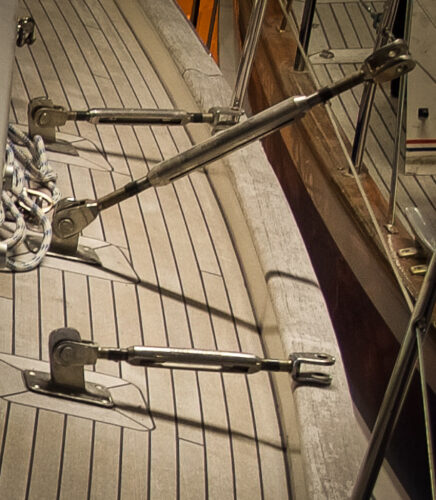
The old type of rigging screws out of stainless steel are missing a toggle. They can move sideways, but not forward/aft.
My rigging screws will not only be upgraded to bronze, but they will also be upgraded with an additional toggle. For some reason, most Hallberg-Rassy's lack the extra toggle that allows for free movement in all four directions (forward/aft as well as port/starboard). The new bronze rigging screws will have these extra toggles and have a breaking load of no less than 18.000 kg. Each! This means that you could lift (an empty) HR46 on one rigging screw only! I expect these rigging screws to hold for a (my) lifetime...
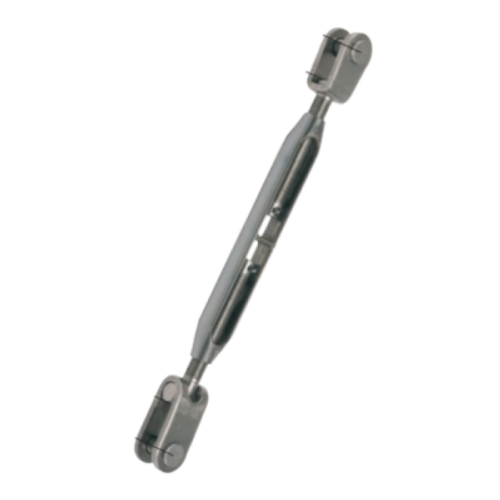
Seldén's new type of rigging screw is made out of bronze, has a fork on the upper side and a toggle for free movement on the lower side.
New Vang/Kicker
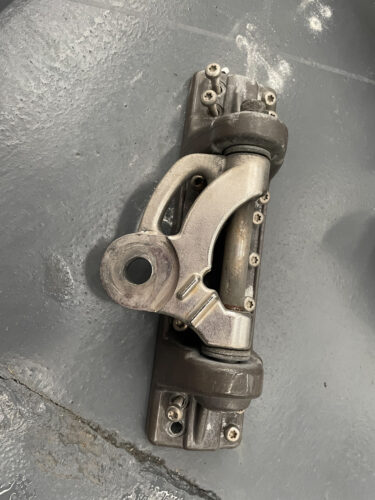
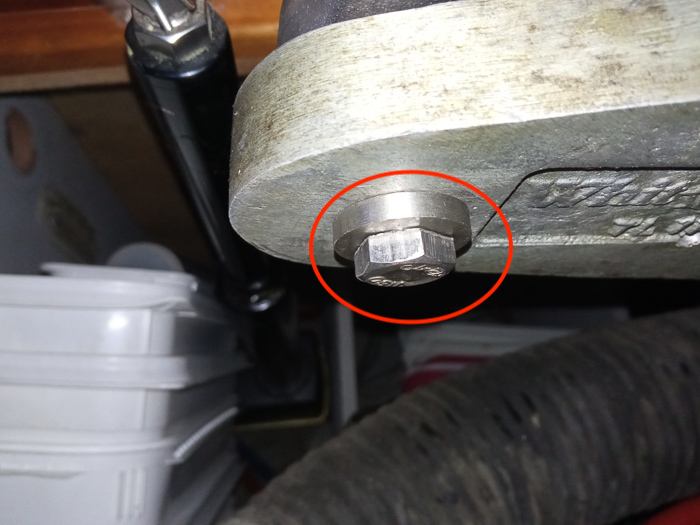
During my 35,000 Miles since last rig change I have only had one problem with my rig and that was when the vang broke during strong winds in the English channel. Also other HR46 I know have experienced broken vangs, amongst others renown HR46 Mahina Tiare III who has experienced vang breakage. I have now finally understood why! The boom I have is the B200 with holes for the vang being 16mm to cater for the bigger Rodkicker. However, on many HR46's a smaller Rodkicker20 has been installed with the pins of no more 12mm. These two imply don't match! For the B200 boom Seldén thinks you should have the bigger Rodkicker30. The smaller Rodkicker2o is designed for a smaller boom.
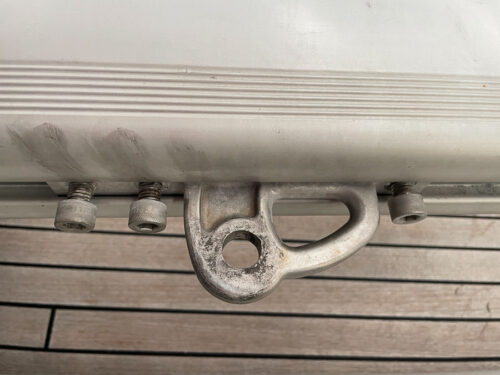
The fitting inside my B200 boom has a 16mm hole - now rather oval as you can see, after many years of play, making a banging sound when sailing downwind.
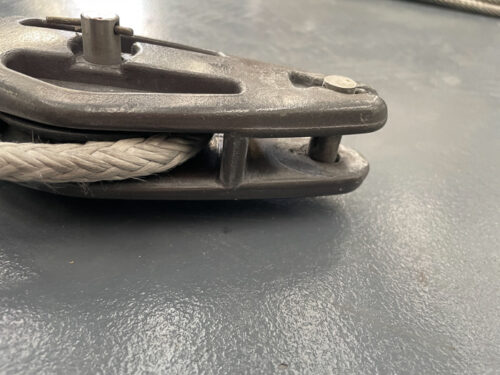
The 12mm pin of the Rodkicker20 on my HR46 (and several others, I have noticed)
No wonder there has always been a play between the pin of the small Rodkicker and the hole of the bigger boom, making a banging sound while downwind sailing. I got used to the sound from the play, albeit never liked it.
Checking the rightening moment (RM) of a Hallberg-Rassy 46 at 30° heel, it is 94kNm while my existing Rodkicker20 has a limit of 70kNm, thus explaining why it broke and why it's been a weak spot during all these years. Seldén has a great page for checking the RM and dimensions of necessary Seldén spares and upgrades for a large number of boat types, by the way. For the HR46, see here.
Pete has now ordered a new complete Rodkicker30, designed for a max rightening moment of 160 kNm, along with new boom fitting and both new mast brackets for the kicker, now all made for 16mm and no play, thank you!
Very well observed, Pete!
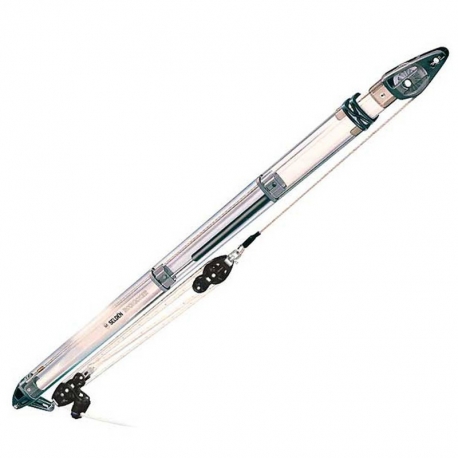
The Seldén Rodkicker30 which is designed for a RM up to 160kNm.
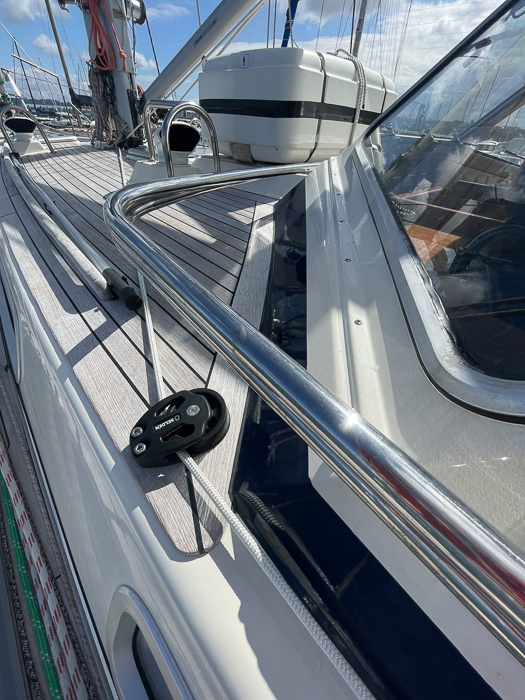
Leading the vang aft into the cockpit
Until now, I had to go on deck to adjust the vang. Franchi at Marina Coruna now copied the way I had lead back the outhaul on the starboard side to lead the vang back into the cockpit on the port side. This way, I don't have to leave the cockpit to adjust the vang. This is quite important on any kind of furling mains since the vang needs to be kept in place in a rather similar place each time.
And while in port, you often wish to lift the vang, e.g. to get plenty of space under the boom and the bimini.
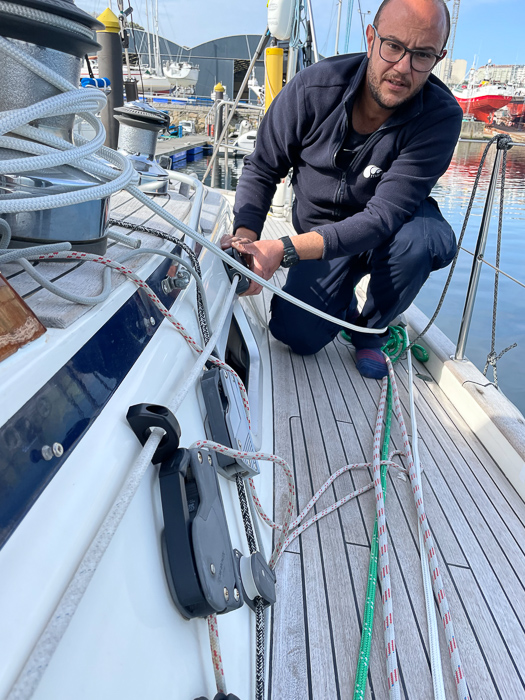
Franchi is a great rigger at Marina Coruna and is leading my vang back to into the cockpit.
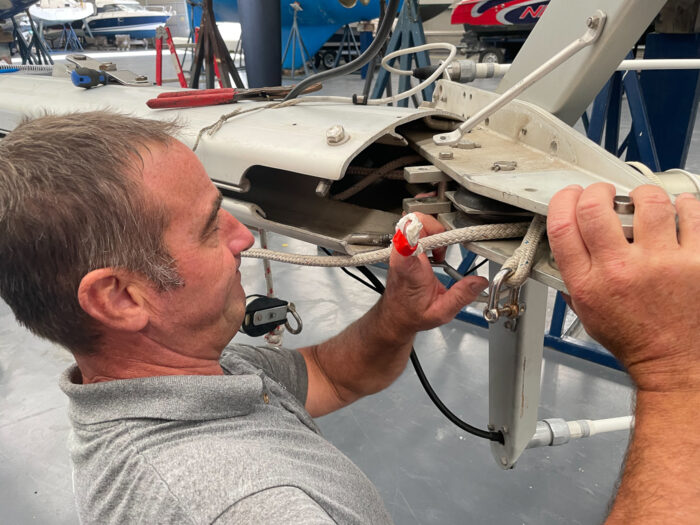
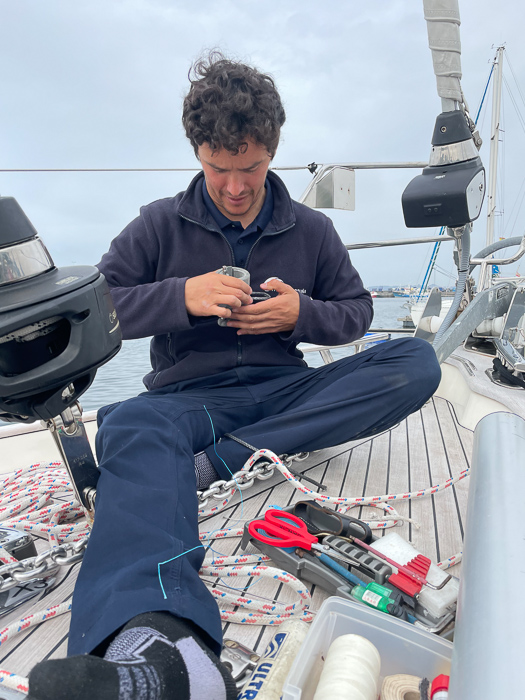
Changing all small ropes
Every little rope is being replaced to be on the safe side. Here, the small rope for the spinnaker pole lift and the forward- and aft guy are being replaced and spliced. Franchi is a master in splicing!
Antal rigging system
Antal has a great system of hoisting the sails. The halyards consist of two halves: One half of the halyard is holding the sails up. This half is made out of very strong and expensive Dyneema. The other half is only used while dropping and hoisint the sails. That "pullling end" can be cheap braid-on-braid line and once the sails are hoisted, they cheap half of the halyard can be removed.
The very strong, light and stretchless single core 12 strand Dyneema halyards can thus be only half of the length of a normal halyard. Once hoisted, the Dyneema halyard is hooked into the Antal system on the mast and the braid-on-braid half of the halyard is stowed away under deck.
This is an idea of Chuny, who explained that this is how they do on the Volvo Ocean Race boats he's used to sail. Thank you, Chuny, for always coming up with great ideas from the offshore racing scene.
For Chuny, obviously, it's all about less weight. For me, it's saving cost and getting rid of three ropes hanging on the mast in the sunlight, which I only use twice a year.
All clutches upgraded to Spinlock
Since the Antal halyard system will be used for the genoa, the mainsail and the cutter stay sail, I will just need to replace four instead of seven of my Lewmark-clutches on the mast. The new clutches are the Spinlock XTS0814, namely for
- Spinnaker halyard
- Spare Genoa
- Topping lift
- Whiskerpole lift
On deck, all clutches will also be upgraded from Lewmar to Spinlock namely for
- starboard running backstack (port stays on the winch)
- starboard main sheet end
- port main sheet end
- furling line for the manual cutter stay sail (here we use the smaller XTS0610)
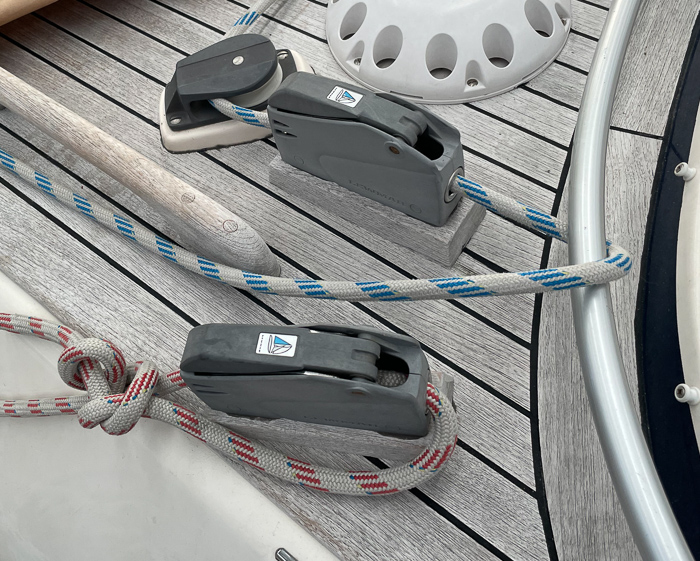
My old Lewmar clutches from 2013 will be upgraded to Spinlock XTS0814, which do less damage to the lines and do not slip.

The new Spinlock XTS clutches will replace my existing Lewmar clutches.
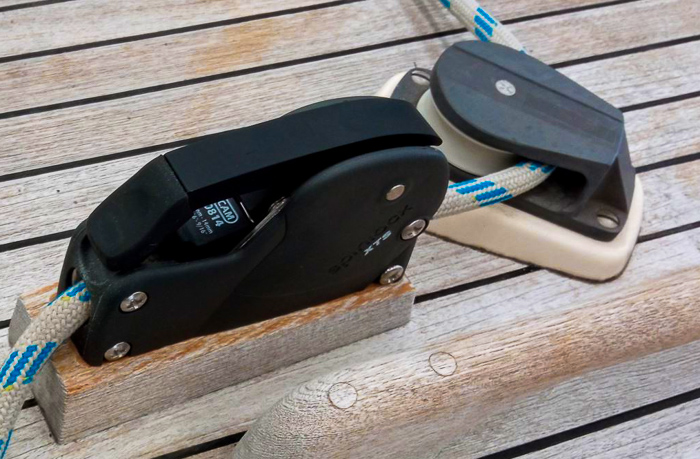
The new clutches installed on Regina Laska.
New Running rigging
All new running rigging will be replaced by Robline, since Marina Coruna is now a Robline dealer and can get these to a competitive price. If you add up all the lines they come to a considerable length! A total of 356 meters of lines have been ordered as follows.
| Orion 300 | Only used when taking down the sales (8mm) | 3 x 25m = 75m |
| single core 12 Strand Dyneema SK78 | - Genoa (anthracite, 10mm) - Mainsail (anthracite, 10mm) - Cutterstay halyards (anthracite, 10mm) | 20m + 20m + 12m = 52m |
| 12 Strand Dyneema SK78 with 24 Plait Polyester cover | - Topping Lift (extra long for MOB recovery in neonorange-silver as "emergency line", 10mm), - Spare genoa halyard (blue-grey-anthracite, 12mm), - Spinnaker halyard (grey-red, 12mm) | 40m + 36m + 40m = 116m |
| 12 Strand Dyneema SK38 with 24 Plait Polyester cover | - Spinnaker pole topping lift (navy blue, 10mm), - Spinnaker pole car (white, 10mm), - Main Sheet (lightblue-white 12mm), - Genoa Sheet (white, 12mm), - Staysail Sheet (green-silver, 12mm) | 24m + 13m + 33m + 23m + 20m = 113m |
| Total | 356m |
The finished installation
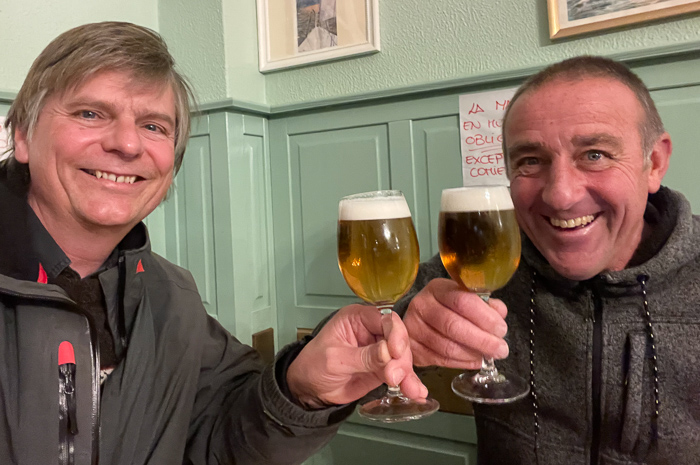
Pete Keeping came up from the Algarve again and stayed an entire week at Marina Coruna working together with the riggers of Marina Coruna to get the mast up and tested. I was present during this week and could witness the professional co-operation between Marina Coruna and Pete Keeping!
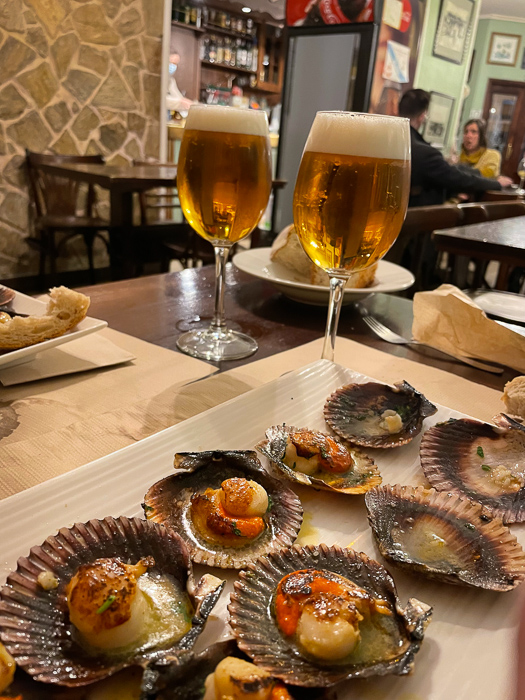
First thing first: Before we start the big project, not quite knowing, yet, if all fits together again, we go out and have a fresh caña of Estrella Galicia coming directly from the copper tanks hanging in the ceiling in the background. And with it: Zamburiñas, the great Scallops of Galicia!
And then we started, getting each new sheave back into its place, kept in placed with new shaft pins. All clutches were exchanged to new Spinlock and the Antal halyard system was installed. 356m of running rigging was led through the mast and we had to be quite smart to find enough place for all the clutches and Antal halyard systems and cleats not to drill (too many) new holes into the mast. And ever bold and ever screw got it's deserved dot of TefGel of course, which you ALWAYS should put on when any two kind of materials touch. Or actually on any thread, if you ask me, unless you really don't want it to open unintentionally. That's when Locktite is being used. But on the mast, we only used TefGel.
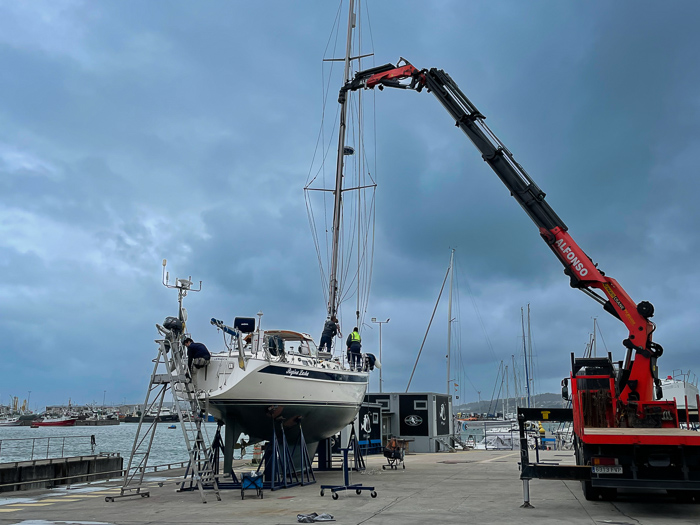
Regina Laska is a complex boat, so there is an abundance of halyards and cables hanging out of the mast. Pete was directing the crane while the riggers of Marina Coruna were a fantastic support!
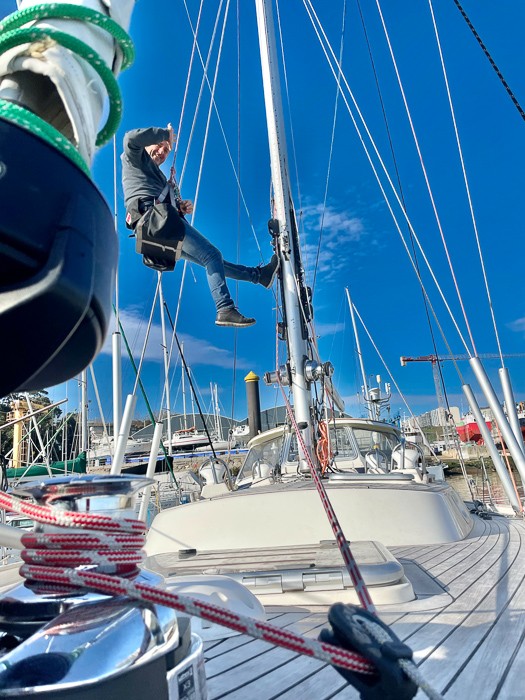
Having Pete, Matias or Franchi from Marina Coruna climbing up and down the mast is a joy! All I had to do was to take in the slack of the halyards, while these master-climbers were gliding up and down the mast like I rise from a chair. After a handful of climbs within less than two hours, Pete said we should test my new electric MOB-hoisting system. It was easily rigged: An Antal block was set to its dedicated fitting (which doubles up as the forward end fitting for the Jackstays) and one of the extra long red halyards were lead forward via the winch on the mast and finally round the anchor windlass. By a press of the button the windlass hoisted Pete up in the mast, while he was relaxing in his bosum's chair! Cool for MOB if the person onboard is not strong enough to winch up the casualty from the water or a person up the mast!
Regina Laska is finally launched, readily rigged.
New Cummins Diesel Generator
The 7.5 kW 220V Westerbeke has been working well, but, lacking the sound-shield, it has been considered loud and somewhat old design-wise. It was installed in Regina Laska in 2013, but had then already been lying unused in the stock of Hallberg-Rassy for many years. If someone is interested: it's for sale for a cheap price. Westerbeke is generally seen as a very reliable generator.
The crew of Marina Coruna trying to figure out how to get the old generator out of my boat in order to replace it.
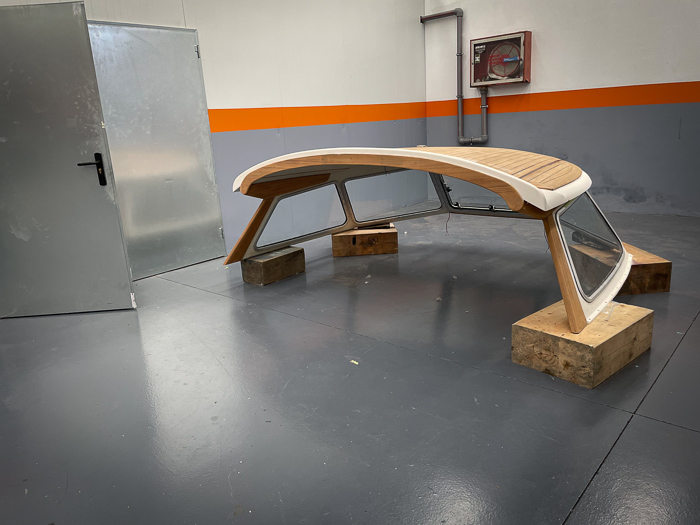
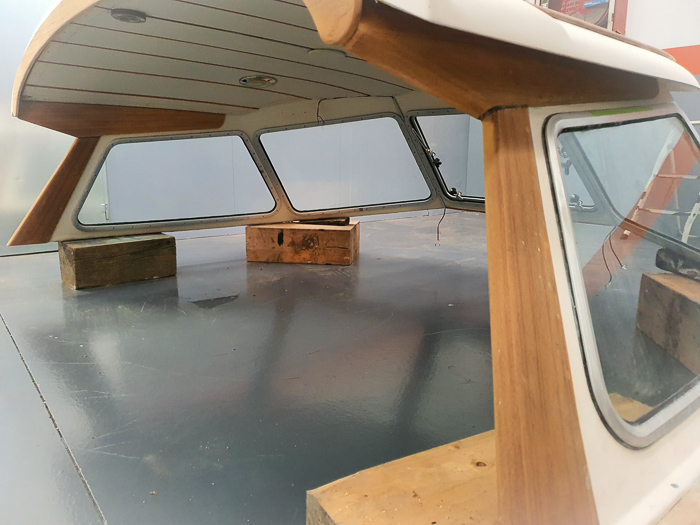
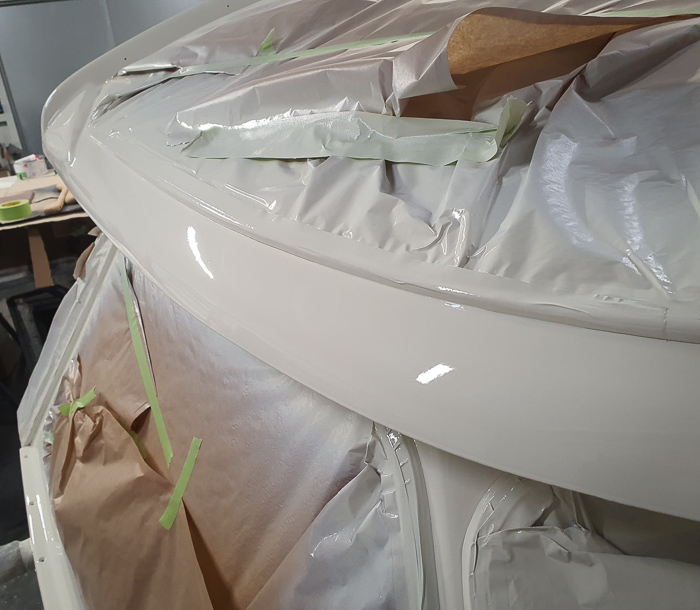
First the hardtop needs to be taken off. With the precision of a surgeon, the team of Marina Coruna cut the sealer between the hardtop and the superstructure and then finally to lift it off the boat.
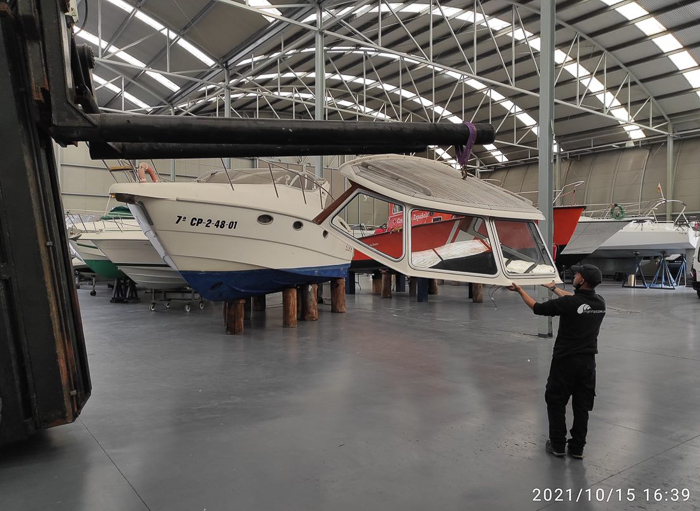
The hardtop is being lifted off Regina Laska

The hardtop ready for refurbishment in the premises of FibraCoruna, who are specialists in wood and GRP-work
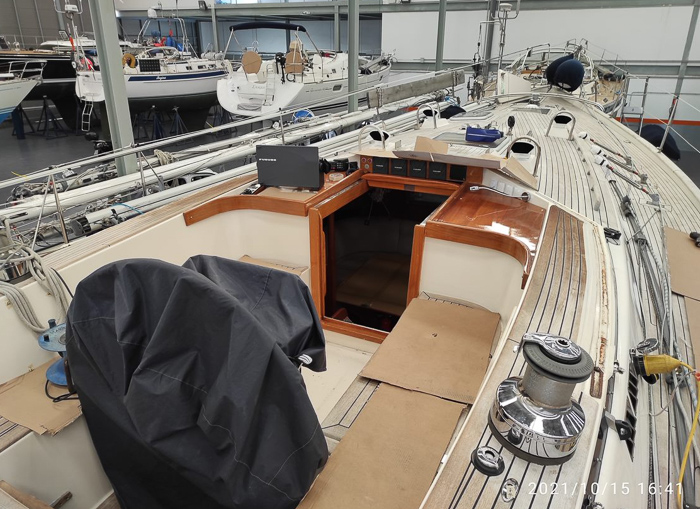
Once the hardtop is iff, the steering pedestal can be dismantled and tilted backwards in order to open up the cockpit floor.
Then, the Volvo Penta D2-75, recently installed in 2018, had to be taken out to make space for the removal of the Westerbeke generator.
Looking down through the open cockpit floor. The Volvo has been taking out.
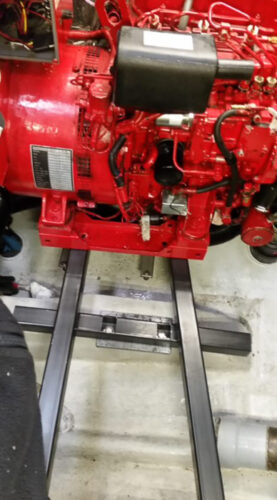
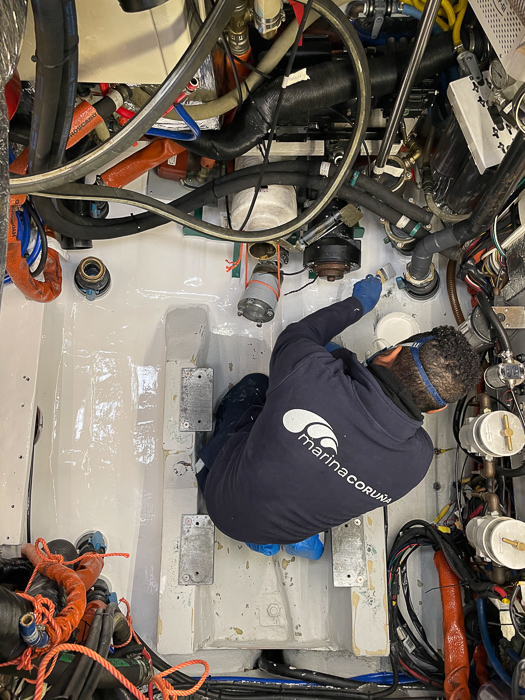
Marina Coruna had to build a slide so the Westerbeke could slide sideways, and then exit the same way as the Volvo.
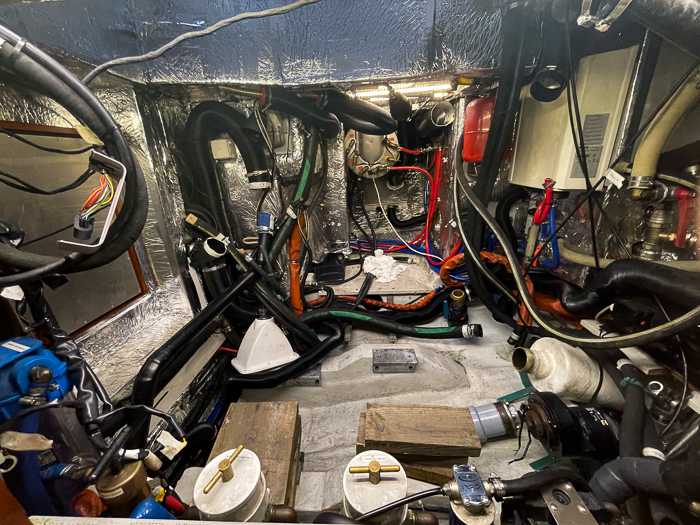
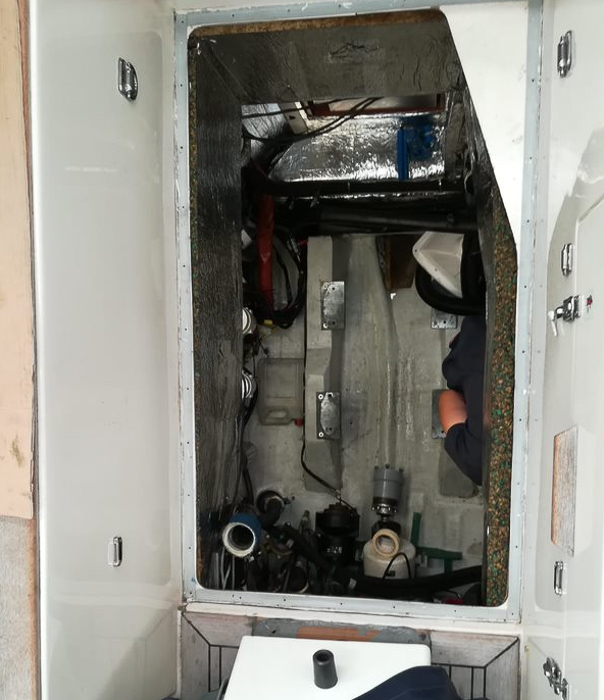
The engine room without the engines but still all the pipes, hoses and cables. Will Marina Coruna ever get it back into place again? They say they have taken 1000's of photos to remember how all fit together. Hopefully they will remember...
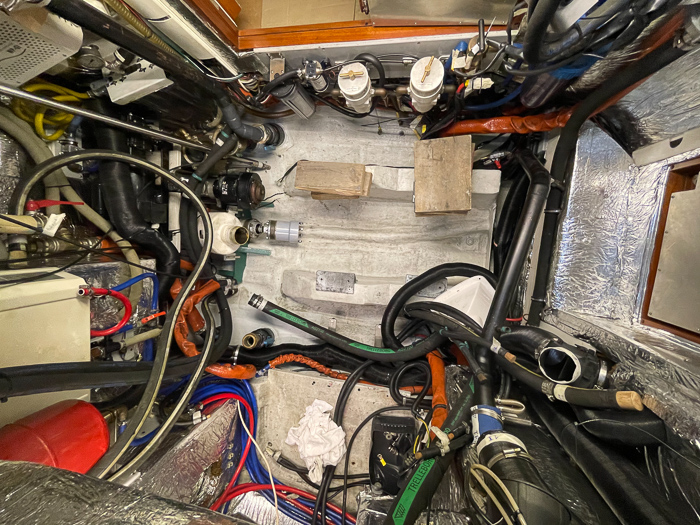
Looking form above into the engine room.
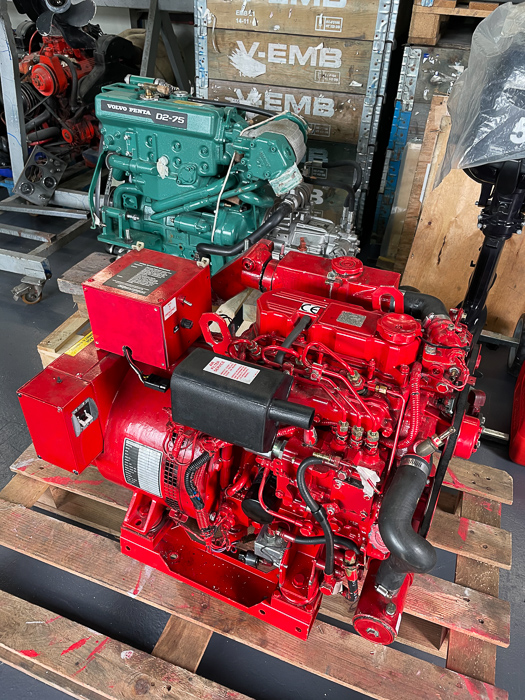
Both engines out of the boat. The bigger red one is the generator. The smaller green one is the main propulsion engine, the D2-75.
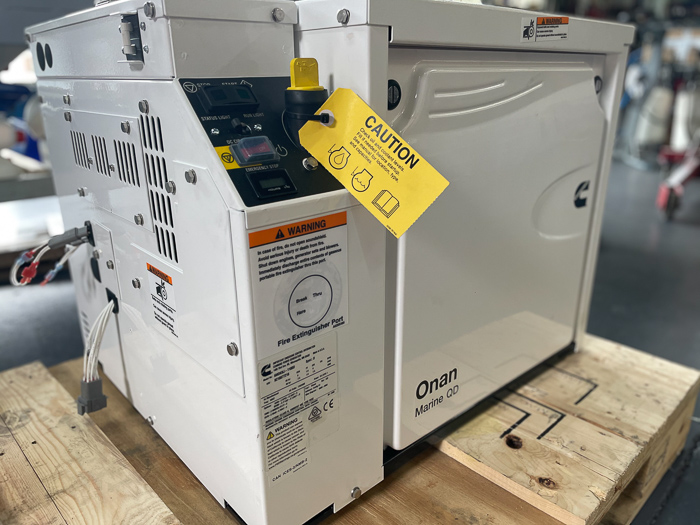
The new 230V Onan by Cummins is giving 6.0 kW and with the extra booster of the 3.5 kW the Whisperpower Combi I can take out 9.5 kW, which is more than enough. The main power consumers are the 230V Water boiler (2.8 kW), Watermaker (2kW) the 24V chargers ( 3kW), Nespresso Machine and electrical tea cattle (1.5 kW each) and the washing machine (1 kW), hair dryer (0.75 kW) vacuum cleaner (0.75 kW) plus 230V chargers for computers, phones, tablets etc. A lot of power, but luckily, they are seldom all being used at the same time.
The 3kW sauna has actually been taken out, since sailing in the south it's not that attractive to do sauna when the weather around us has a comfortable temperature.
Some funny guys at Marina Coruna were asking why I was installing a washing machine in the engine room...
The 6.0MDKBJ Onan consists of an efficient and smooth running 2400 rpm constant speed and diesel-efficient 3-cylinder Kobota diesel connected with an AC alternator. I chose Onan not only due to its careful design for low vibration and sound, but especially due to Cummins largest network of worldwide certified support network for service. All points of access are easily reachable from one side only.
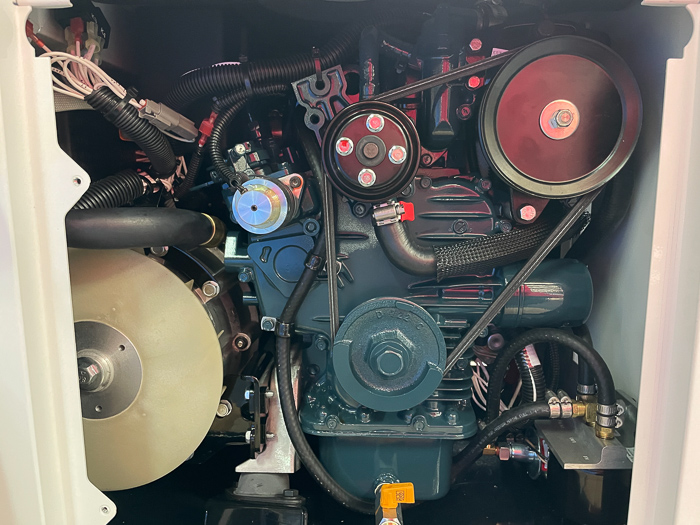
When you open the front door, all service points are easily accessible, yet encapsulated in a soundproof housing.
Installation
The challenge, however, became the installation! It's not easy to install a 3-cylinder diesel generator with sound-shield with the access points pointing the correct way. I was lucky that my old TMD31 Diesel was replaced by the much more compact D2-75 three years earlier giving much more space for the generator. Yet, it was not easy for Marina Coruna to install the generator.
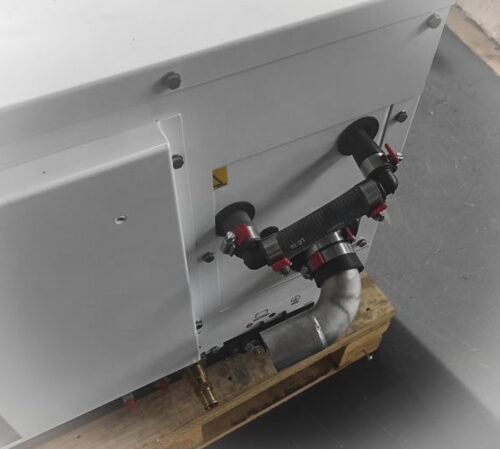
For example, Marina Coruna had to amend the exhaust pipe to make a 90° curve in order to fit into the tight space on a HR46.
First of all, the engine room was cleaned, sanded and re-painted to look smart. I think it's important to have a clean engine room with great bright light so one can easily see if something is wrong. Having great working light, e.g. from Båtsystem, is crucial when working in the engine room.

Sanding down the engine room floor.
Repainting the engine room.
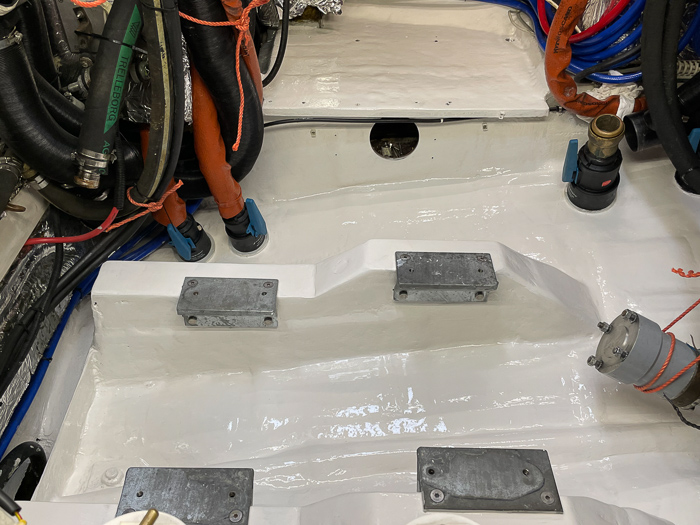
The refurbished engine room floor
Due to the curving hull shape, Marina Coruna had to build a new cradle for the generator installing it a couple of inches higher than the intended shelf-like surface for the generator. This cradle had to be welded together with a sort of built-in sledge on which the Onan was sliding along into its position. Once installed where it should, the overshooting "sledge" was cut off with an angle grinder and sacrificed. Left was the underlying cradle giving enough hight to fit within the dimensions of the hull shape.
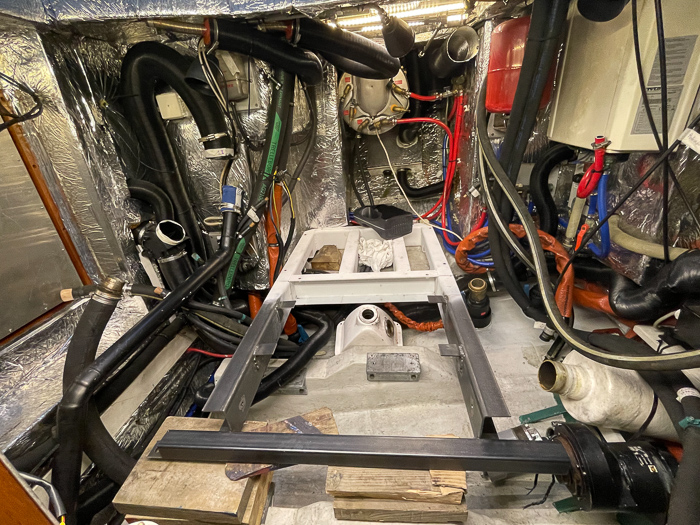
Testing the combined slide and cradle for the generator. The black part will eventually be cut off once the new generator is in place on top of the white part.
These guys think before they install something and "impossible" is taken as a solvable challenge. I heard rumours that the Marina Coruna team went home at night muttering something about "it's not gonna work!!" and then, after a couple of hours of sleep, they returned in the morning with new ideas how to solve it!
For instance, the water-gas separator for the dry exhaust was placed in a very good way: in between the two engines and, yet, not in the way for opening the door for servicing the genset.
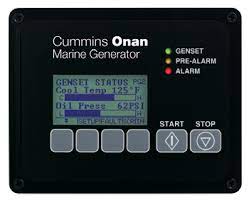
The digital QD (Quiet Diesel) Series models are also the first marine generator sets with self-monitoring capability and network communication with a digital display giving exact data on how the generator is doing with self-diagnostic features and text display including extensive engine and alternator information.
Last, but not least, I am saving some weight by changing from the Westerbeke to the Onan.
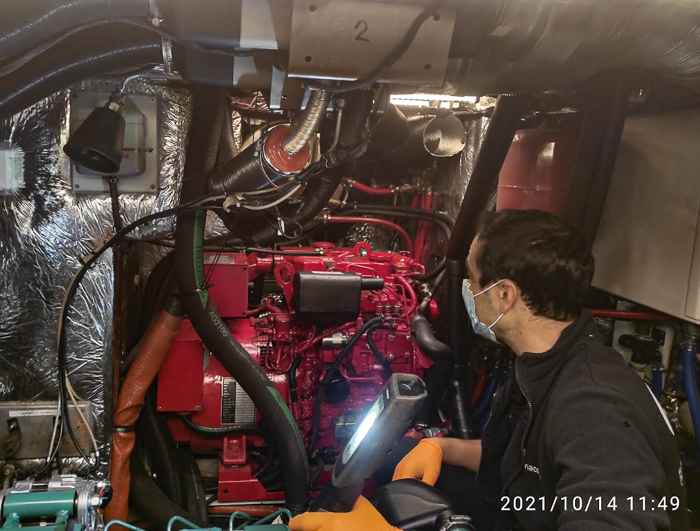
Major Service on Volvo Penta D2-75
In order to change the generator, the Volvo Penta propulsion diesel had to be taken out first. And while it's out a major service with done on the Volvo after 4 seasons and 1400 engine hours.

Major service of the D2-75 after 4 seasons and 1400 running hours
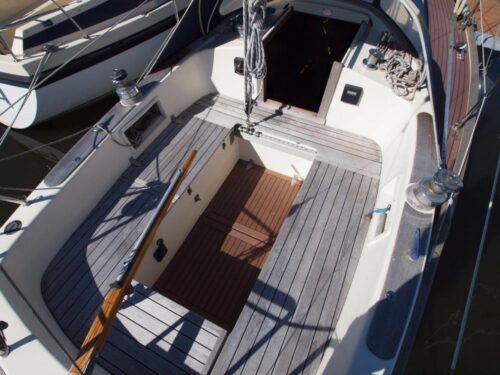
Adding an important valve to cockpit locker drain
What every boat owner should do is to perform a stresstest for pooping. What can happen in open sea is that your are getting "pooped" meaning that a huge wave breaks over the stern and fills your cockpit. The risk is higher with an aft-cockpit boat compared to a centre cockpit model. A centre cockpit boat has its cockpit higher up and further forward, so waves have more difficulties to enter to cockpit from astern, but it can still happen. And from the front a large windscreen or even hardtop is giving some shelter, but believe me: I have had waves reaching all the way into the cockpit nevertheless!
An excursion to certification:
Did you know, by the way, that these Hallberg-Rassy models are only certified for sailing with the lower washboard in place and locked down? Comparing with classic models (HR29, HR312 and many boats from the classic era) they all had a raised cockpit in front of the companionway to make sure no water was getting inside when being pooped. This deck has been replaced by the lower washboard. Officially, you should only take out the lower washboard out when in a harbour or in very calm weather.
The very modern HR models of today bypass this by having an extra low compartment/bilge under the cockpit grating where the water can gather before it exits through the cockpit drains. One could claim the cockpit floor is at the lower washboard level today so the very new HR's do fulfil the rules without you noticing it.
Few people sail with the lower washboard placed in the companionway, but it's good to remember to lock it there, when you sail under harsh conditions.
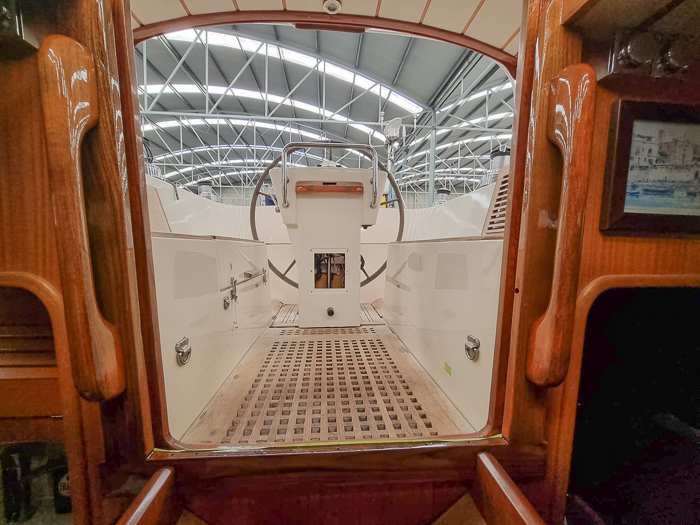
Observe the raised deck level which you need to climb over before entering the companionway in order to get down into the salon. Water can be contained in the cockpit. Without this deck, you need to have the lower washboard installed, or else: water will pour into the salon!
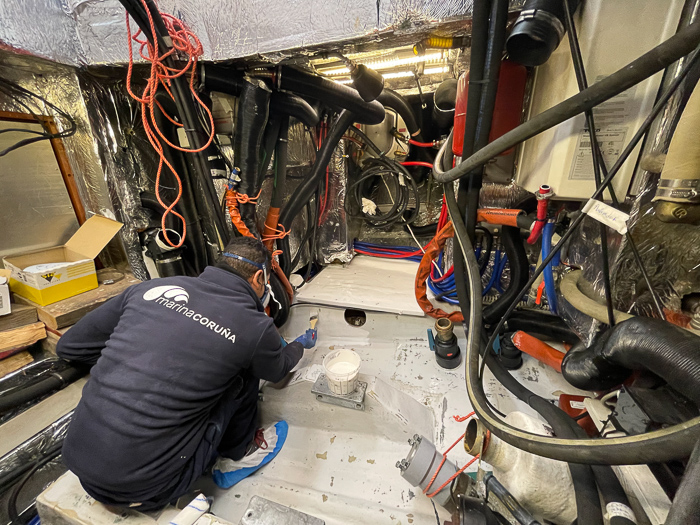
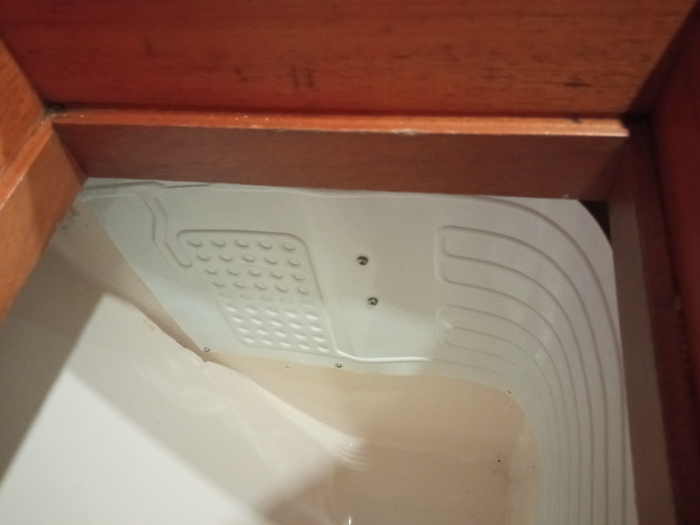
Anyway, back to the stresstest, that works like this: Close the through-hull valves for the cockpit drain and fill the cockpit with water using a water hose in port. In my case, when filling the cockpit with water, it leaked heavily into the underlying engine room. It felt like it had started to rain inside the engine room! Why?!
On my HR-model, the cockpit locker has also a drain in case the cockpit locker gets filled with water. This drain leads down into the standing pipe of the cockpit drain (see transparent hose in the picture below).
If the cockpit gets filled with water and cannot escape fast enough through the drains or if the through-hulls are closed, blocked or ceased, the water flows backwards upwards into the cockpit locker and from there onwards to other cable and hose openings and ends as rain into the engine room under the cockpit locker.
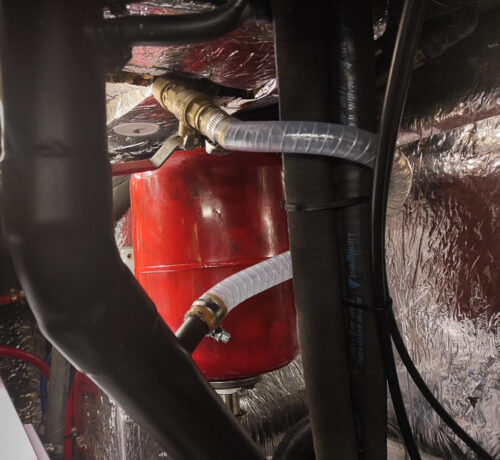
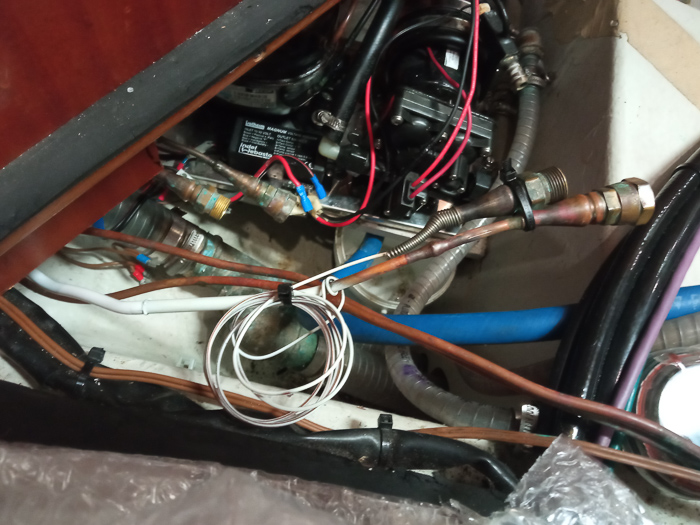
A new valved has been installed for the cockpit locker drain (transparent hose) leading into the standing pipe for the cockpit drain.
The solution is to install a valve on the drain from the cockpit locker which is to be kept closed under normal circumstances. Only if you wish to drain the cockpit locker, it should be opened or if you, for some reason, have lost the cockpit locker lid and need to drain the cockpit locker.

The stress test: Close the through-hulls for the cockpit drains and fill the cockpit with water. No water should find its way into the boat but be kept in the cockpit until the through-hull valves are opened again.
Final Installation
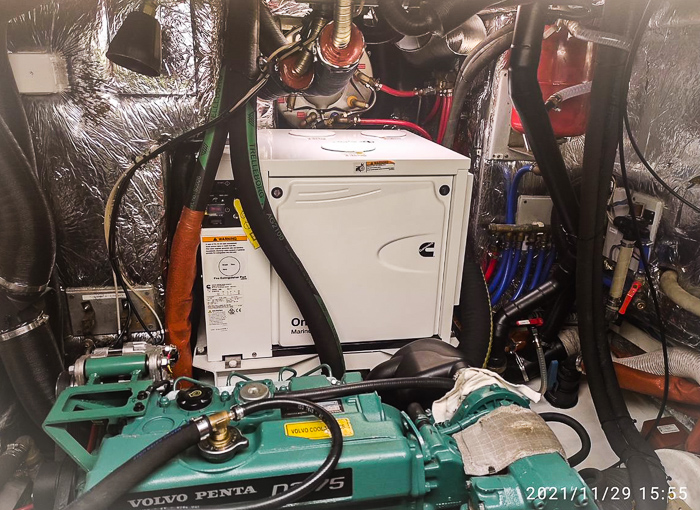
Both the new Onan Generator and the Volvo-Penta D2-75 are re-installed and in place. Both engines have been test-run and they work nicely.
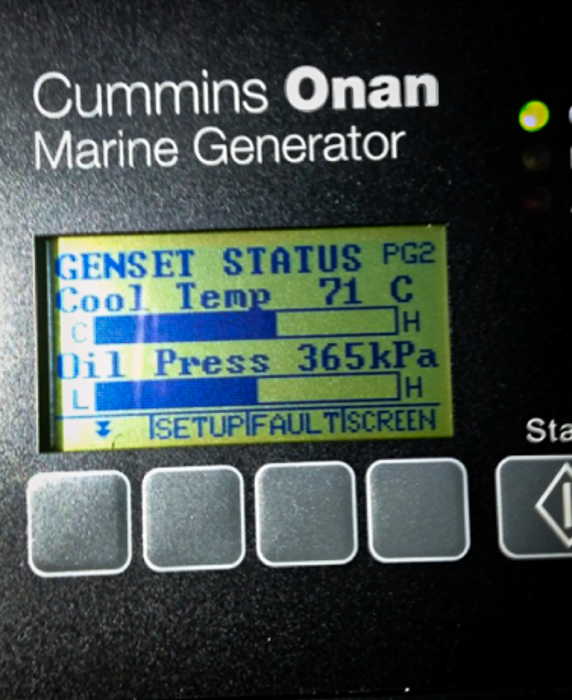
The Onan is running giving some valuable information about its health. Photo taken of the display while the generator is doing its virgin start-up.
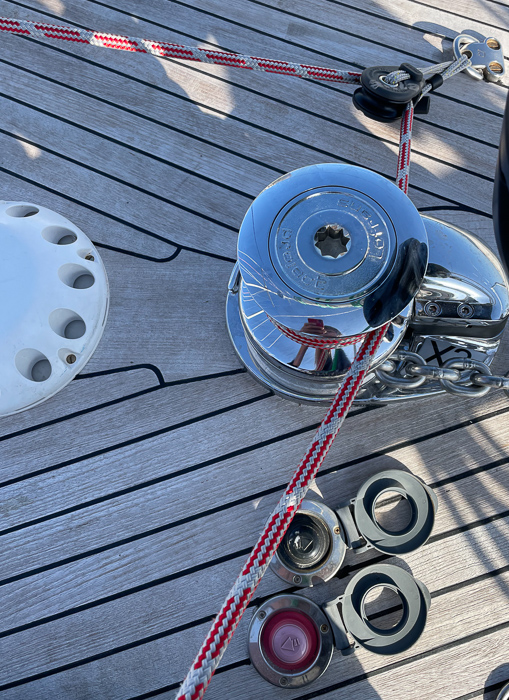
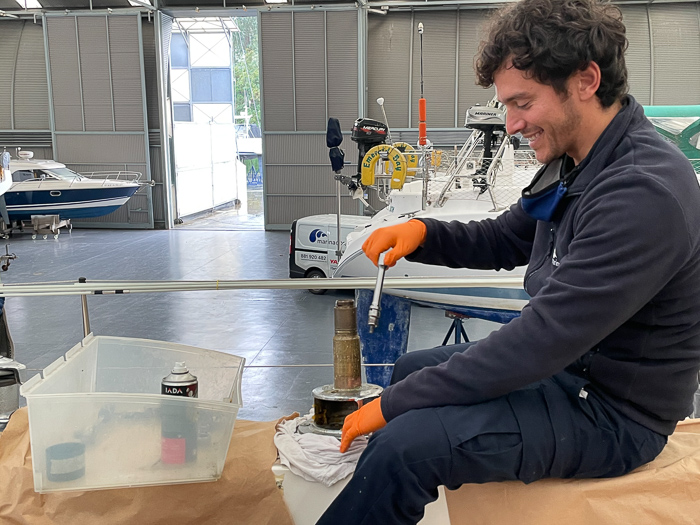
Cleaning and re-greasing winches
This is a job that is done every year and hardly worth mentioning as a "refit". This winter, I happened to be in La Coruna when the yard did the dismantling, cleaning and re-greasing the winches. It looked so professional that I wish to share the photos of how clean and careful Marina Coruna is doing a standard job like this.
There are 7 winches in total on Regina Laska; four in the cockpit and three on the mast. Three of these are electric. They are by Lewmar (but Andersen make much better winches, I think, but since the boat came with Lewmar and as long as they work, I won't change them. For now....).
Matias from Marina Coruna taking apart the winches.
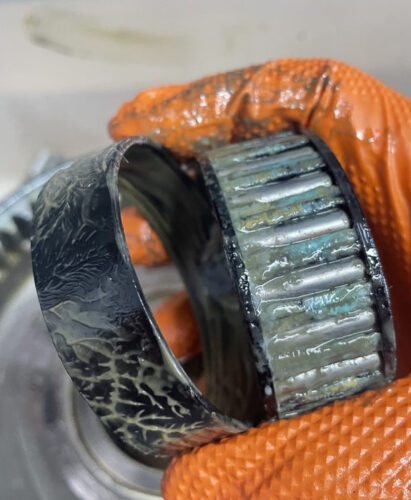
Water and grease don't go well together and therefore it's good to take apart your winches once a hear. It's easily done, albeit a bit dirty.
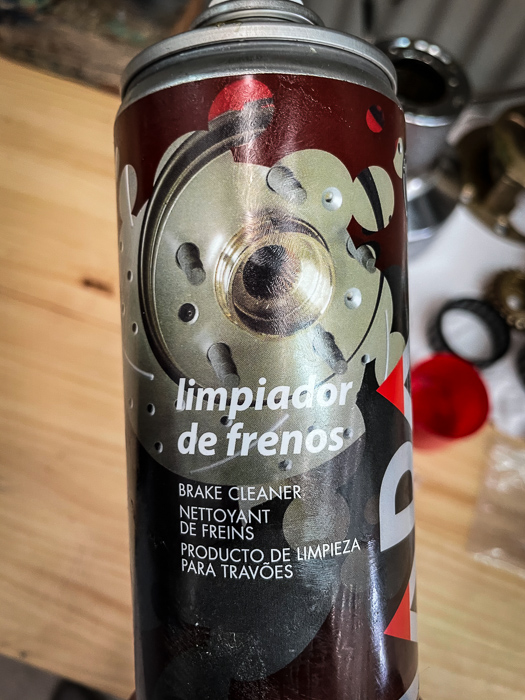
I observed them cleaning the winches to get some secret tricks they use to get it so shiny. I think I found one, I'd like to share. While I normally use diesel to clean my winches, they use brake cleaner. Ah! Cool tipp, isn't it?!
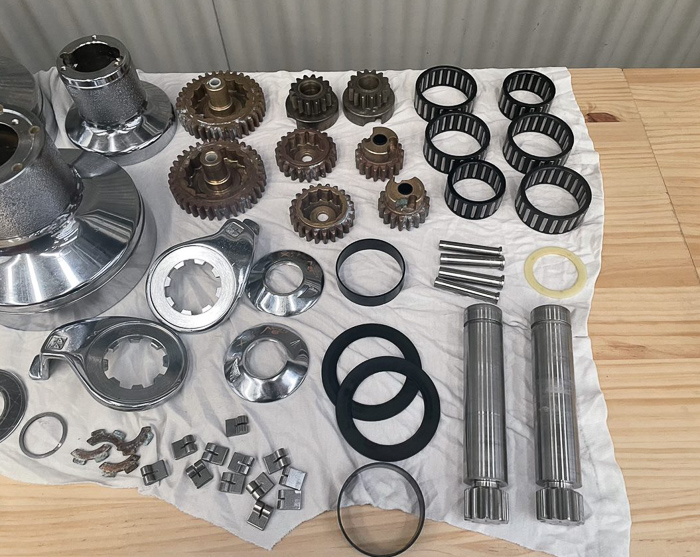
Winches taken apart and cleaned.
There are many small parts and springs, so it's good to carry some spares.
When re-greasing it's important to use very little grease and light oil for the springs. Too much grease and they don't run freely! Matias has done this job many times before and is a pro, so I'll let hem gladly do it this winter again!
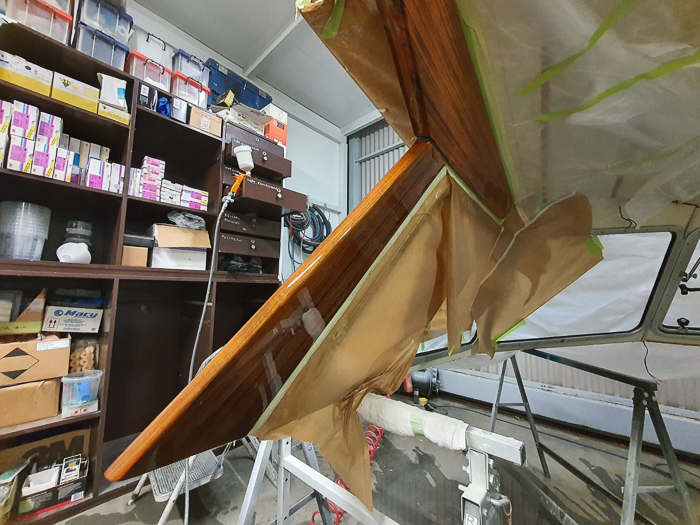
Hartdop refurbishment
While the hardtop has been taken off, it's a good opportunity to give this beloved extra shelter a face lift.
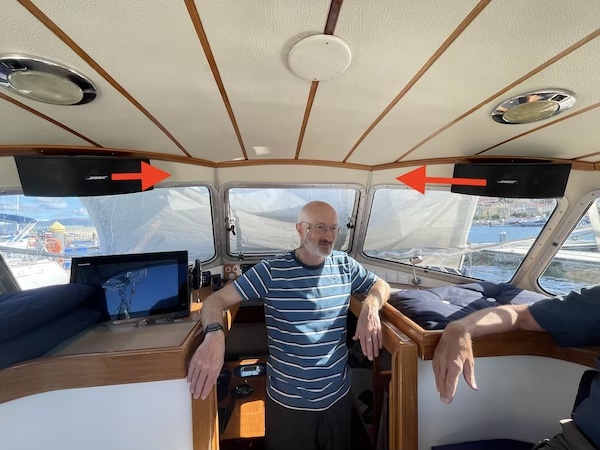
Moving the Bose speakers
As requested by many guests, the Bose loudspeakers will be moved inbound, so they are less in the way for your head when leaning forward over the outer chart tables. I am sure many returning guests reading this will sigh and think "Thank you! Finally!!" remembering one or the other head-banging.

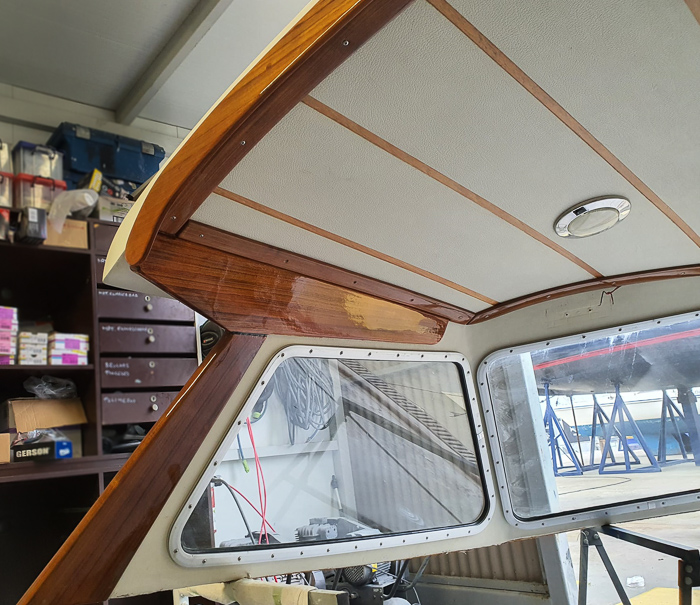
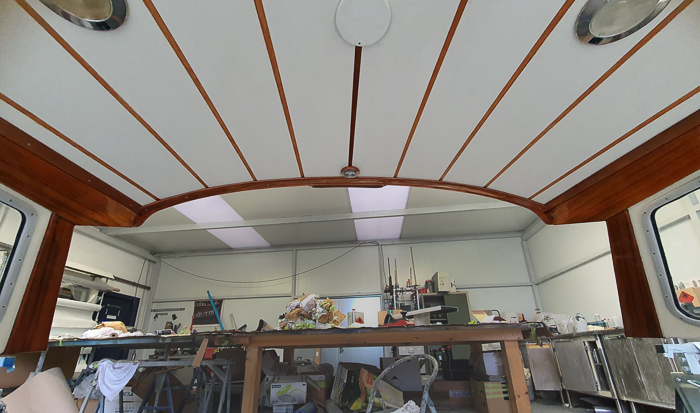
More beautiful light under the hardtop
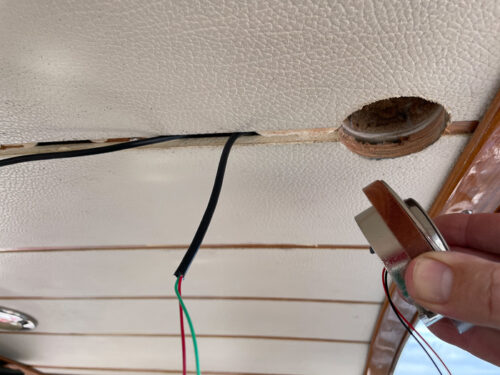
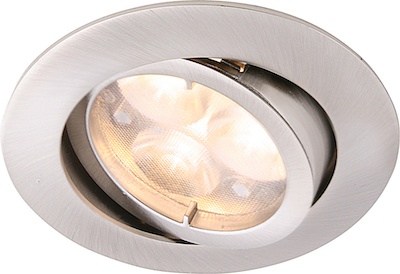
The old lights in the hardtop ceiling (see photo above) will be replaced to new Båtsystem MARS.
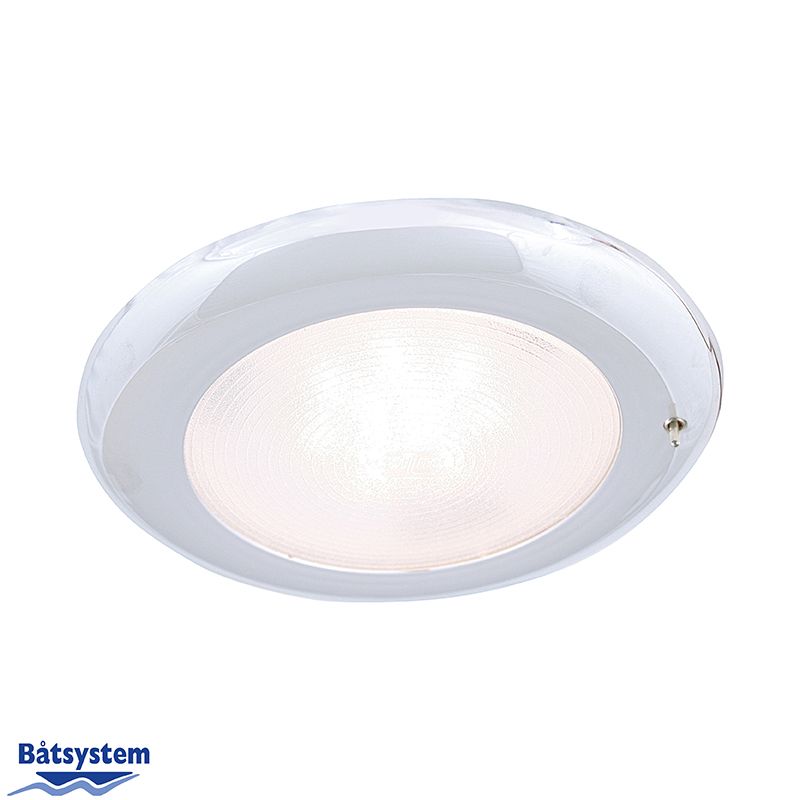
Since the old lamps were slightly bigger, Campillo at Fibra Coruna in co-operation with Marina Coruna made me great intermediate rings which look really as if they are part of the new smaller MARS-lamp.
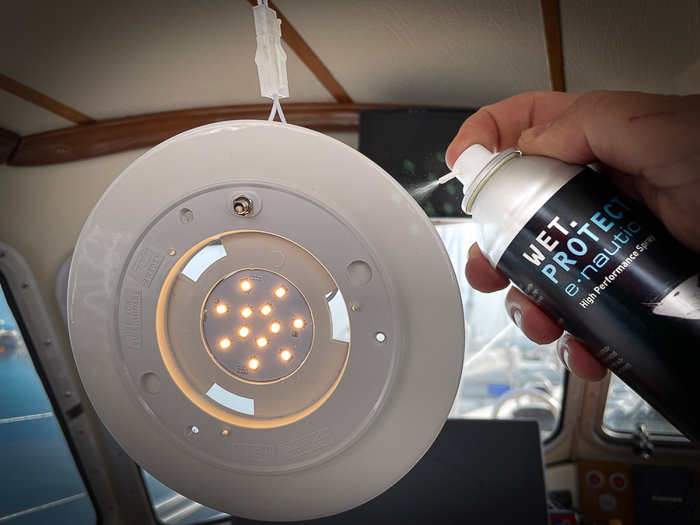
Every electrical component gets a quick spray of WET.Protect to avoid moisture and good contact. It's magic!
A Neptun Power-LED spotlight in the center aft of the hardtop ceiling has already been installed. This spotlight with a 30° cone, lights up the cockpit table during cozy evenings while dimmed own, it lights up the cockpit floor during night sailing just so much that one can see where to place the feet without destroying the night vision.
The tiltable Neptun light being installed into the hardtop with its 30° lens for the CREE Power-LED spot light. It's being controlled by a separate new dimmer.
I am a big fan of really dimmed down white light compared to red light which needs to be so much brighter in order to see something. Moon-shine atmosphere, as I call it!
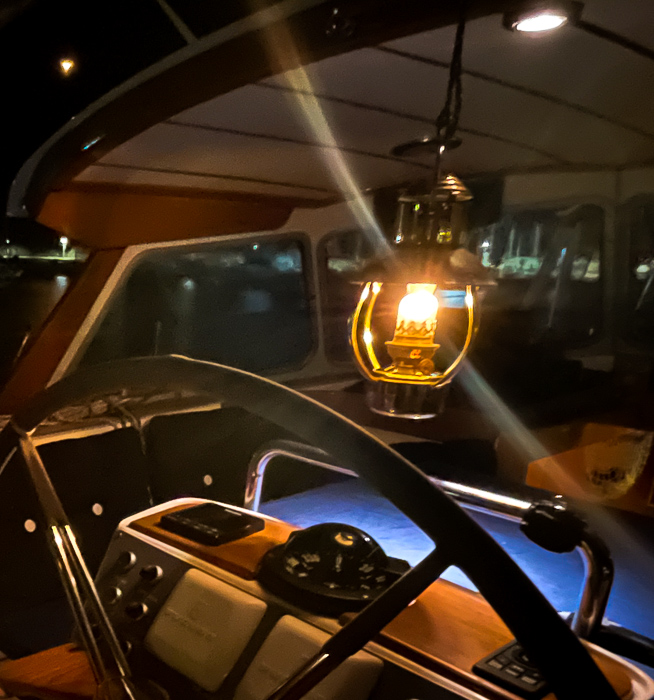
Nothing beats an old fashioned oil lamp in the cockpit, but please observe the great indirect light from the Neptun Power-LED in the background, shedding light onto the blue table cloth of the cockpit table without shining into the eyes of the crew. That's what indirect light is all about!
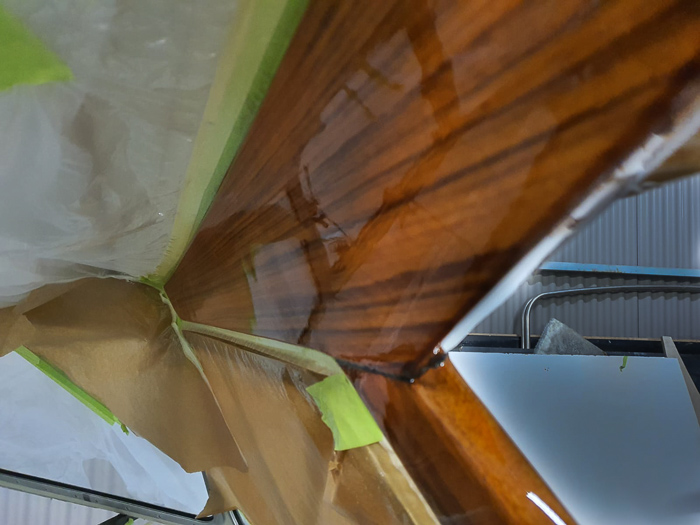
Varnishing the teak and re-calking
I changed the calking shortly after the new teak deck was laid due to its inferior quality. But undre the handrails, the calking was never changed since it was considered too much work to take them off and re-calking thereunder. This is being done now.

The handrails had to be taken off, since the calking thereunder has to be replaced du to the fact that it was giving stains when touching it.
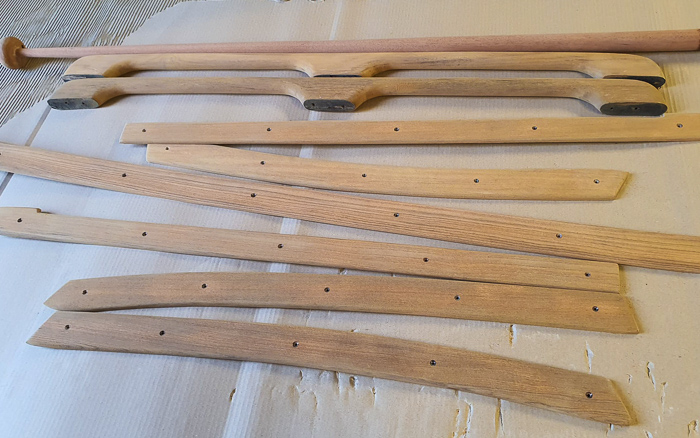
While the hardtop is off the boat, it's so much easier to take off all the old varnish in order to re-varnish the teak. First of all, all the old varnish needs to be taken off, which is a major job on its own.
The hardtop readily sanded down with grab-rails and teak battens taken off. It's so clean, it all feels as if this is no yard but a hospital or spa for boats.
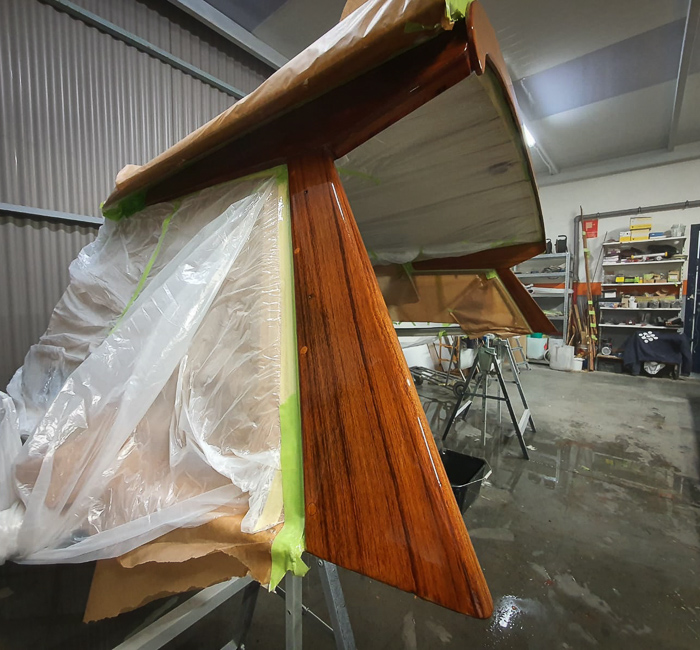
Next, it's time to give the beautiful teak a large number of coats. Hereby, Campillo is using a hybrid method between two- and one-component varnish. First layers consist of two component polyurethane and the finish is made of a one component varnish.

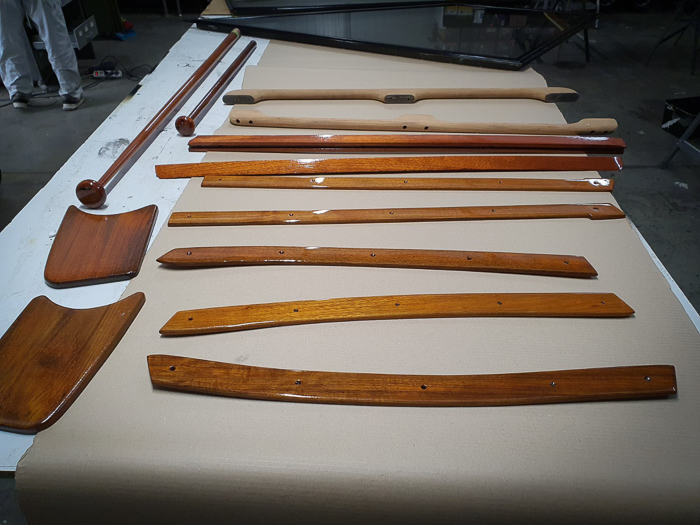
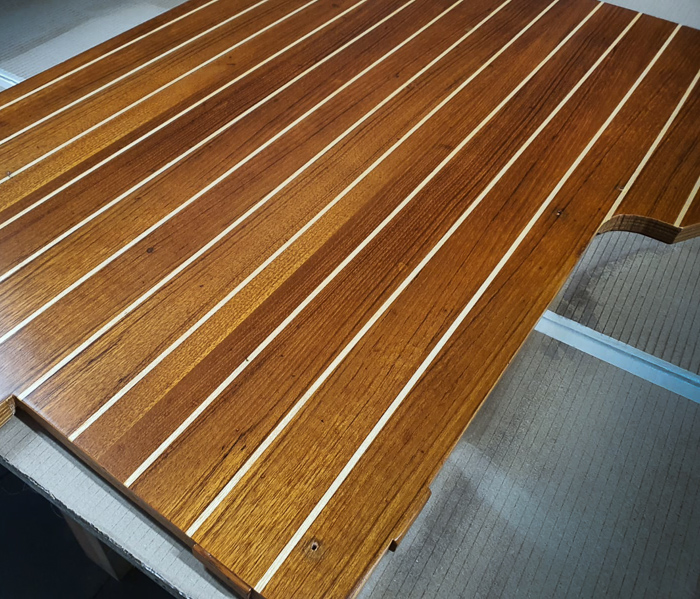
The varnished floorboards.

The handle on top of the sliding hatch.
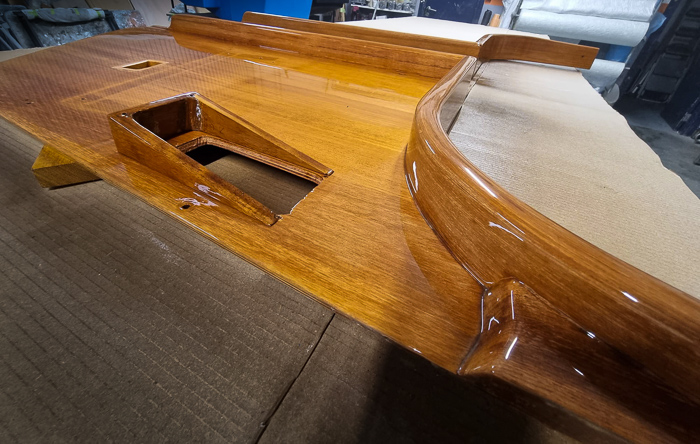
The port outer navstation.
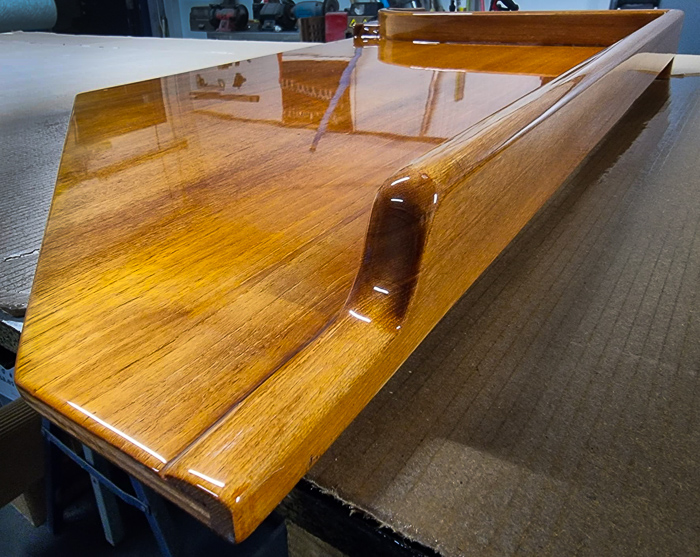
The starboard outer navstation.
Epoxi on the GRP
There were many small scratches and marks here and there on the hardtop which would be a lot of work to fix one by one. They were simply too many. Easier to re-paint the entire hardtop GRP. First layer is down with with white epoxi. The below photo are of the epoxi, giving a matt finish.
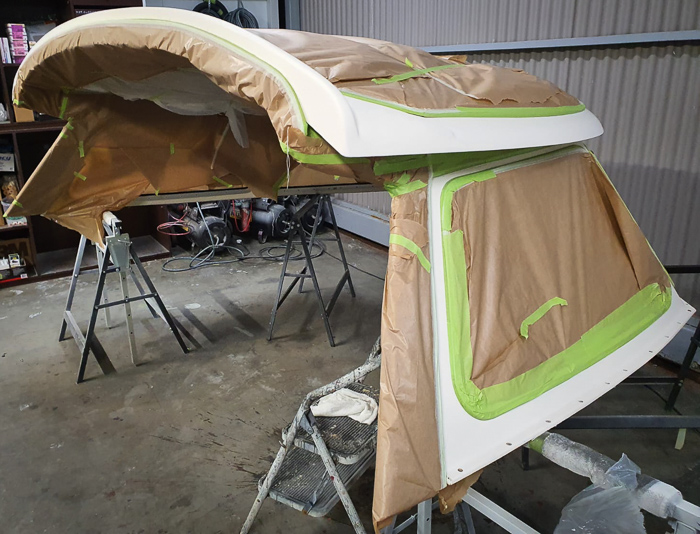
The wooden and aluminium parts are covered and the first coat of Epoxi has been added.
In order to give that shiny finish, the white epoxi is then coated with two-component polyurethane, giving that shiny finish, as you can see.
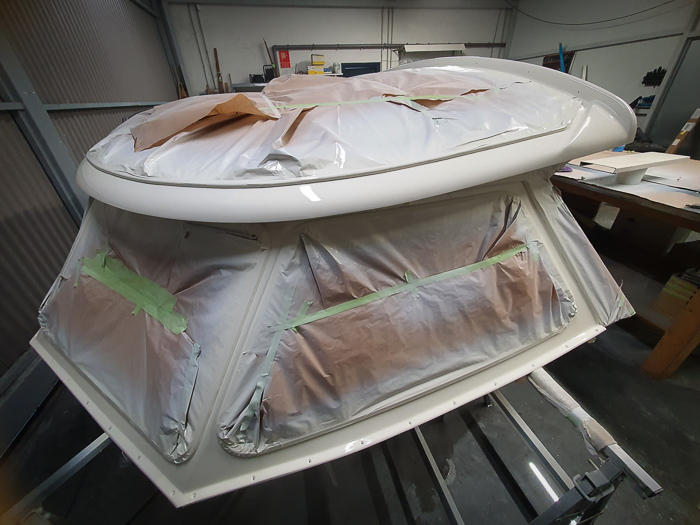
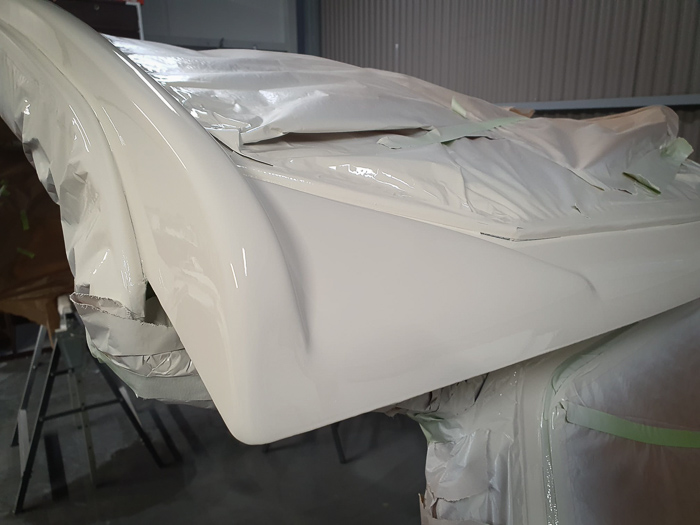
Once dried and all the masking has been taken off, the hardtop looks like new. Just the two internal lights in the ceiling are not yet changed to Båtsystem MARS, otherwise the hardtop is ready to go back onto the boat.
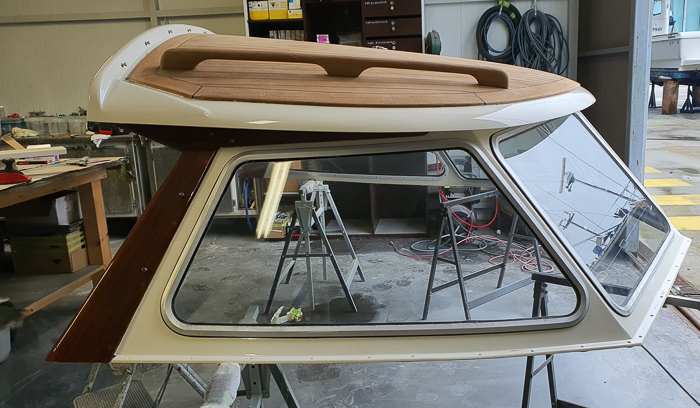
Please also observe the refurbished ceiling, now shining white!
Campillo is no less than magic!
To see the final outcome, check a short video showing all angles of the hardtop here.
Electrical update
Raul from Nauelec in La Coruna is one of the best boat electricians I know, in line with my other favourite boat electrician being Christer Verta at Adams Boat Care in Sweden . Like with Christer, it's a joy to work with Raul who really knows his stuff and Nauelec is closely related to Marina Coruna. His companion José is also a great help since very often it makes sense to be two working together.
Exchange Whisperpower Power Central
Further to the electrical installation of the above mentioned Cummins Onan diesel generator, I have exchanged my entire Power Central with an identical one. Maybe crazy, to change to an identical one. Having said that, I'm so dependent on my electrical power and having used my 24V/3.5kW/90A Inverter/Charger Combi for 9 years, I just felt it's time to change to an identical one. After all, it must be good, if they haven't done any design change for 9 years!
My old Power Central is for sale at a very low price, if someone is interested. For some reason I could not change the maximum charging power (should be choosable between 1 - 90A at 24V) and it remained fixed at 78A. Rather than trying to find the problem, I exchanged it.

Redundant 24V charger
I very much like redundant systems, which not necessarily means that you have two of everything but rather that you can solve a problem in alternative way. So far, my 24V charging has been redundant in that respect that I could charge the 24V house battery by means of the generator or shorepower and the Combi and as, a my redundant system, by means of the main engine and a 24V/110A alternator.
I wanted to take it one step further and being able to charge 24V by means of the generator or shore power should the Combi Power Central fail (despite being replaced with a new one). Therefore a second 24V/30A charger (WP-BC Supreme 12 V - 20 A) has been installed. As a side effect, I can now charge with both chargers in parallel, getting 90A from the Combi plus 30A from the new charger, i.e. 120A at 24V or almost 3kW. Having two chargers in parallel, the generator running hours should be reduced.
On shore power, however, I only use the Combi where I can turn down the charging current since in most marinas you can only charge well under 10A at 230V or else the voltage drops under 200V. The booster-charging is thus only used when running the generator.

When so much power is being charged, cooling becomes an issue. Thankfully, Regina Laska is of the classic type of sailing boats with louvre doors giving very good ventilation. To enhance the air flow even more, to allow for maximum charging, an automatic temperature-sensor controlled forced air ventilation system has been built into the louvre doors under the port V-berth where the chargers are placed for optimal weight distribution (batteries are place midship by the mast as far down as possible, by the way).
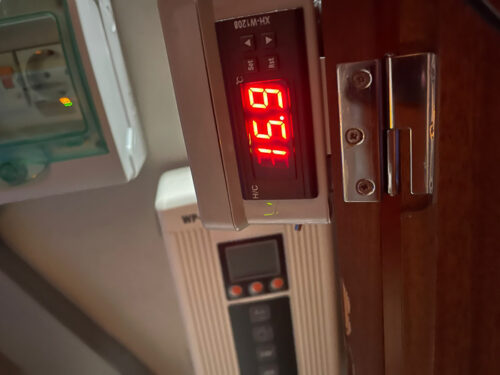
The temperature sensor (now showing 15.9°C in La Coruna), the 30A/24V charger in the background at the bottom and the 230V power outlets at the top left to access 230V power from the generator should the Combi fail.
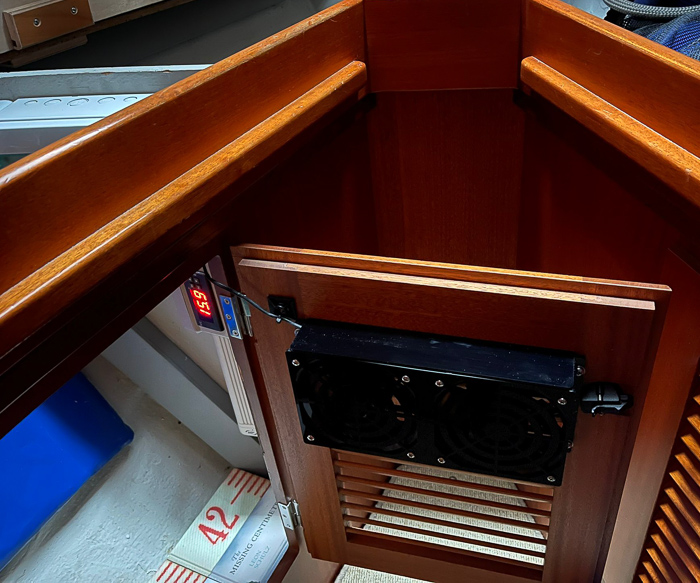
The forced-air ventilators in the louvre door.
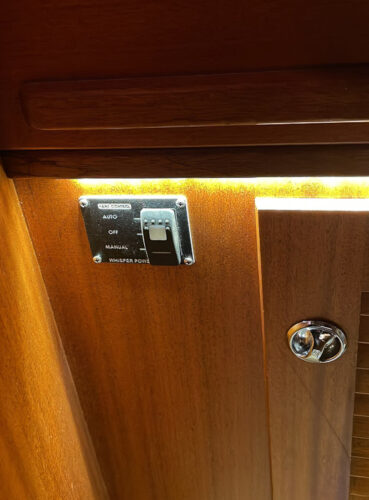
The "Auto-Off-On" switch for the ventilator under the port V-berth bunk.
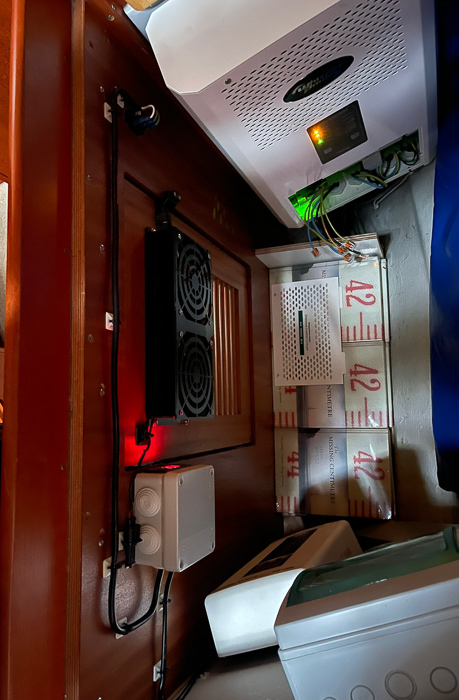
The complete installation with the Combi Power Central to the top, the 30A 24V charger at the bottom, extra 230V outlets to access 230V directly from the generator should the Combi fail and the ventilation with temperature sensor at the door.
The Whsiperpower Combi is now set to 23A@230V (5.3 kW) not to challenge the limits which is enough to charge the Lithium batteries with 110A/24V and heating the domestic water with 2 kW. If I need more power, the charging goes down accordingly - even past zero! In other words, if I needed more than 5.3kW the Whisperpower Combi boosts by as much as 3.5 kW giving a total of 8.8 kW, if ever everything is running at the same time (watermaker, washing machine, Nespresso, Tea kettle, water heater and styling your hair). Well, in theory at least, since it wouldn’t happen. But it could! And that matters for an engineer like myself! Haha!
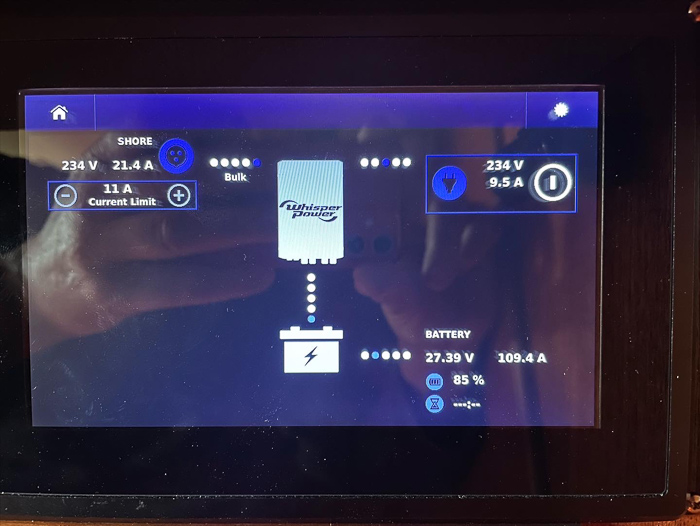
Typically charging with 110A at 27.5V now, i.e. with around 3 kW into the batteries. With the 6 kW Generator, I have 3 kW spare to run other 230V applications while charging.
Victron Battery-to-Battery charger
To keep the 12V emergency battery banks always full is crucial. There are two 12V battery banks on Regina Laska. One is for the start of the main engine and the generator and the second one is for basic navigation and communications as well as for emergency lights and one of the two high capacity bilge pumps (256L/min each). Both 12V batteries are placed high up over the water line under the stern port bunk and thanks to the fact that they are both AGM they can both be used for engine start. Both 12V batteries can be connected in parallel by means of a switch under the nav-settee. This way, either or both batteries can be used in case one of them is empty or faulty. Normally, however, they are separated by a diode and both are need to be charged in a variety of ways.
With shore-power or the diesel generator working, the batteries are charged by means of a Whisperpower 230V/12V/30A charger. Secondly the Volvo propulsion engine has a separate 12V alternator charging the batteries.
For 2022, a new Victron Orion-Tr Smart DC-DC Battery to Battery charger is installed as a third mean of charging. This way, the 24V batteries can keep the 12V batteries constantly full without the need to run any engines. Before, this was done via the detour via the inverter and 230V. Now the 24V batteries can keep the 12V batteries fully charged directly at all times.
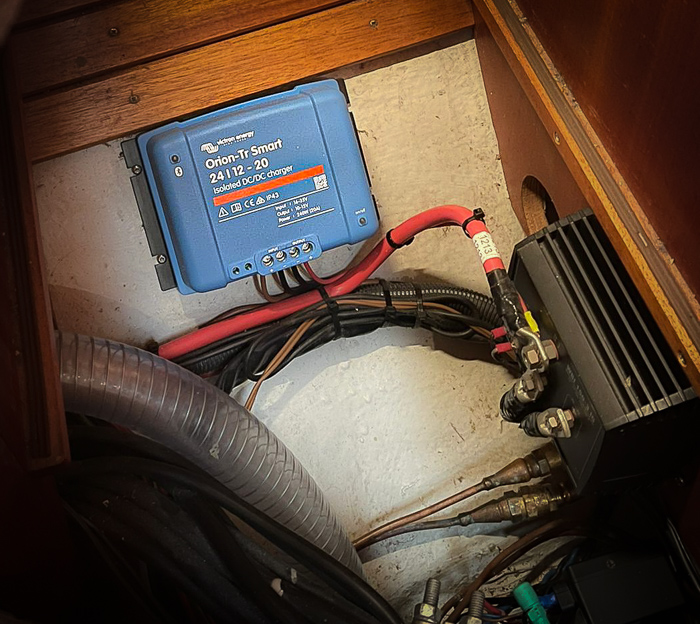
The B2B-charger feeding 12V from the 24V main battery bank via the diode (right) to both 12V battery banks.
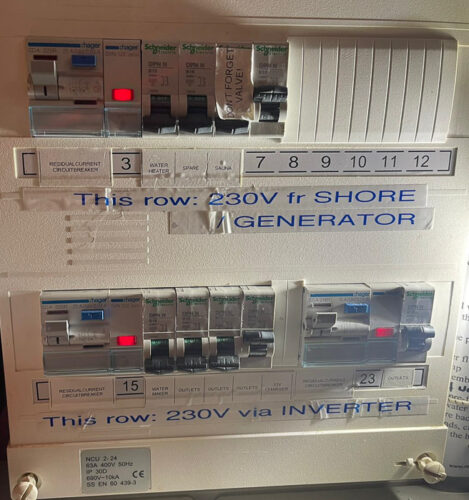
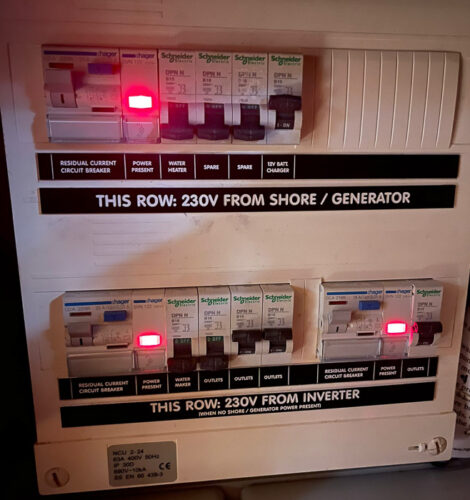
New 230V signs
With all these new couplings Raul pulled out is marking machine refurbishing the signs for the 230V fuses. This is another great quality of Marina Coruna and Nauelec: Nothing is left unattended and the look and feel of an installation is just as important as anything else. Compare before and after! Doesn't it look more trustworthy when it looks nice and clean?
New bow thruster
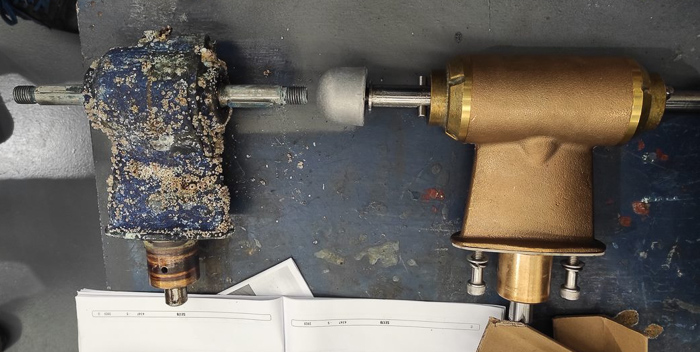
When a piece of equipment is just functioning flawlessly, it's often simply forgotten. A bow thruster is one of these very reliable pieces of equipment, buried in the forepeak somewhere under tons of sails and other stuff. Regina Laska's bow thruster is no different and has been working well during all 25 years and I have seldom checked it where it was buried under the sails. Like for any of us, the years pass, age does show in the end and looking at my bow-thruster it simply doesn't look like a typical Regina Laska item any longer, don't you think?
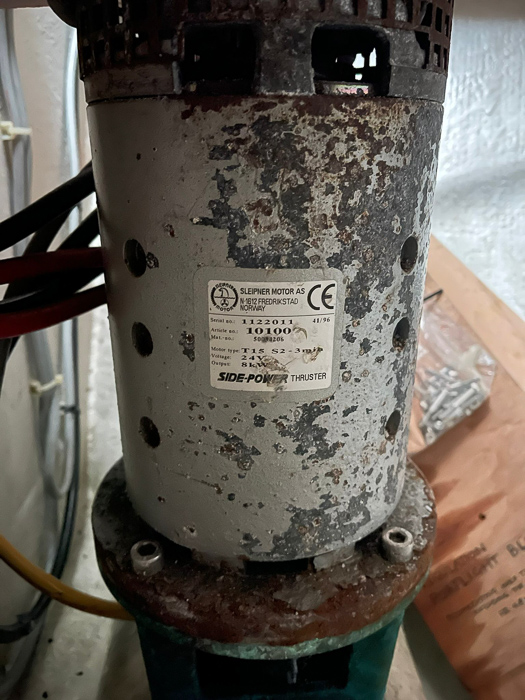
My bow-thruster, left and forgotten under a bunch of sails under the forepeak bunk.
I had the idea to take it apart, sand down the outer housing and then repaint it. The seals and bearings are all standard, so they could easily have been bought and replaced, despite the fact that Sleipner officially does not supply spare parts of this old "10hp" version.
I'm almost embarrassed to show picture of my bow-thruster, but so it looked and it has been working fine, albeit I don't use it much other than in very strong side-wind when I mis-judged the approach. A bow thruster is not necessary but good to have. Or, like John Neal from Mahina Expeditions once said "it takes the thrill out of a tight manoeuvre".
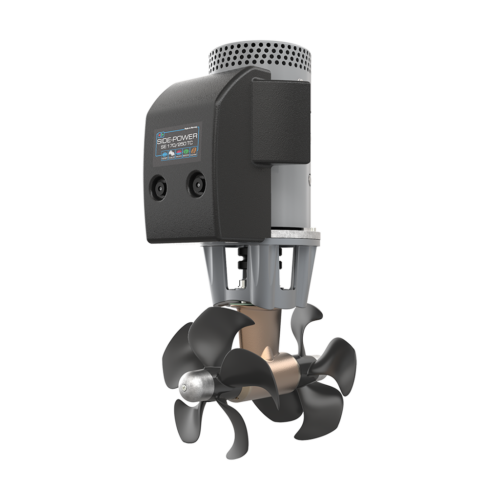
The old thruster is now being replaced by a Sleipner/Side-Power SE170 Tunnel thruster. Like my old one, it has an 8 kW motor, but smaller in size, no brushes to change and encapsulated lubrication, meaning no oil level to check or changing gear oil. Thanks to its twin counter rotating 5-bladed composite propellers it gives significantly more thrust than my old one, which had a three-bladed bronze propeller and gave some 150kg thrust. The new bow-prop gives a thrust of no less than 170 kg at 21.7V. My four Super-B Lithium batteries give a bit less than 25.6V at rest (obviously less when 8W is discharged), but the bow-thruster specifications say that at 24V the thruster gives a full 210 kg thrust.
Let's see if I can feel any difference...
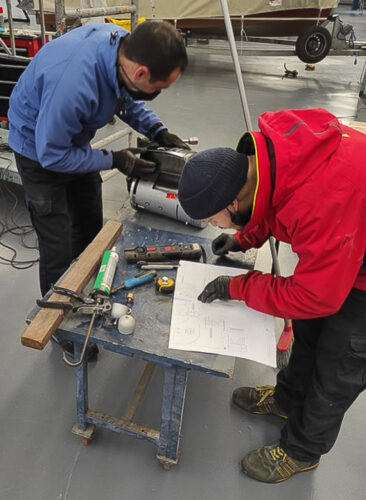
Rubén and Enmanuel from Marina Coruna are checking the installation of the new thruster to find out if it fits to exactly replaces my old thruster. The idea is that by investing in a new thruster, the installation takes less time than refurbishing the old one.
Rubén and Enmanuel have dismounted the old one, comparing with the new. They noticed that the seals of my old thruster were damaged and oil was mixed with water. Sometimes you just need to follow your feelings and change when you feel it's time!
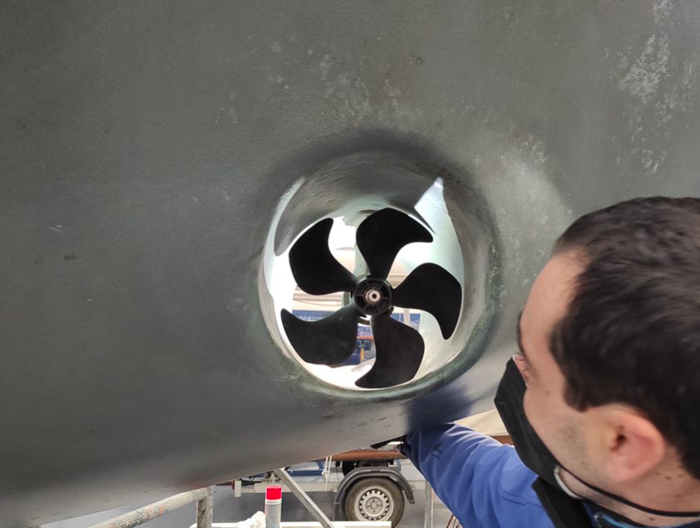
The new bow thruster and propellers fits perfectly into the tunnel of Regina Laska. A remarkable increase of power und thrust can be expected with this new one, thanks to more efficient blades.
New SSB antenna
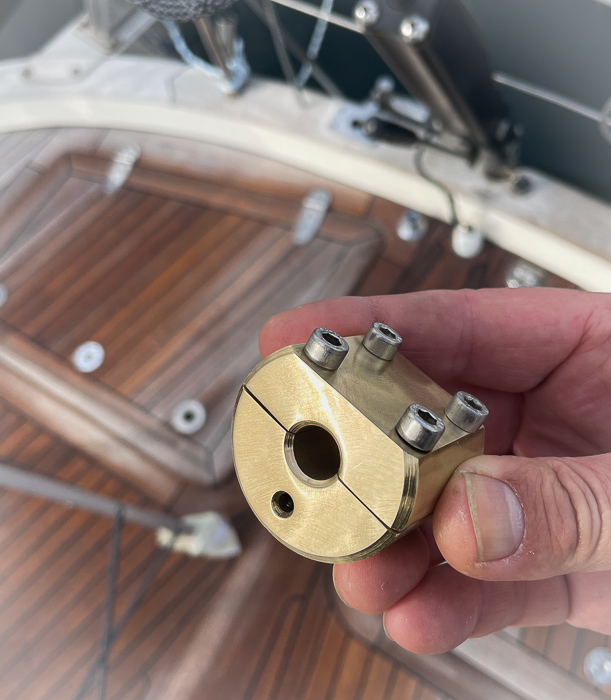
While changing the rigging, I also changed the back stay antenna feed for the SSB at the same time. Previously, I just had an ordinary water hose-clamp to attach the SSB antenna to the backstay, but Raul from Nauelec thought that this was not in Reginasailing-style. So he made me a new one. Hand-made in bronze to fit the 12mm backstay on one side and the antenna feed on the other end.
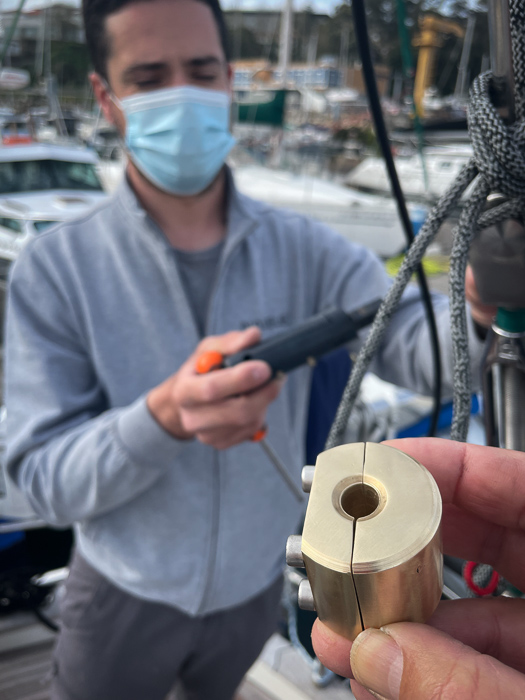
José from Nauelec fitting the new SSB-antenna cable with the beautiful new handmade back stay fitting.
The lower connector to the isolator has an L-shaped stainless steel re-enforcement and then vulcanising tape on top.
New anchor windlass
A snubber is an essential tool in order to take the load of the anchor windlass. The entire weight of the boat should never "hang" directly and solely on the anchor windlass. Hence you use a snubber which is hooked into the chain and then fastened at one or both cleats.
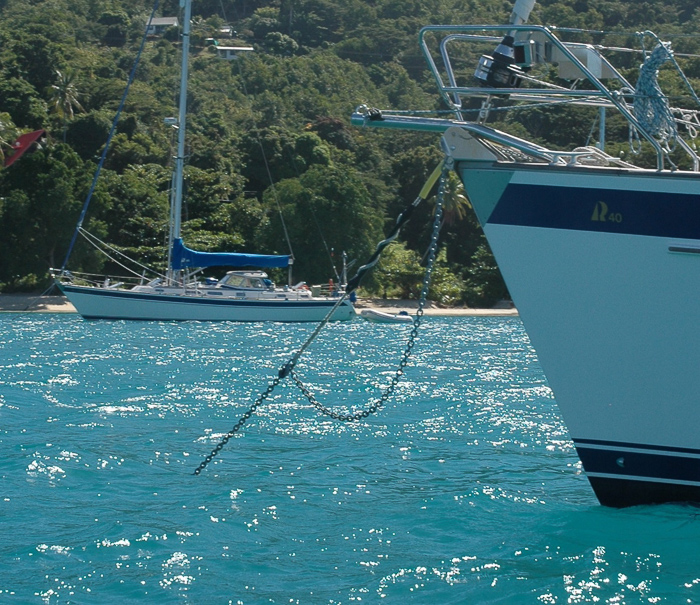
The snubber set on our HR40 Regina during our sabbatical year in the Caribbean. Here in Bequia.
So far so good, but while anchored outside Cascais (close to Lisbon) in 2021, the snubber broke with a great bang during a stormy night at anchor. No problem for the 40kg Rocna and the 10mm Duplex Stainless Steel Chain, but the rest of the night we were hanging onto the windlass without knowing (we slept like babies in the aft cabin, and the gests in the forepeak didn't call us during night).
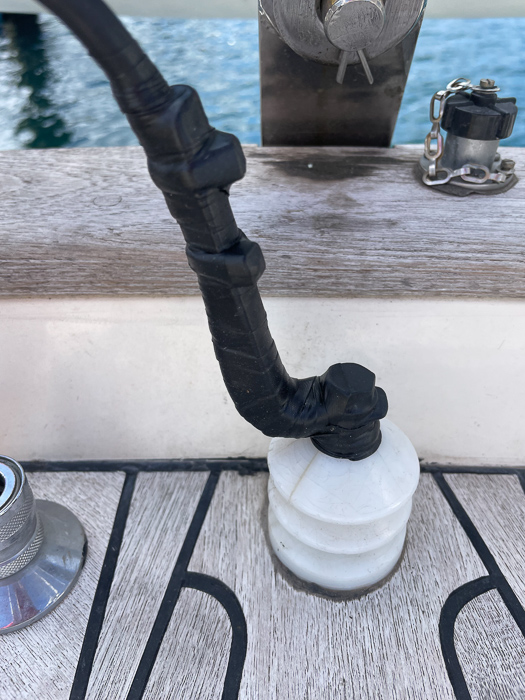
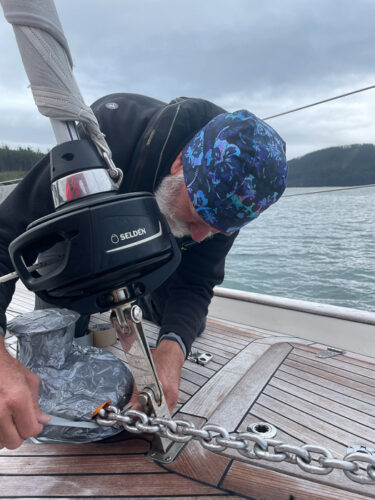
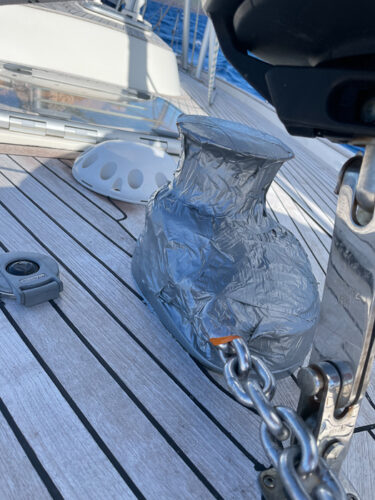
Sailing downwind the coming weeks, we didn't notice anything wrong. The Windlass still worked and all fine. Until we sailed upwind with a great amount of green water on foredeck! Now we noticed that the windlass actually was leaking water into the cupboard under deck. No big problem for a sailor, who loves lashing wore and duck tape! With a plastic bag it became 100% watertight again - although we had to redo the job each time we were anchoring...
At Marina Coruna, the windlass was taken apart. It could have been save, but after 10 years and kilometers of chain work, it was decided, just as well to replace it and get a brand new one.
When changing to something new, I tend to opt for a yet stronger or better model, and this is no exception. Instead of 1500W, an stronger moden is chosen, namely the Lofrans X3 in classic chromed bronze giving 1700W (model No 602103). This corresponds with the upgraded anchor, where my 33kg Rocna was upgraded to a 40kg Rocna a couple of years ago.
And yes, there will also be a Lofrans chain stopper (model No 636257) to avoid any pulling on the windlass in the future. This is also practical when digging in the anchor and testing if it's neatly stuck by driving with maximum thrust in revers.
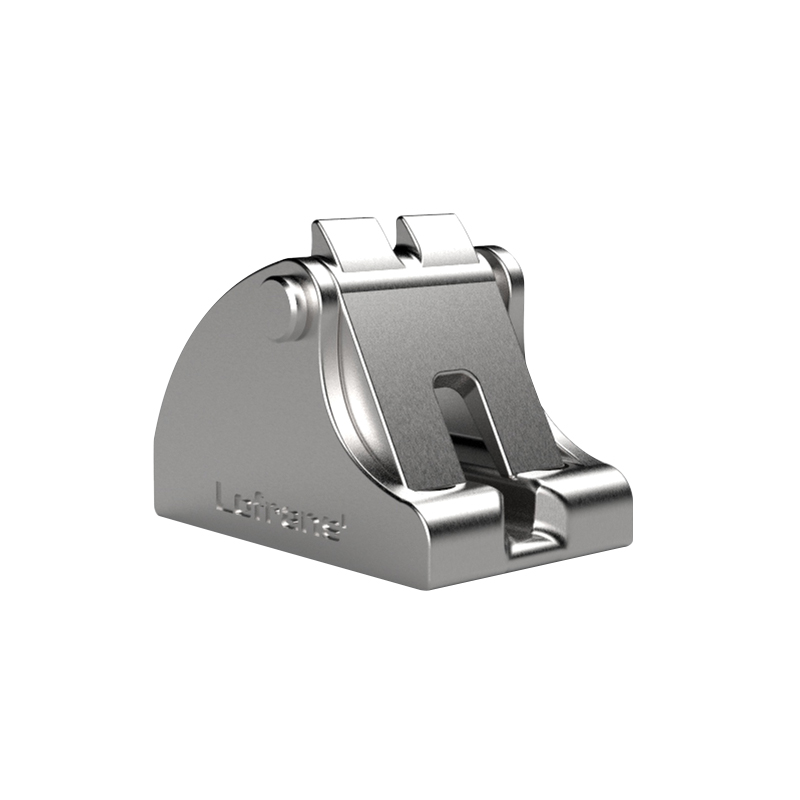
The chain stopper to be installed between the anchor windlass and the bow roller.

The Lofrans X3 1700W anchor windlass
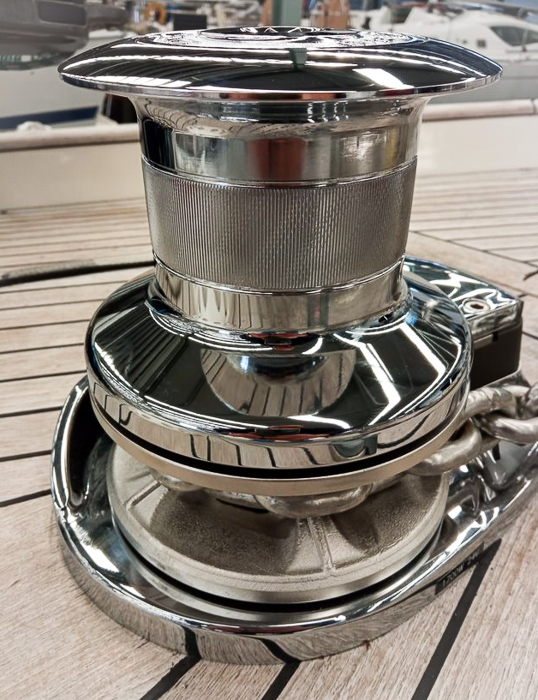
The newly installed windlass by Marina Coruna.
As discussed above, the windlass is perfect to electrically hoist the crew into the mast as well!
Updated power system
For an overview of the upgraded electrical power system onboard Regina Laska click here or on the thumbnail picture below.

Click on the picture for a full pdf of the Regina Laska power concept
Changing gas system and new stove
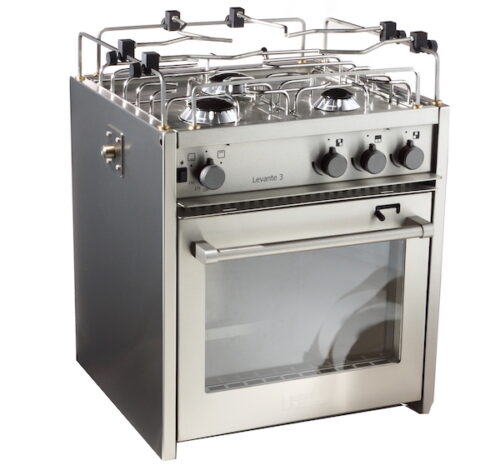
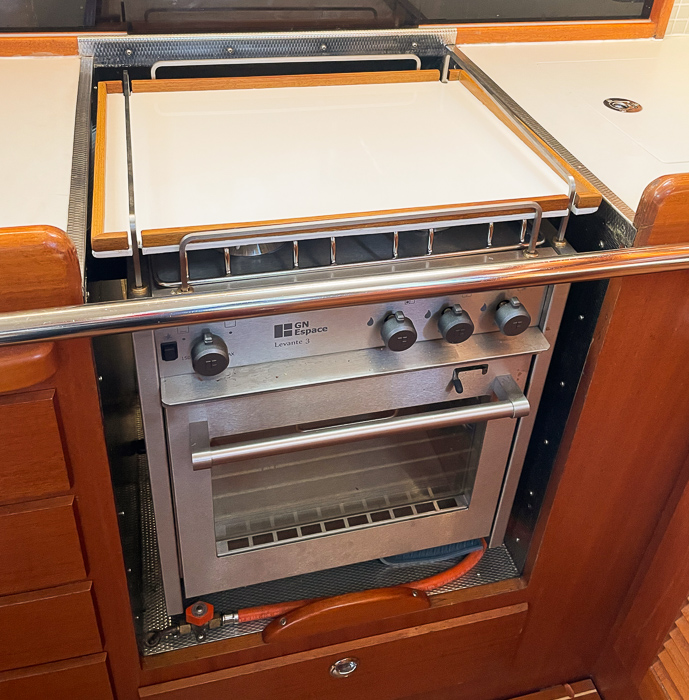
In order to keep the safety standards at a maximum, Regina Laska changes its gas hoses every four years and the gas system is annually inspected and checked with a pressure test by a gas specialist. After 9 years with the French ENO Le Gasgogne stove, it will now be upgraded to a GN Espace Levante.
See the full brochure here.
See some examples of installations of GN Espace stoves in other Hallberg-Rassy boats here.
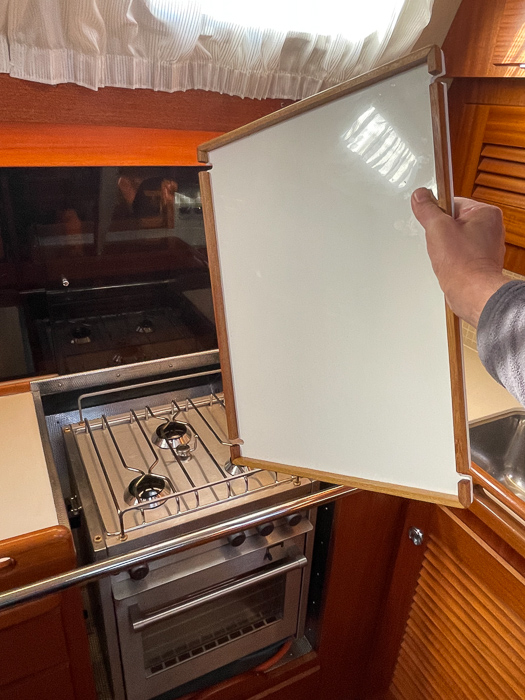
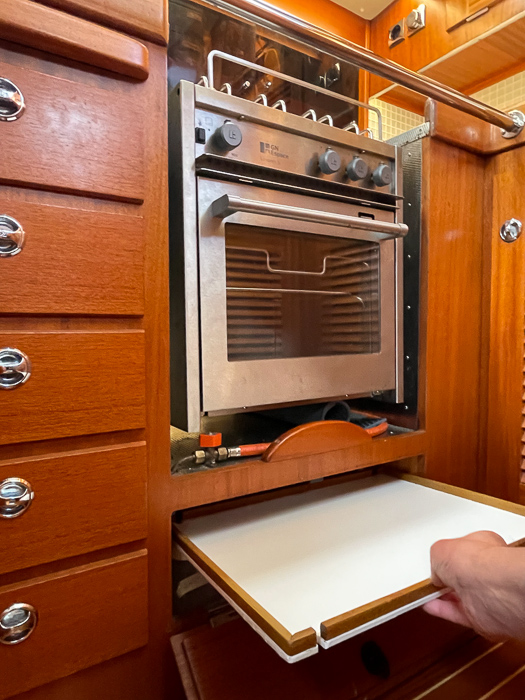
The new GN-Espace oven is said to become hotter thanks to better installation. It is heated from the back rather than from below and so the heat should be distributed much more evenly without any burnt bred from below. It even has a built in grill! This is all important, since my guests on leg 4-2022 have announced a scones-baking competition, so I thought I'd do my part and give them the best oven I could find! :-)
On the top of the stove, it also has more space for more pans and it's a three-burner rather than the smaller 2-burner I had before. Like for professional chefs, the Levante is built to follow the Gastronorm (GN). This system is a standard for container sizes. Also other utilities you buy follow the GN and you can even buy sinks according to the GN system so you can place a container directly into a sink. See for the GN-sized containers for the new GN Espace-oven here.
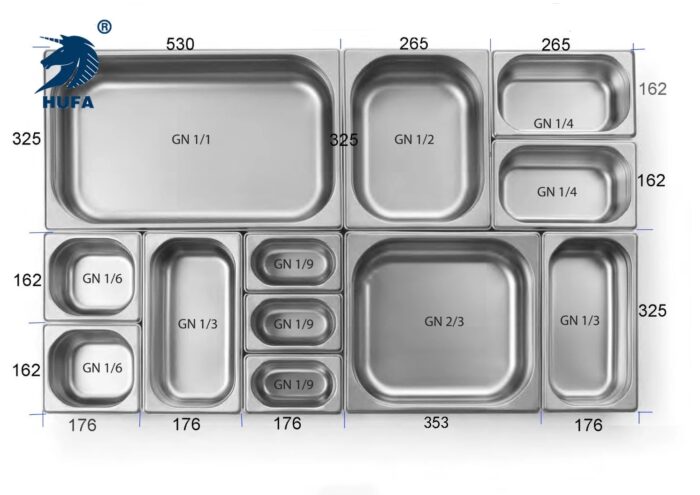
A general overview of the Gastronorm.
The only drawback of the new oven is that it will no longer fit under the lid over the stove, giving extra workspace when not in use, e.g. when preparing breakfast or sallads.
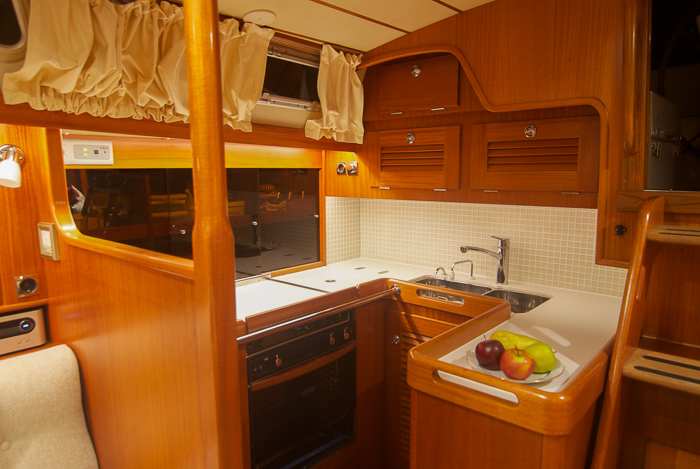
Gone are the times when I could close the lid over the stove when preparing sallads etc. :-( It was such a nice workplace!!
For this reason Campillo has promised to build a similar surface in wood or GRP as I have seen on another HR46, namely "Momentum of Fal". On the plus side, I would be able to place items onto the gimballed surface an no longer have sallad bowls or other stuff flying around in the salon when a big wave hits! It has happened before, I tell you - and not only once or twice or three times... So a gimballed worktop to place stuff is maybe not that bad after all!
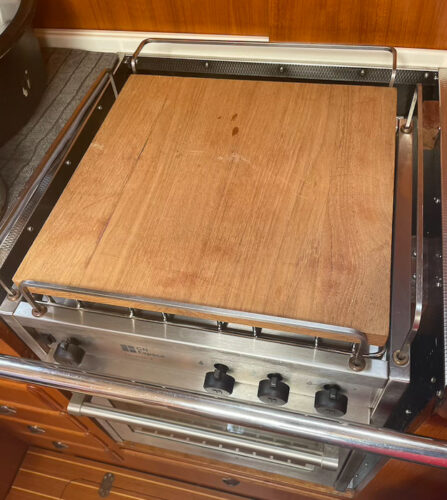
The GN-Espace on HR46 Momentum of Fal with a wooden surface for storage or cutting, nicely gimballed.
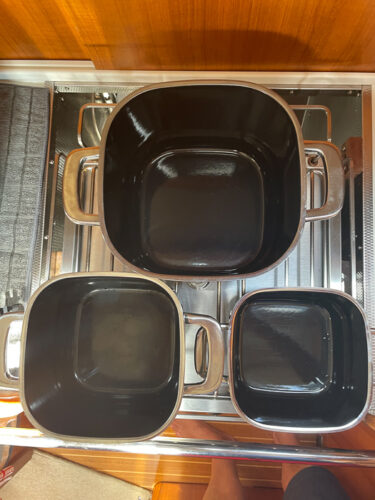
Testing my pots and pans on the GN-Espace "Levante" on the HR46 "Momentum of Fal"...

...yes they do fit!
And this is how it turned out in the end with a great loose lid that is exactly held in place by the pot holders and easily stowed under the oven.

New water maker control box
After 9 years of water production the control box started to drip and leak water in one seal. Just a drop now and then, but it wasn't as it should. When I went into the box with my endoscopic camera I could clearly see where it was leaking. Can you?
Against the recommendations of the watermaker manufacturer ECHOTec, I replaced the entire control box. They said it was not necessary to replace the entire box, just because there was one of the couplings that was leaking... I did so anyway, keeping the old box for spare parts onboard.
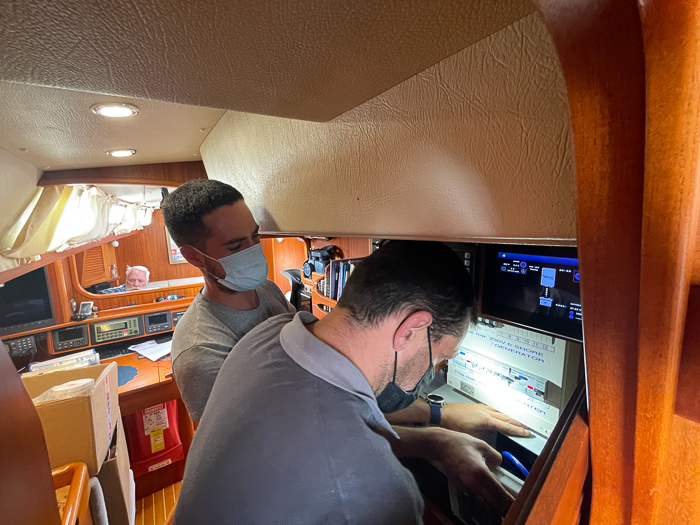
Raul and José from Nauelec exchanging the watermaker control box to a brand new one from ECHOTec Watermakers.
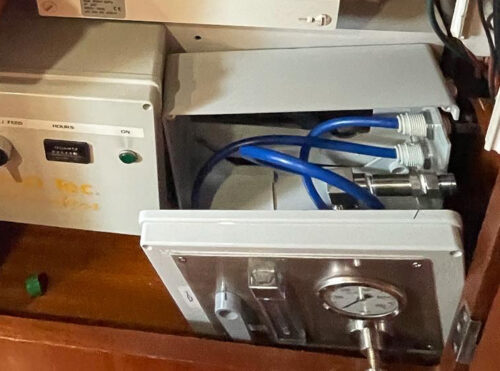
The new watermaker box is being connected to the water hoses, consisting of product water, brine discharge water and high pressure hose.

Raul from Nauelec in La Coruna refurbished my old box, however, which now looks like new again! So ECHOTec was completely correct in saying there was no need to change the entire box. Well anyway... yes, I confess: could have easily saved the cost to replace the box... Some of these things you overdo. But now at least I have one as spare.... And sparparts is something I really like and have the entire boat full of!
Check here to see my old and refurbished control box. Doesn't it look great and as new?
Miranda gets a complete refurbishment
Our Carib 9L RIB dinghy will undergo a complete refurbishment by a special RIB company liaising with Marina Coruna.
New Spinlock 6D Deck Wests
After 9 years it's time to exchange my heavy weather life wests. My guests are very happy with the comfort of the Spinlock Deck wests so I am replacing the 5D with the newer 6D mode. The benefit is that these are "one size fit all", meaning that I can reduce my total number of life wests to 12 wests as follows:
- 5 new Spinlock 6D each equipped with OceanSignal MOB1 AIS Personal Location Beacon (PLB), spray-cap, harness, lights, a knife, MOB-life-saver, whistle and fully automatic with manual override.
- 1 Spinlock 5D size 2 equipped with OceanSignal MOB1 AIS Personal Location Beacon (PLB), spray-cap, harness, lights, a knife, MOB-life-saver, whistle and fully automatic with manual override. This my own and is from 2017 and still good.
- 2 Spinlock 5D size 1 for my daughters who like the smaller size. Equipped with McMurdo S20 AIS Personal Location Beacon (PLB), spray-cap, harness, lights, a knife, MOB-life-saver, whistle and fully automatic with manual override. If the daughters like the new 6D I don't need to carry these in the future. They were bought in 2013 and 2017 respectively.
- 4 Spinlock LITE+. Very light fair weather wests without light, spray-cap or PLB. They do have a harness and a MOB-life-saver, however. New 2019.

The new Spinlock 6D life jackets
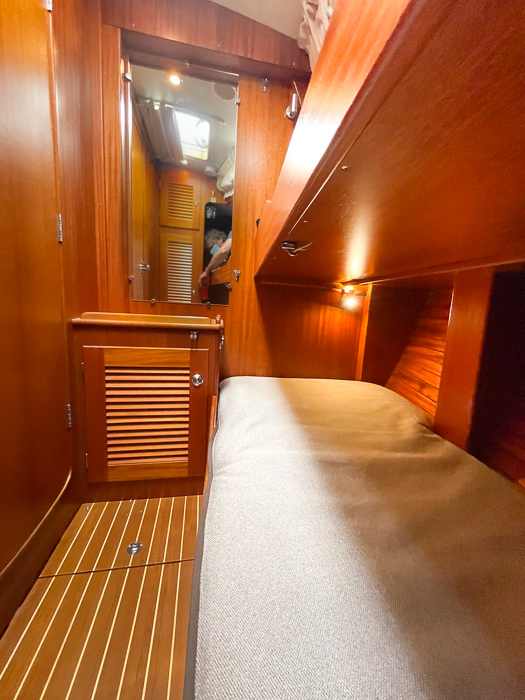
Interior refurbishment
Also under deck, Regina Laska will get some updates and refurbishment.
New upholstery from Monli
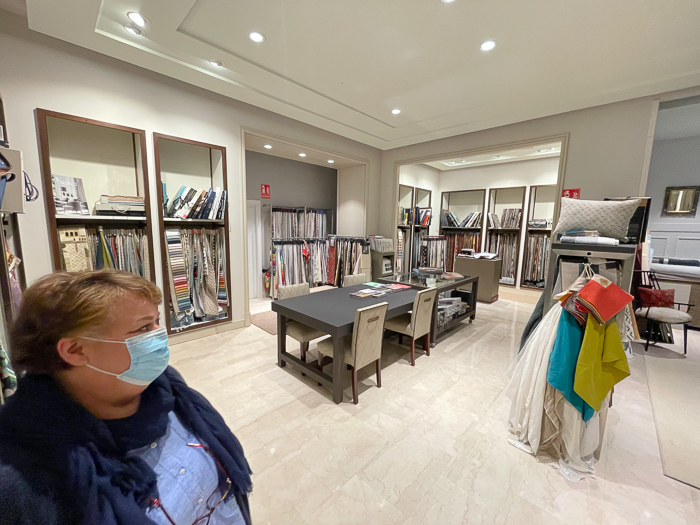
Monli is a big supplier of upholstery for hotels and superyachts and they are based in La Coruna and co-operate with Marina Coruna. They have a huge selection of IMO-approved materials that are fire-retardant, UV-resistant and made for the harsh marine environment. I visited their show-room while I was in La Coruna and got good advice on upholstery.
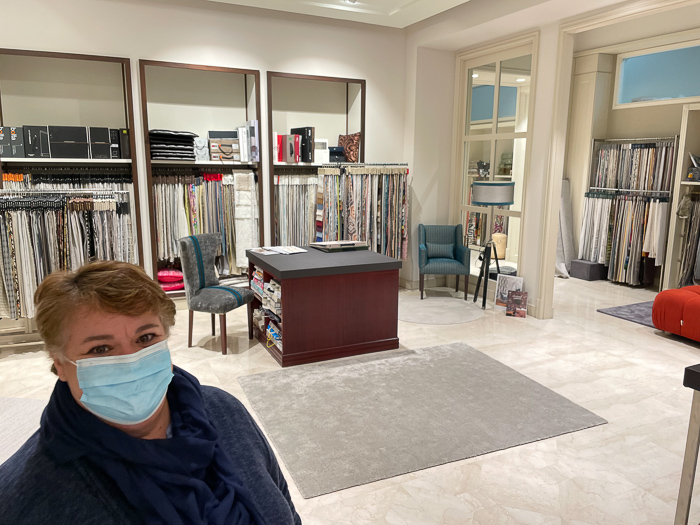
Berta showing me around in their several huge show-rooms with hundreds if not thousands of different material samples.
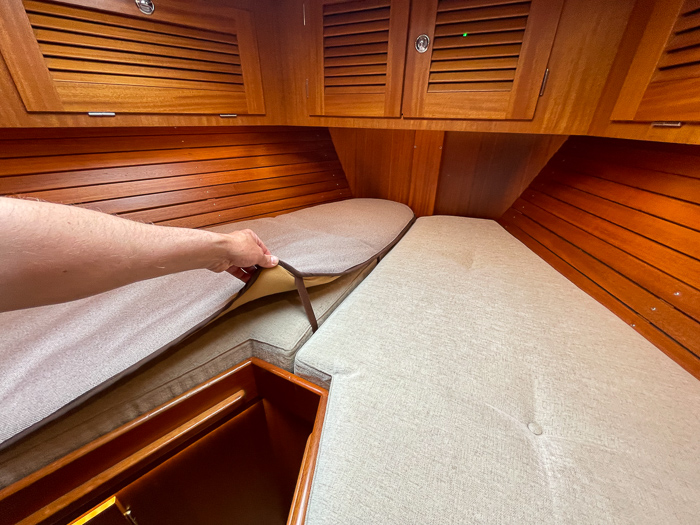
Regina Laska will get 20mm toppers for the guests on top of the mattresses to enhance comfort. After all, my guests stay often no less than 2 weeks onboard and some are returning - both annually as well as several times per year. Sleeping comfort is important, of course.
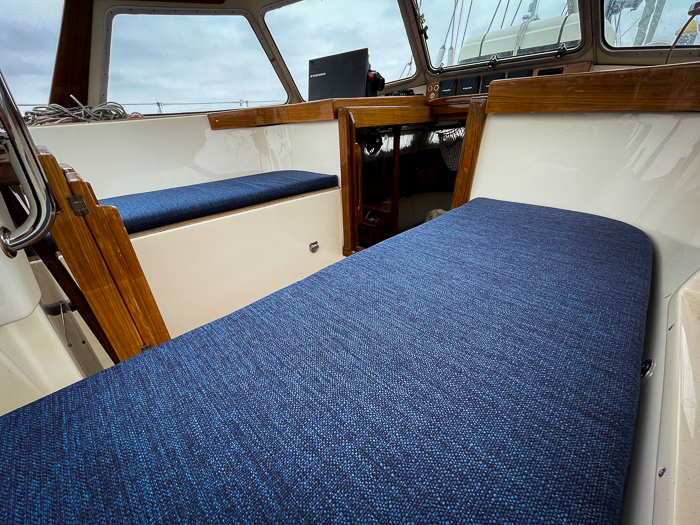
Further, Regina Laska will receive new curtains in the salon and bathrooms and also new thicker cushions for the cockpit. The ones I had are only two seasons old, but they were too thin and not comfortable enough for long watches. Comfort is an important aspect of sailing on Regina Laska!
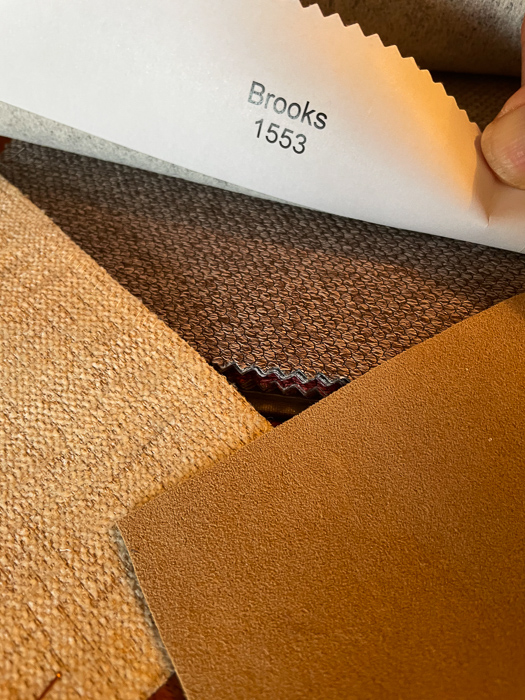
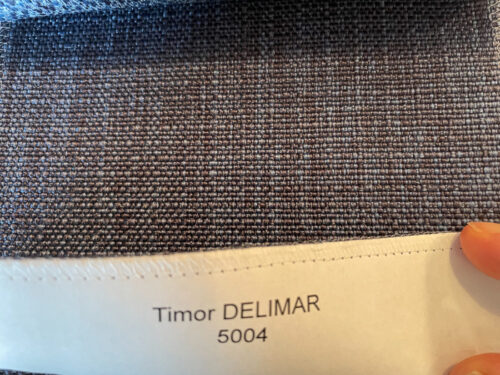
The new four toppers for the guest cabins will be 20mm thick and the material will be Brooks 1553 (top). To the left bottom the mattresses as they look today (Tathra 63) and to the bottom right the possible future upholstery in the salon (Alcantara Camel)
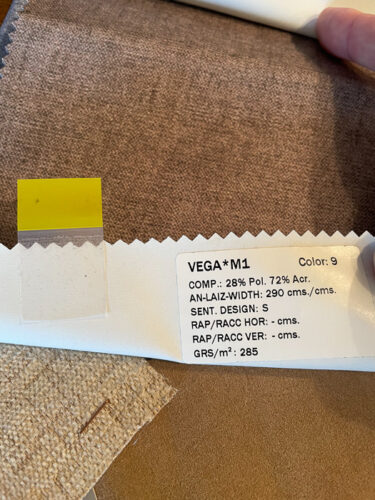
The material of the new cockpit cushions.
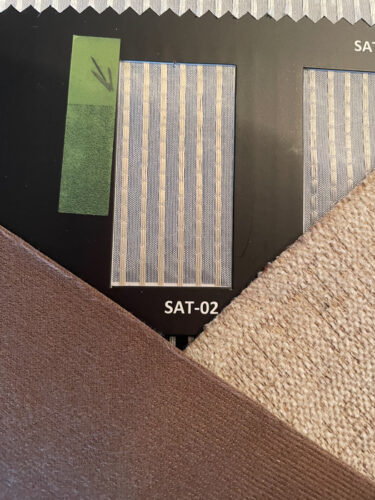
The new curtains sample (top) with the current upholstery (right) and the possible new one in the future (left)
The water and mould resistant new curtains for the bathrooms.
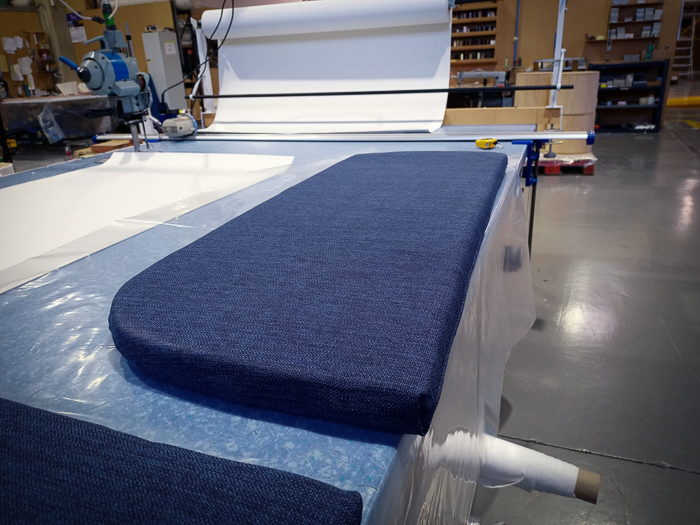
The new cushions for the cockpit under production at Monli
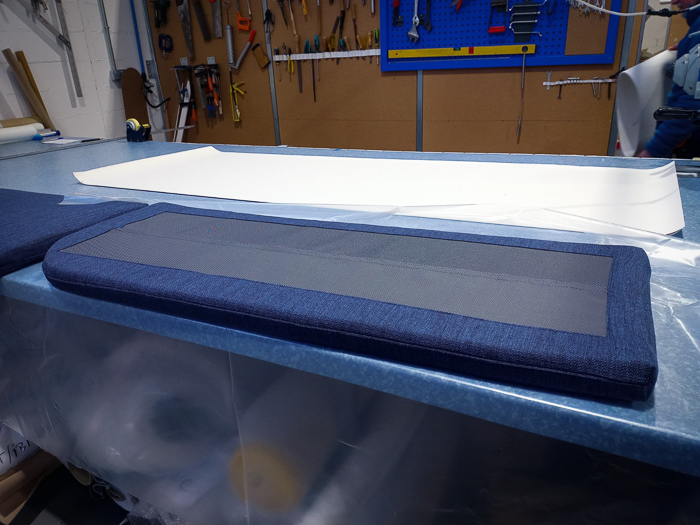
The back side is letting in air for drying and water to exit if they get wet.
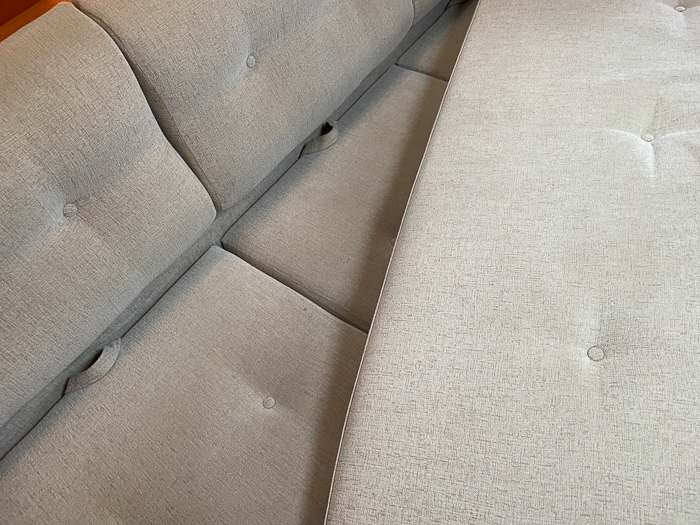
The upholstery was also undergoing a special cleaning procedure. The below photo illustrating "before" and "after" really well!
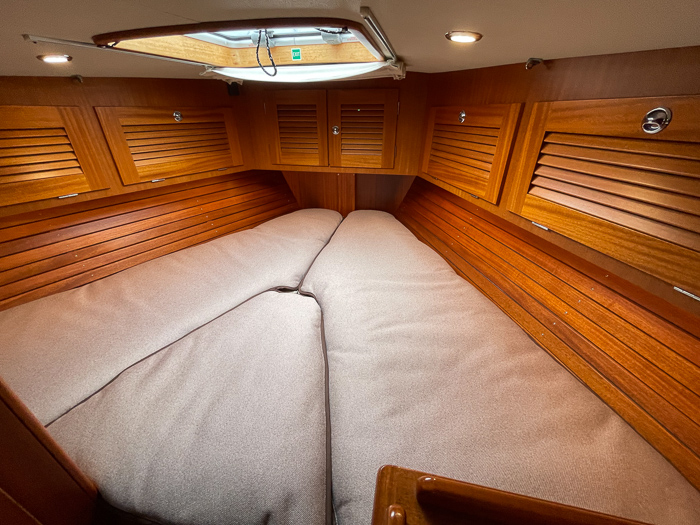
The new curtains, mattress covers and cockpit cushions are put in place. It's a great feeling when there are a constant flow of people onboard working on Regina Laska! :-)

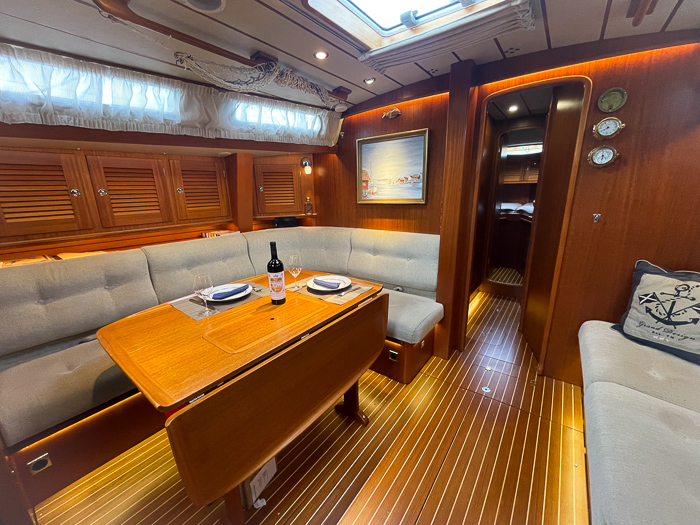
New painting
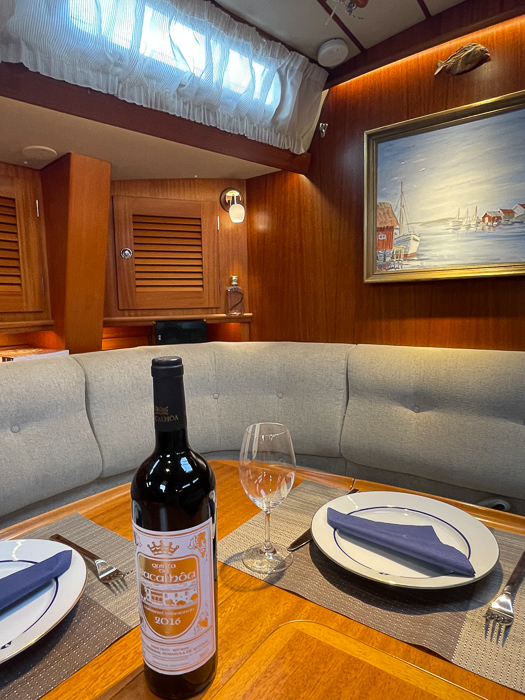
In addition to the painting of Spinola Bay in Malta, where I live during winters, I have added a second small painting of the cathedral of Limburg in Germany, where i was brought up as a boy.
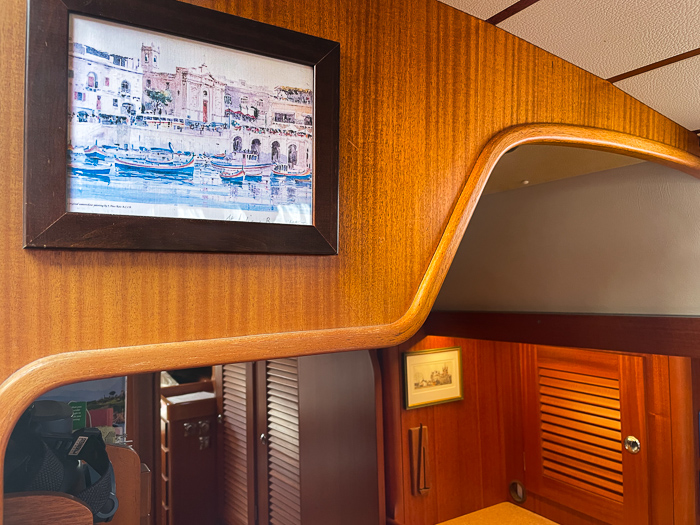
Spinola Bay (Malta) in the foreground and Limburg (Germany) in the background.

The old painting got some love and care by a framing company in La Coruna before it was hung up behind the nav-station.
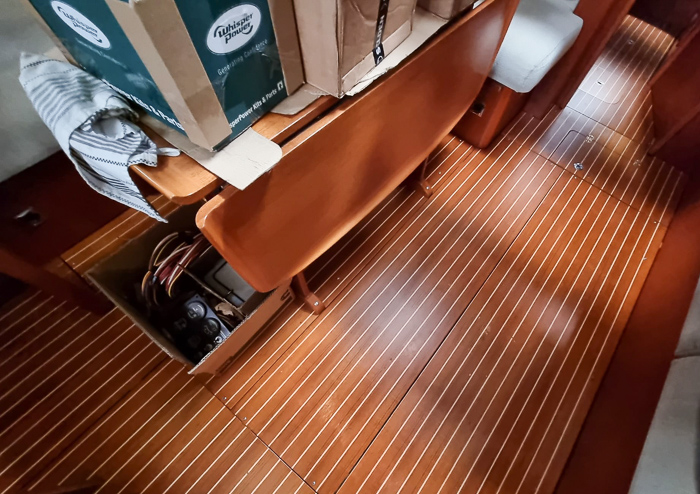
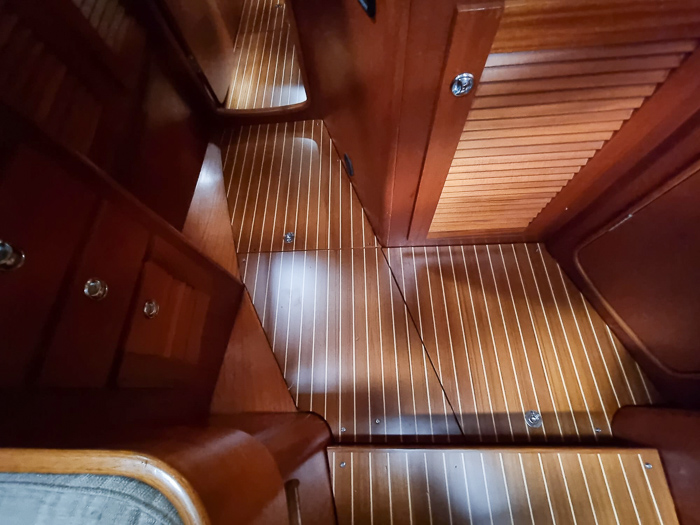
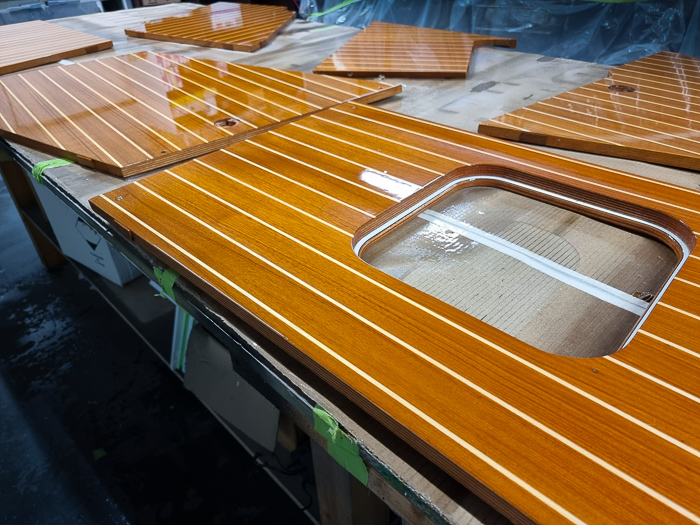
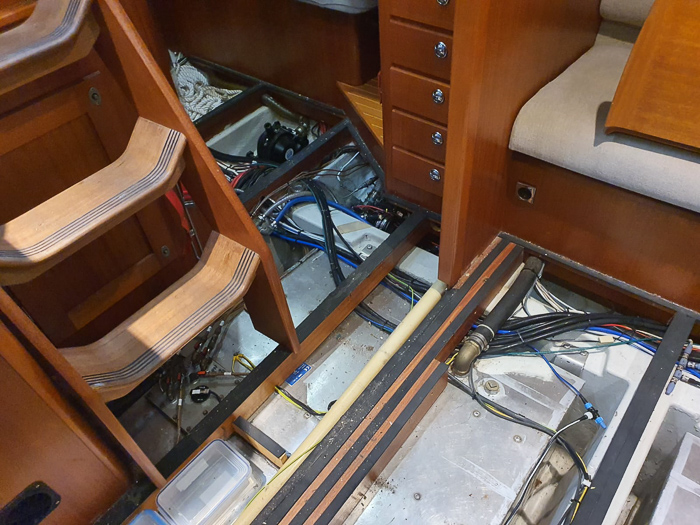
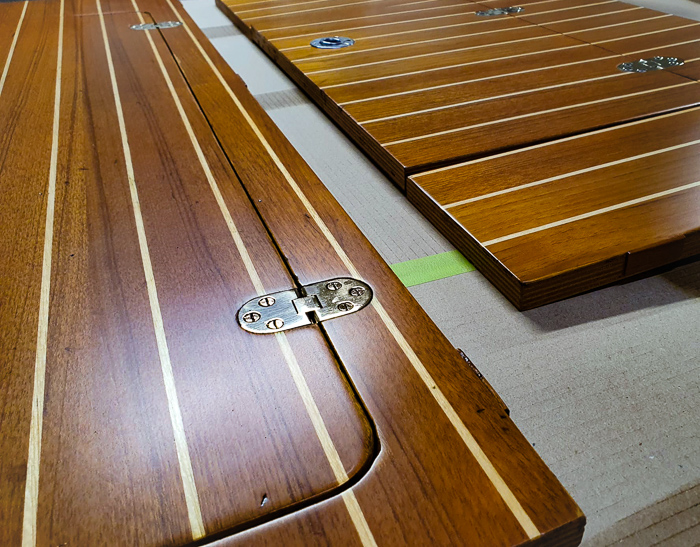
Revarnishing the floor
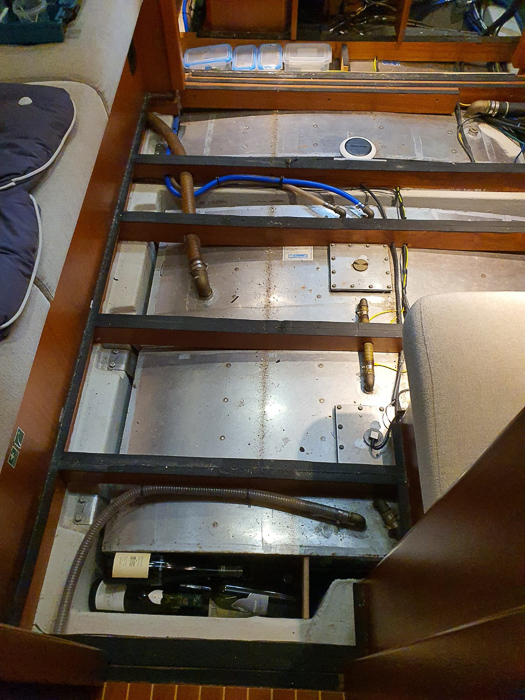
The entire floor is being taken out in order to re-varnish the same with a matt anti-slip varnish to look smart, when the carpet is not being used (while sailing in southern waters).
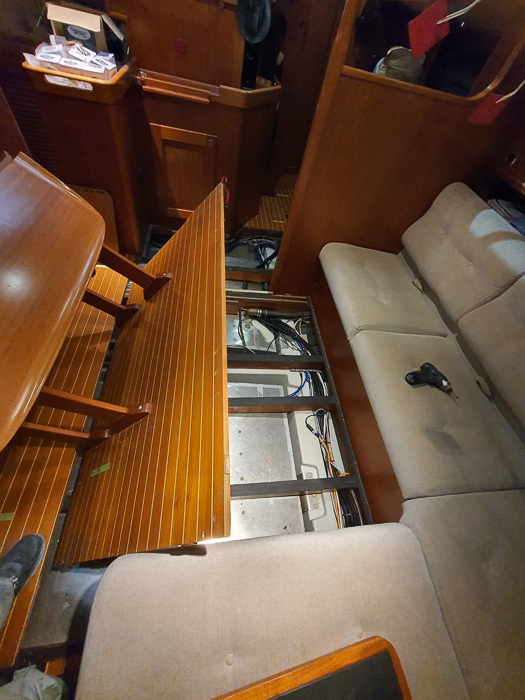
The cockpit floor is taken out and while we are at it, the boat will be inspected and cleaned under the floorboards. It also frees up the possibility to lay the new bus-cable for the new Furlex 400E Mk2 from the pedestal to the bow furler.
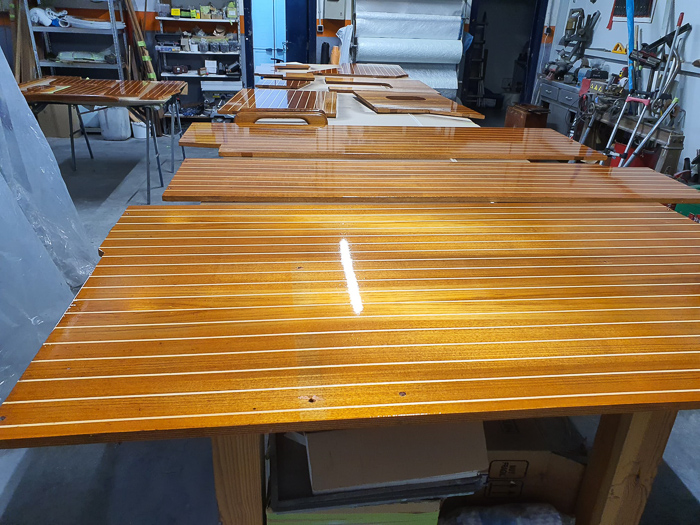
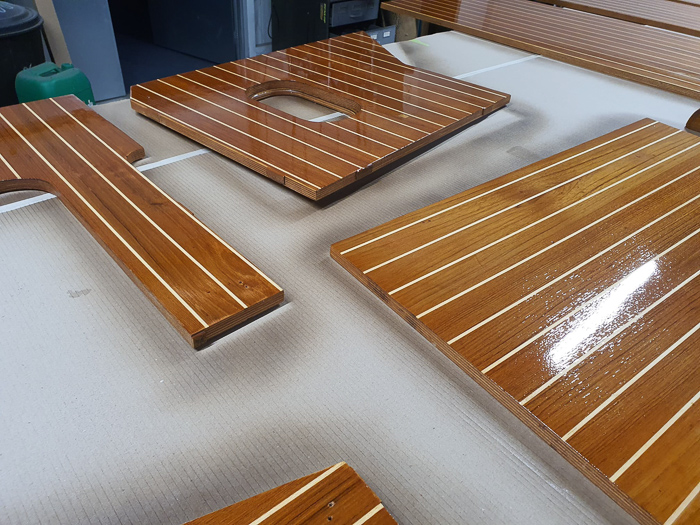
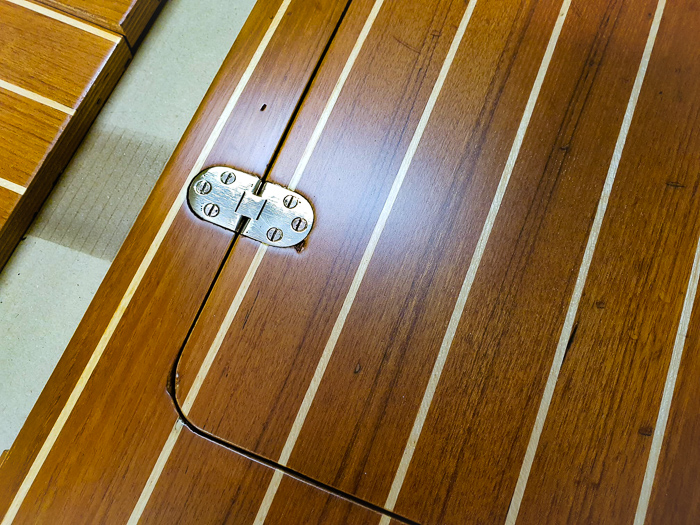
The varnished floor pieces.
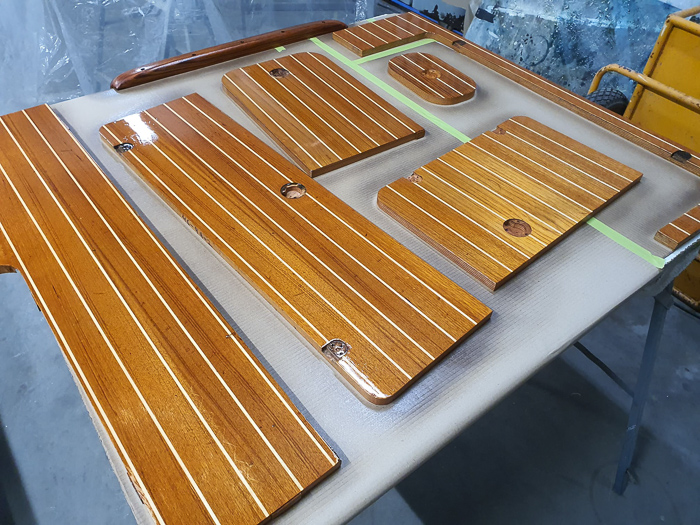
After the first 3-4 coats above oft he two-components Epifanes PPXtra (which is based on alkyd resin/isocyanate) it's time to add its final matt finish for anti-slip function and no reflections. You can use a brush (as on the hardtop) or, like for the floor, use a spray. If you wait between 1 - 24 hours with the correct ambient temperature, no sanding is needed in between. If you wait longer, do do need to sand. After PPXtra always wait and sand with P400.
For UV-resistance, Campillo continues with Epifanes Clear Varnish, Epifanes Woodfinish Gloss or Epifanes Polyurethane Clear Gloss Finish. On the floor he puts first 2 layers of 2-component polyurethane, thereafter a clear finish and at the end satin. Campillo prefers 2-component varnish on the floor since it’s stronger against constant walking on the floor. On the hardtop, Campillo ends with mono-component gloss finish for the look. Again, these last coats you can use with brush or spray (on the floor: spray for better finish). Last, but not least, all hinges and fittings have been polished by Campillo. This is how my old floor looks now. Still, some marks and scratches, which gives the charm to an old lady, but now looking beautiful without the previous moisture stains and discolouring!
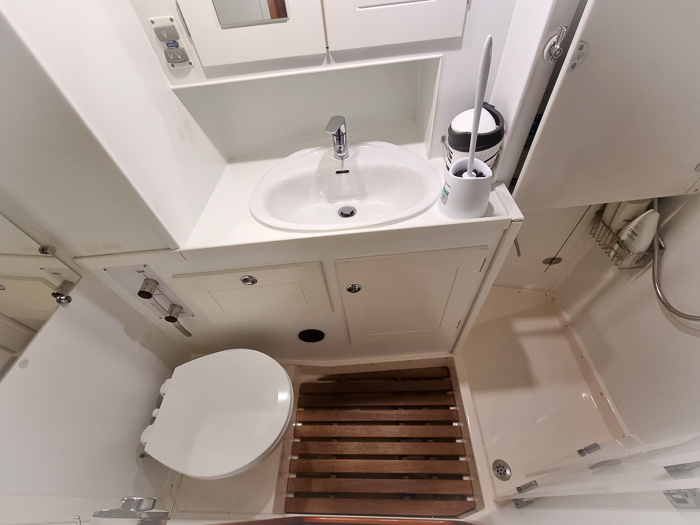
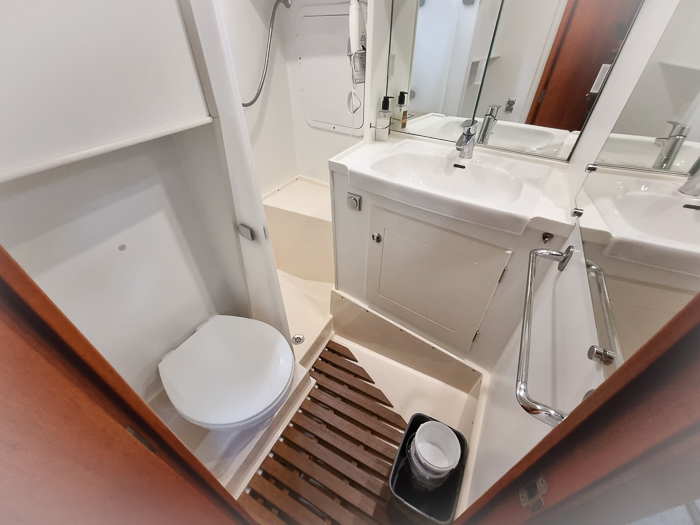
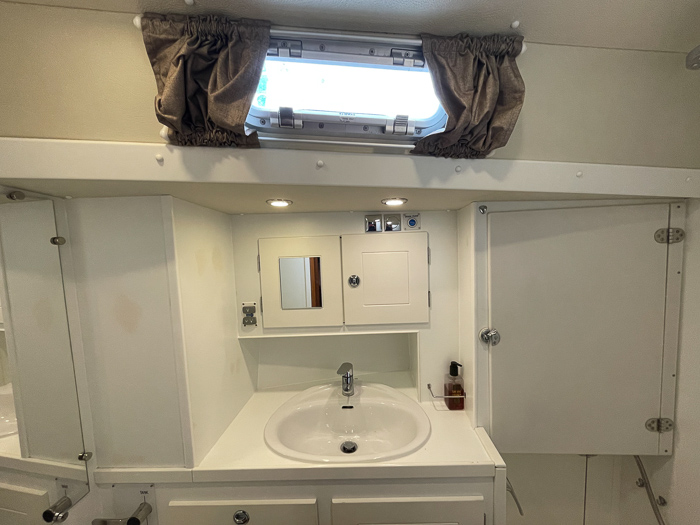
Bathroom floor is polished
The GRP floor in the shower area as well as under the teak grating will be polished for smarter look and easier cleaning.
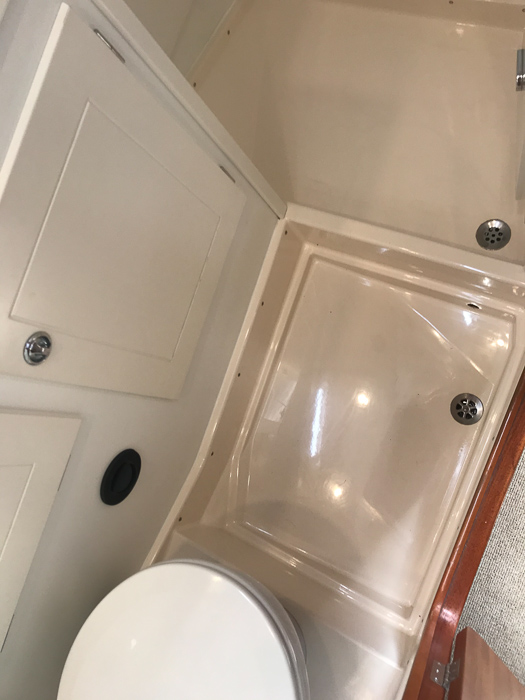
The GRP floor in the bathrooms are being polished for easier cleaning and smarter look. This is how it looked before.
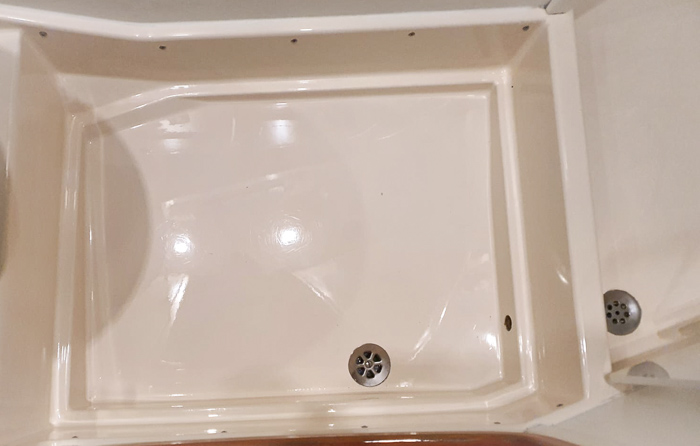
The bathroom newly polished and shiny for the look but also for easy cleaning.
New mirrors
The mirrors will be replaced in the bathrooms and side cabin, since it starts to loose its metal surface on the edges.
Replacing complete fridge unit and condenser for freezer
The fridge lost gas last year, so it is being completely replaced by a new one. I received a very good support from Sweden-based Thermoprodukter AB for this refit.
The old unit is being dismantled so I can use the costly electronic parts and the cooling water pump as spares.
The freezer was still working well, but Marina Coruna found a very small hole in the condenser, so the condenser is also being replaced.
The new condenser installed in the freezer.
The new condenser for the freezer connected to the compressor unit for the freezer.
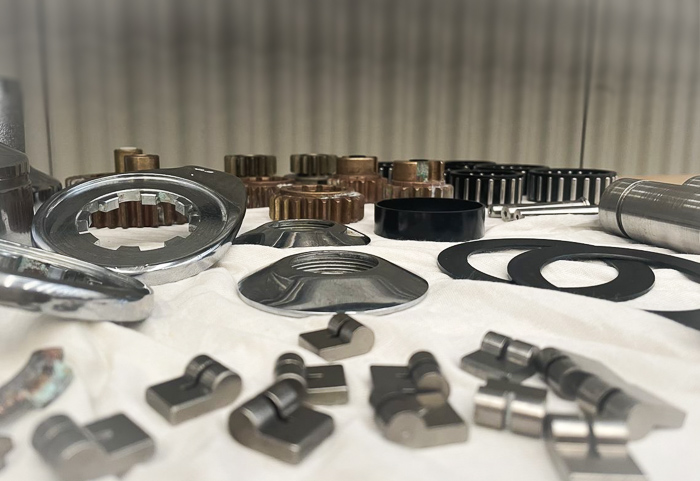
Issue with washer on Mamba-Steering
Alfred from Göteborgs Båtelektriska made me aware of a possible weakness on a Hallberg-Rassy 46 and possibly others.
I checked on mine and sure enough I had the same problem!
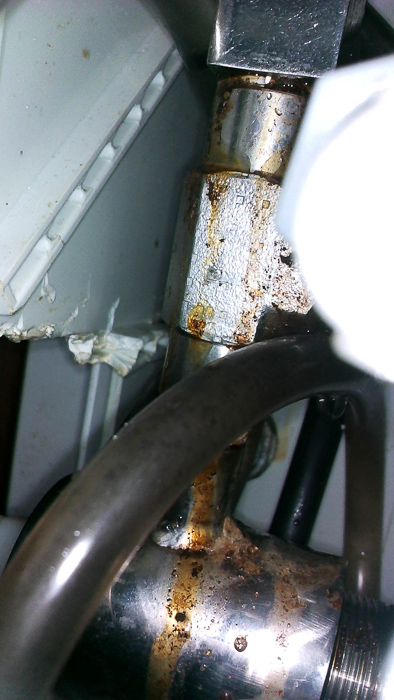
The upper and lower bolts of the ball-joint on the steering arm between the steering gearbox and the rudder shaft had a too small/thin washers. A new special thick washer needs to be made, so you don't loose steerage. If you own a Hallberg-Rassy with a Mamba-Drive, I suggest you check that washer on your steering! If your washer is too small, the arm risks to jump off and you loose your steering!
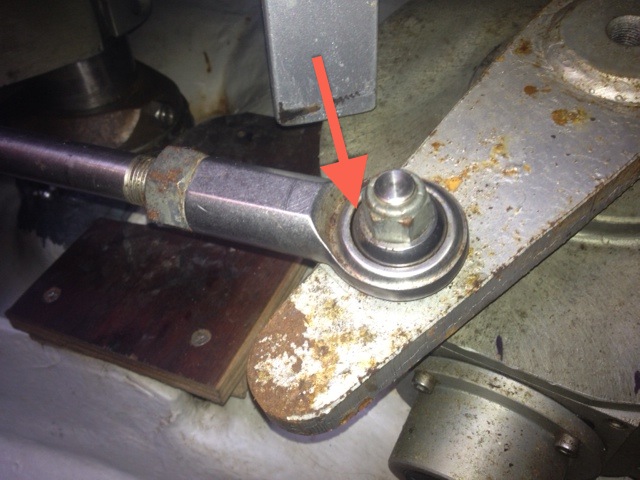
This thin is how my old washer looked. I have seen other HR46's where the development has gone even further!
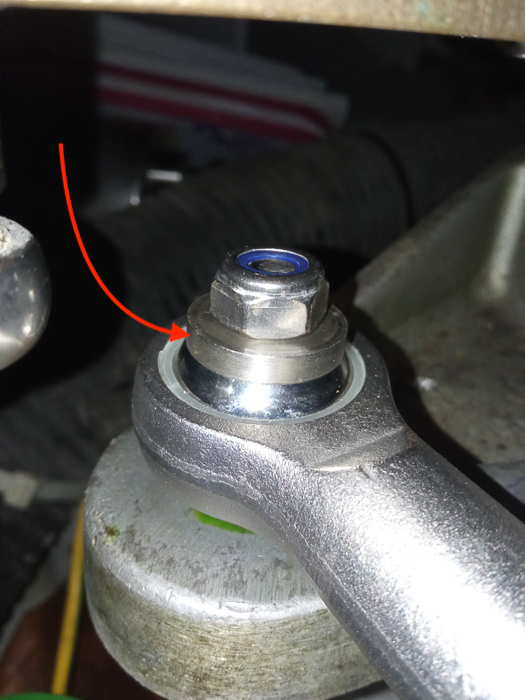
New specially thick and sturdy washer installed, that cannot bend or be eaten up!
New sextant
My Astra IIIB Sextant has gotten a companion: The Ultra Horizon Sextant by Cassens&Plath. This new sextant has built in a lot of sexy features to facilitate celestial navigation, which I will be present in detail in videos and texts on my ocean sailing page and in the video room.
I am very much looking forward to testing the new sextant and comparing the same with my old Astra IIB. The very similar version, however certified by Cassens&Plath, is also available as the "CP Sailing".
Read more about comparing and buying sextants here.

My old Astra III B to the left has safely navigated me over many ocean passages. It's not a bad sextant at all, and Cassens&Plath is also selling a very similar sextant they call "CP Sailing". Comparing it with my new Cassens&Plath Horizon Ultra with all the bells and whistles, the old one does stand in the shade, however. More info to follow!
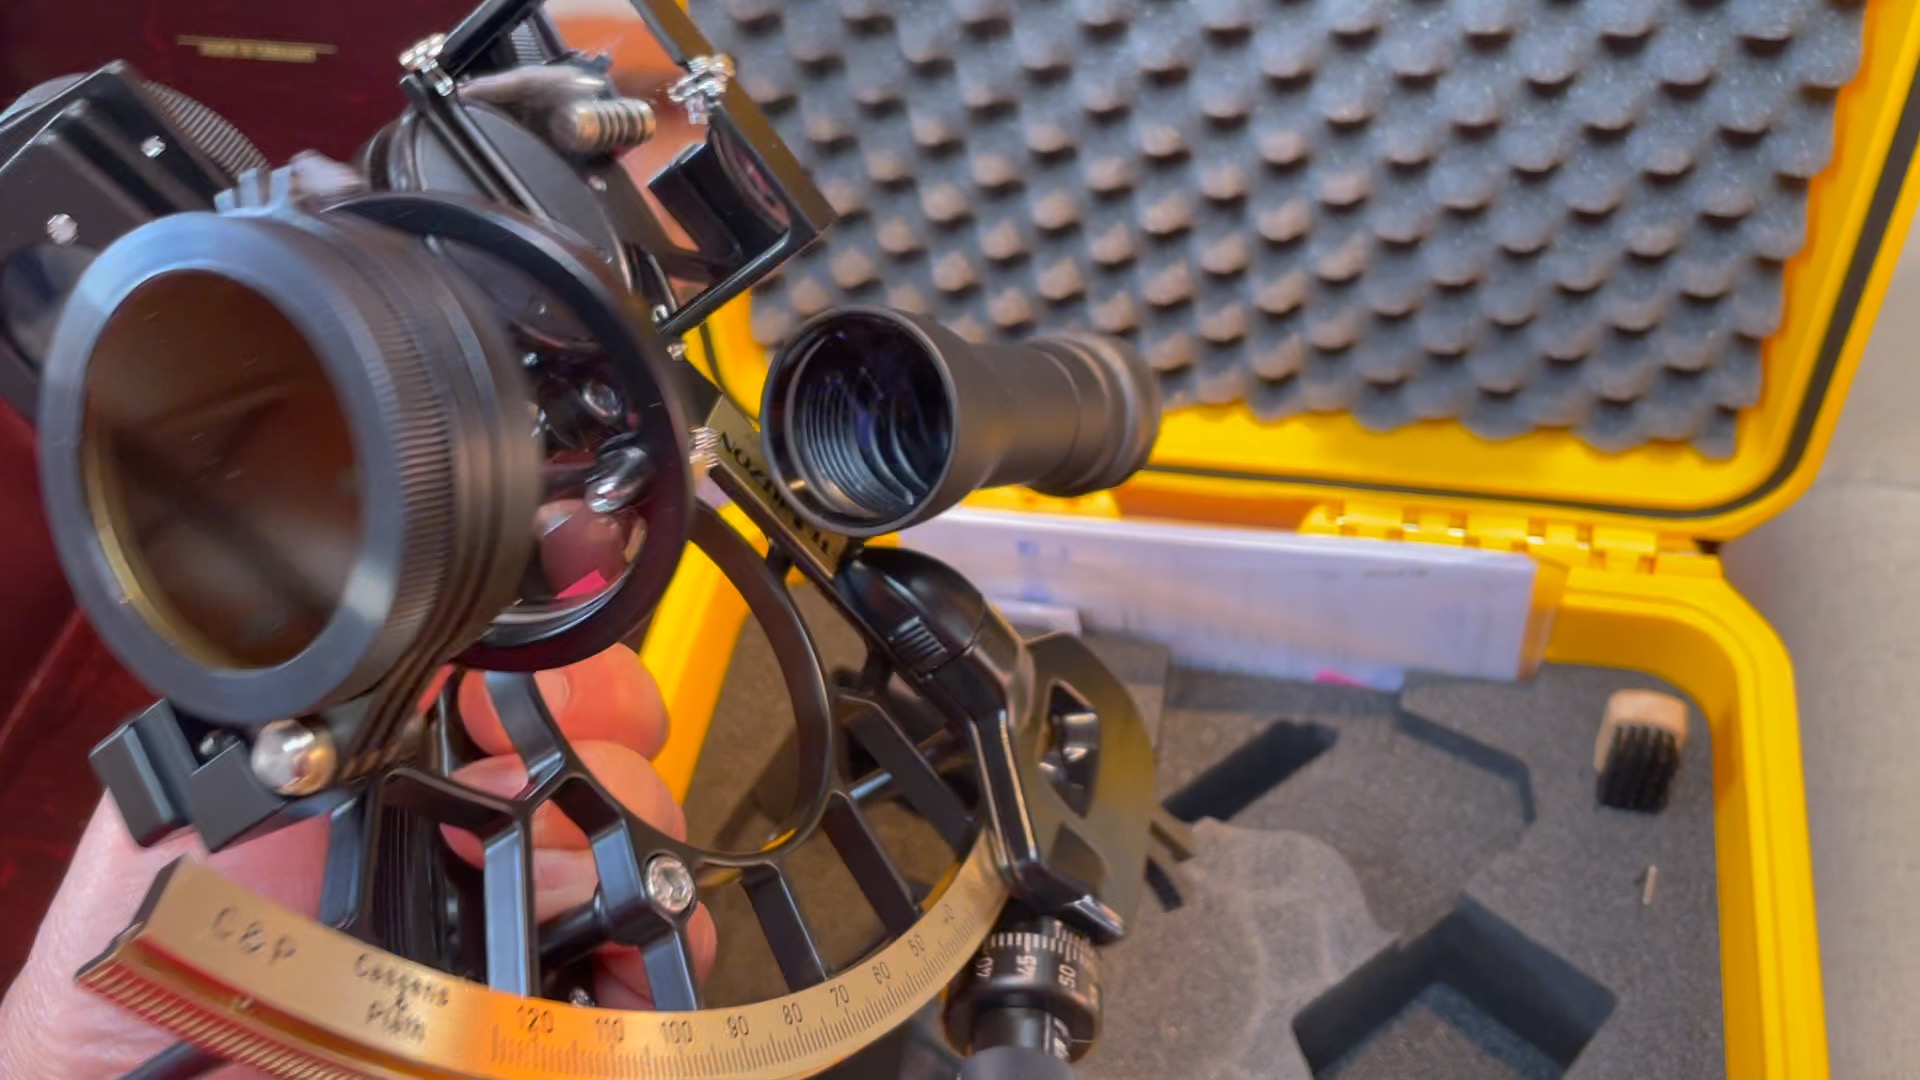
Holding my new sextant in my hands for the first time. It feels very sturdy and massive! Made in Germany! All the glasses in the foreground are not just shades... Some of them come with extraordinary features, which I will talk a lot about in due course!

My new Cassens&Plath even has my name engraved. Very cool!
New precision chronometer by Wempe
What is celestial navigation without a precision time keeping? The chronometer has been an essential tool ever since Harrison inventing his H2 chronometer in 1732. For the following 100 years, the price for the chronometer could stand for well over 10% of the total construction price of the vessel! Not until 1820, when the a 10-gun 90 foot brigg HMS Beagle of the Royal Navy was launched (after two years of construction), the price of the Chronometer had dropped drastically. This was mainly thanks to a - then! - inexpensive copy of the famous Harrison H4 chronometer: The Kendal K1. HMS Beagle cost close to 8,000 pounds sterling to build, while the K1 "only" cost 500 pounds sterling, or 6% of the vessel's value. And by the end of the Beagle's voyages, the chronometer had dropped to some 40 pounds sterling and became the standard instrument onboard the majority of marine ships - along with the sextant, of course.
So, when I now have invested in the Precision Chronometer 1058 by Wempe, it's investment seems defendable compared to the above historic prices! While standard quartz clocks and watches oscillate at 32,768 Hz (times per second), this precision chronometer oscillates at 4.194.304 Hz, whereby the the oscillating frequency is temperature-stabilised as well.
A typical good watch crystal has a typical accuracy of 20ppm meaning that the maximum error is 20 per Million. Since there are 86,400 seconds in a day and the maximum error is 20 millionth (20 ppm), this corresponds to approximately 1.7 seconds per day.
The Wempe Precision Chronometer has an accuracy of 2 ppm, i.e. a tenth of a normal quartz watch! The accuracy is thus some 0.17 seconds per day or in a typical 3 weeks Atlantic ocean crossing 3.5 seconds. And as the participants of the RYA Ocean Theory course might remember: every 4 seconds corresponds to a maximum error of 1 nautical mile. In other words, this chronometer ensures that after three weeks without any outer references, the time error accounts for considerably less than one nautical mile.
In these uncertain times of international conflicts, a seafarer does not want to solely rely on outer sources such as the GPS or a time signal given via SSB Radio (which is the standard way of checking your chronometer at sea, by the way). And only with an accurate time, celestial navigation is exact enough.
Now, the above argument is my official version I tell my spouse. The in-official version is that I just find that this piece of precise chronometer housed in a beautiful mahogany box weighing some 2.4 kg is a worthy companion to my new Cassens&Plath sextant and a jewellery for Regina Laska! Others give diamonds to their wives, I give a chronometer to my yacht! ;-)

Unfortunately, some components of the chronometer are in back-order, so it will most probably not arrive until Leg 2-2022.